Blog
How to Install Redis Enterprise Clusters Using Operators on OpenShift

The world of microservices is an exciting place where we are witnessing fast-paced, frequent, meaningful advances. One of the most significant recent steps forward in the OpenShift/Kubernetes ecosystem was the introduction of Operator-based deployments, which we touched on in a recent blog post.
In this blog we describe how to simplify the installation process for more complex applications, use cases and stateful apps using Redis Enterprise Operator packaging and deployment.
Here is a step-by-step overview of the process.
Requirements:
Before you get started, make sure you have:
- An OpenShift cluster installed with at least 3 nodes (each meeting the minimum requirements for a development installation).
- The kubectl package installed at version 1.8 or higher.
- The OpenShift cli installed.
Step 1 – Login
- Log in to your OpenShift account as a super admin (so you have access to all the default projects).
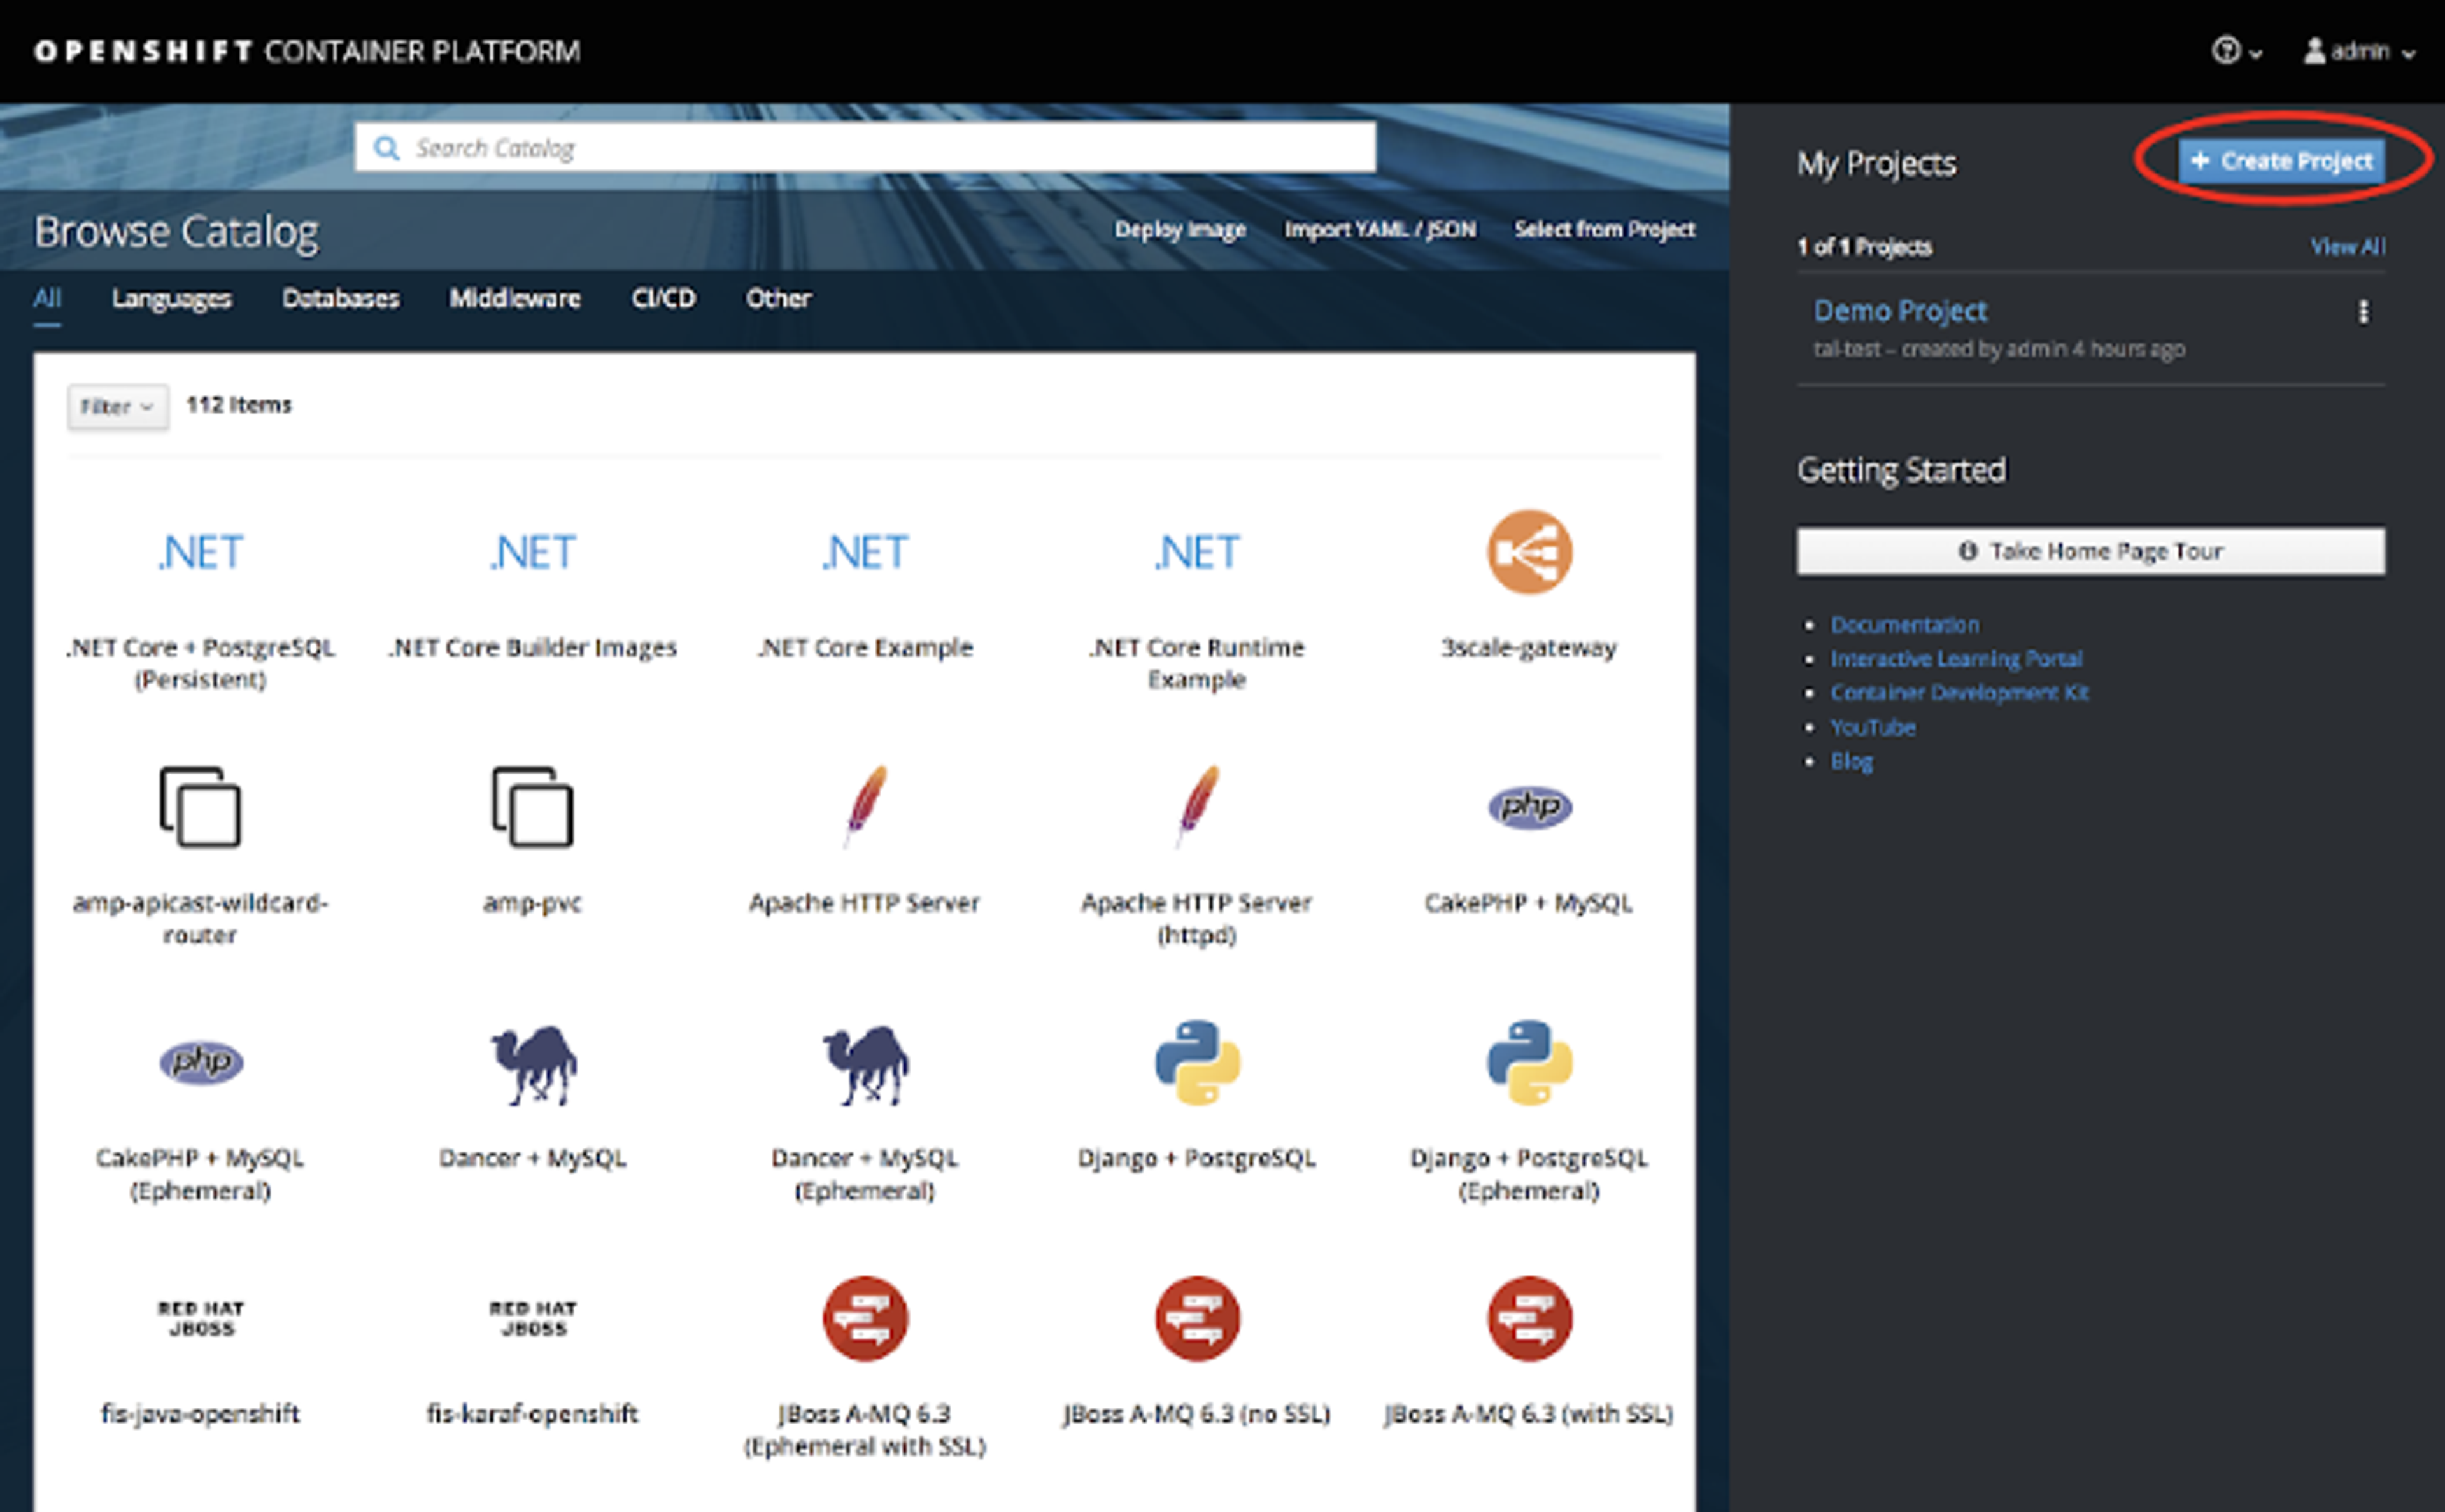
- Create a new project, fill in the name and other details for the project and hit “Create.”
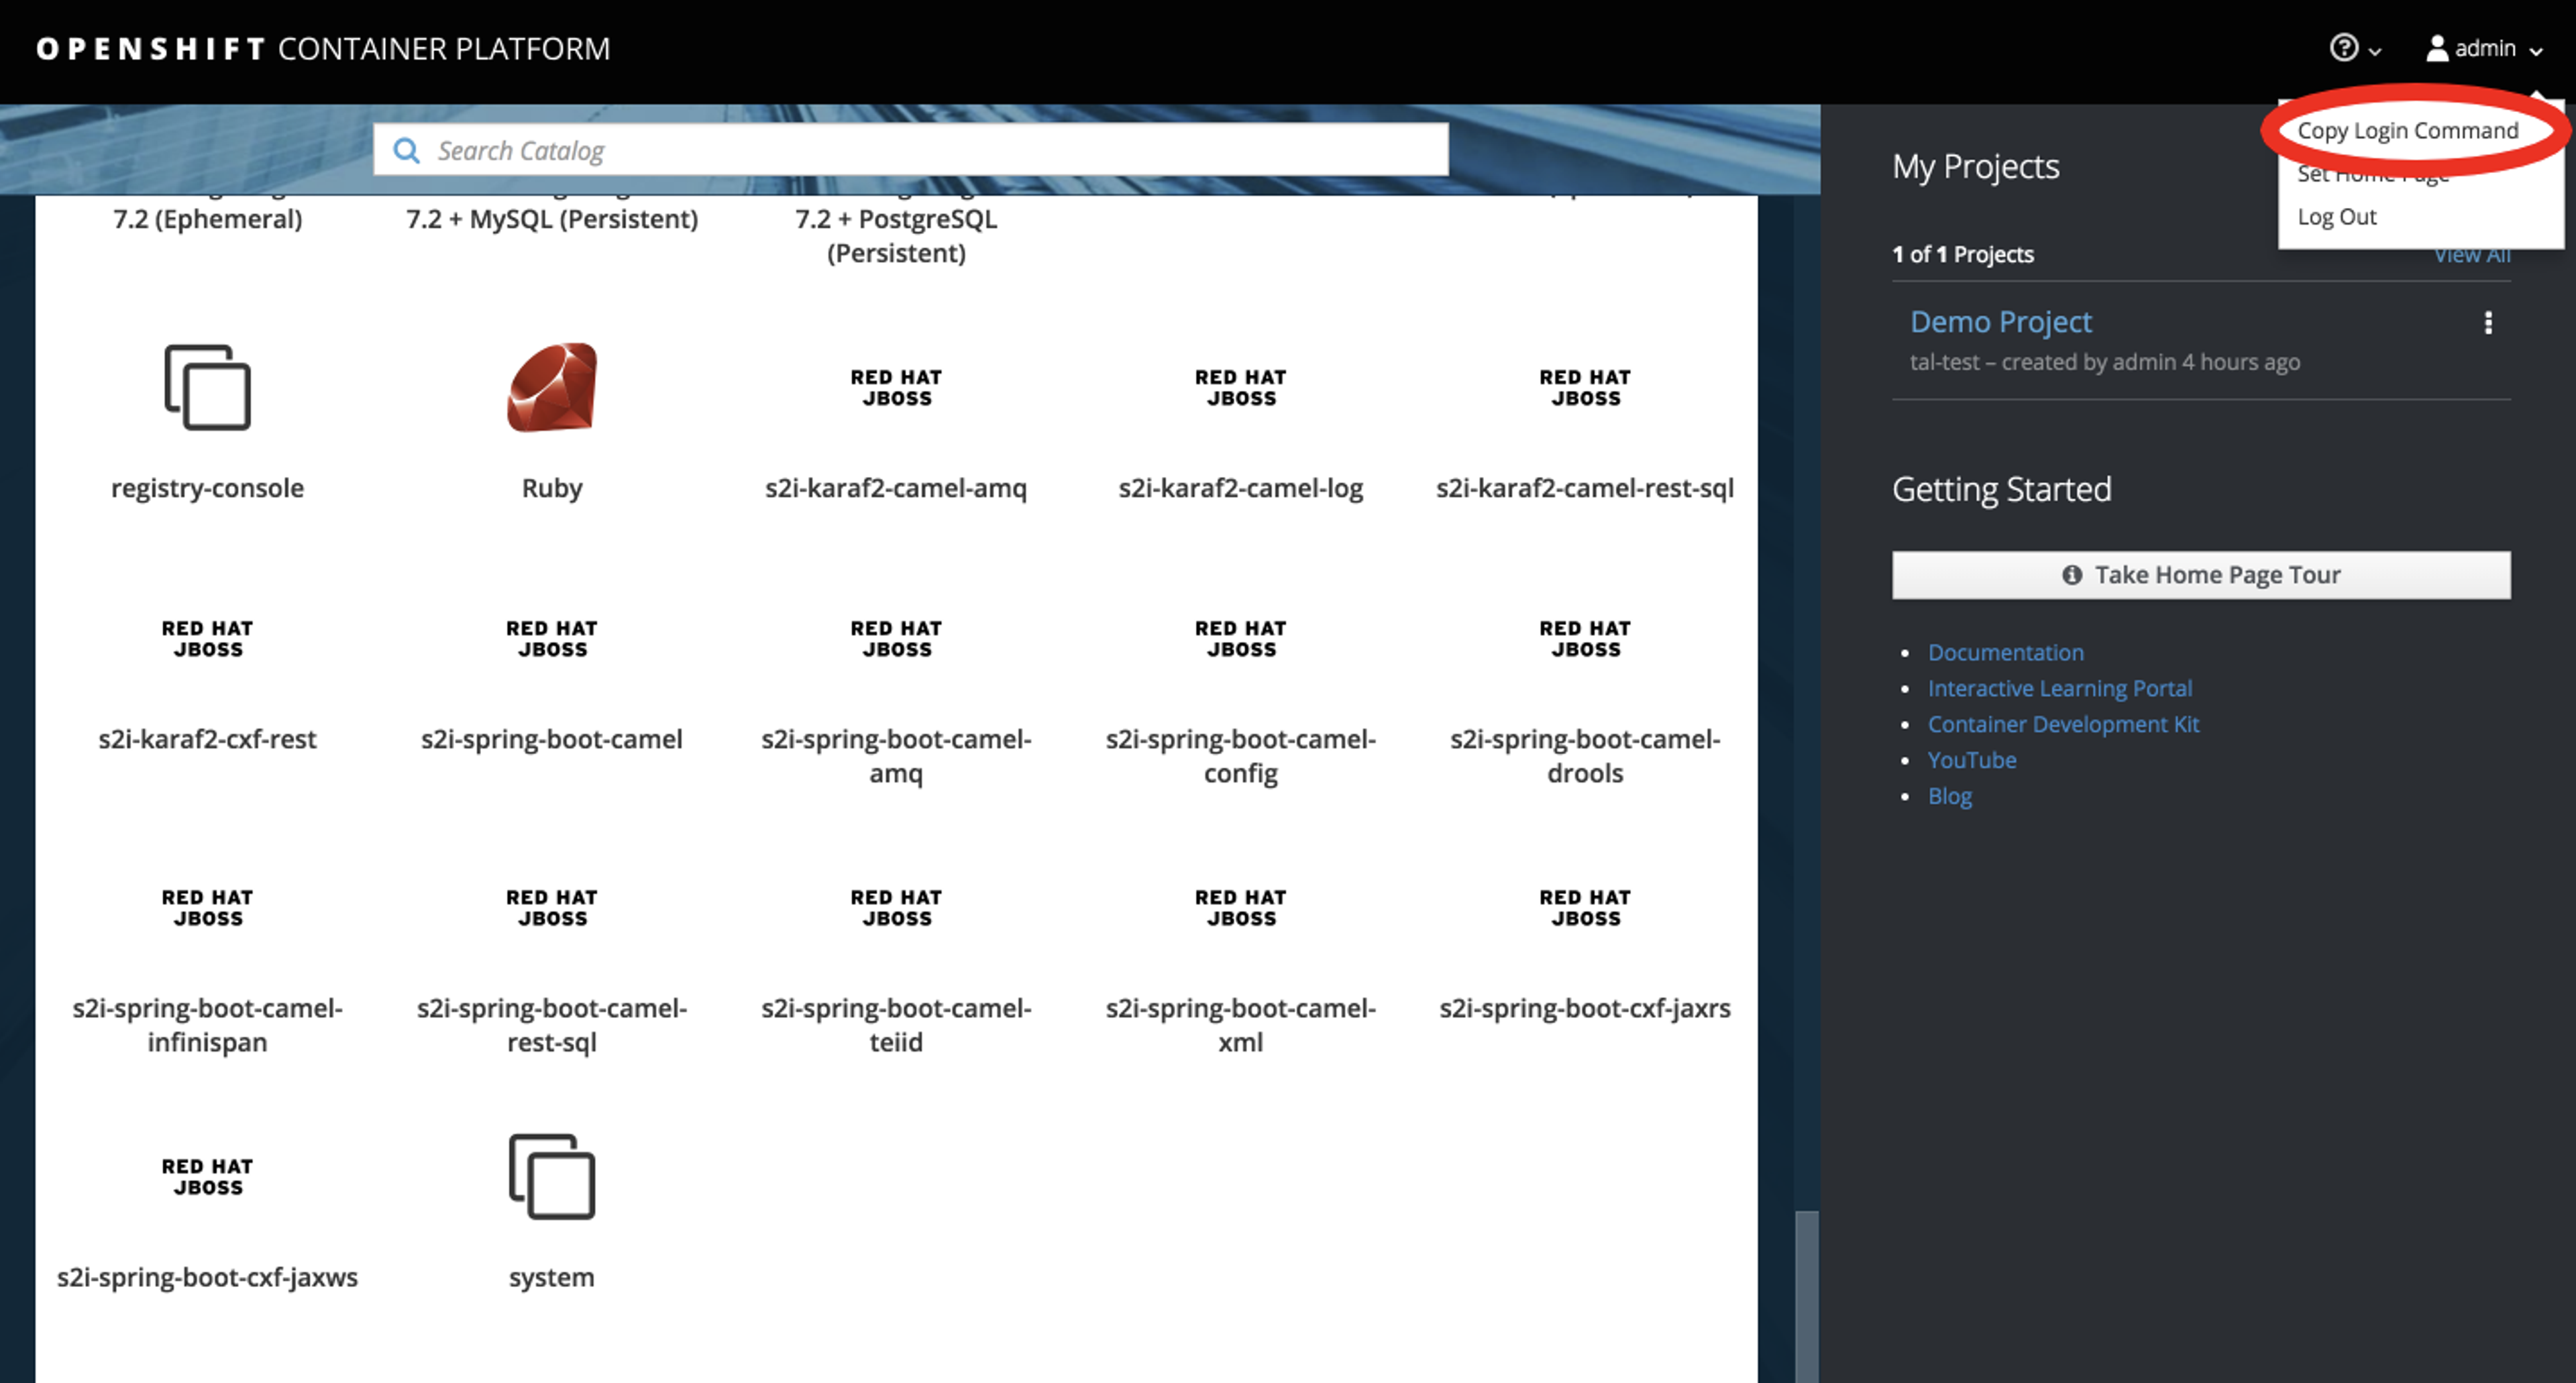
- Click on Admin (upper right corner) and then “Copy Login.”
- Paste the login command into your shell; it should look something like this:
oc login https://your-cluster.acme.com –token=your$login$token - Next, verify that you are using the newly created project. Type:
oc project your_project_name
This will shift to your project rather than the default project (you can verify the project you’re currently using with the oc project command).
Step 2 – Get deployment files
- Clone this repository, which contains the deployment files:
git clone https://github.com/Redis/redis-enterprise-k8s-docs
Specifically for the redis-enterprise-cluster yaml file, you may also download and edit one of the following examples: simple, persistent, service broker or use the one provided in the repository.
Step 3 – Prepare your yaml files
Let’s look at each yaml to see what requires editing:
The scc (Security Context Constraint) yaml defines the cluster’s security context constraints, which we will apply to our project later on. We strongly recommend not changing anything in this yaml file. However, you do need to apply it by typing: oc apply -f scc.yaml
You should receive the following response:
securitycontextconstraints.security.openshift.io “redis-enterprise-scc” configured
Now you need to bind the scc to your project by typing:
oc adm policy add-scc-to-group redis-enterprise-scc system:serviceaccounts:your_project_name
(If you do not remember your project name, type oc project)
The rbac (Role-Based Access Control) yaml defines who can access which resources. We need this to allow our Operator application to deploy and manage the entire Redis Enterprise deployment (all clusters). Therefore, we strongly recommend not changing anything in this yaml file. To apply it, type:
kubectl apply -f rbac.yaml
You should receive the following response:
role.rbac.authorization.k8s.io/redis-enterprise-operator created
serviceaccount/redis-enterprise-operator created
rolebinding.rbac.authorization.k8s.io/redis-enterprise-operator created
If you’re deploying a service broker, also apply the sb_rbac.yaml file. First, edit the sb_rbac.yaml namespace field to reflect the namespace you’ve created or switched to during the previous steps. The sb_rbac (Service Broker Role-Based Access Control) yaml defines the access permissions of the Redis Enterprise Service Broker. We need this to allow our Service Broker application to expose and manage database plans.
As a first step, edit the file and change the following:
namespace: your_project_name
We strongly recommend not changing anything else in this yaml file.
To apply it, simply type:
kubectl apply -f sb_rbac.yaml
You should receive the following response:
clusterrole.rbac.authorization.k8s.io/redis-enterprise-operator-sb configured
clusterrolebinding.rbac.authorization.k8s.io/redis-enterprise-operator configured
The next step applies crd.yaml, creating a CustomResourceDefinition for your Redis Enterprise cluster resource. This provides another API resource to be handled by the k8s API server and managed by the operator we will deploy next. We strongly recommend not changing anything in this yaml file.
To apply it, type:
kubectl apply -f crd.yaml
You should receive the following response:
customresourcedefinition.apiextensions.k8s.io/redisenterpriseclusters.app.redis.com configured
Applying this yaml creates the operator deployment, which is responsible for managing the k8s deployment and lifecycle of a Redis Enterprise cluster. Among many other responsibilities, it creates a stateful set that runs the Redis Enterprise nodes (as pods).
Always make sure you have the latest operator.yaml. Alternatively, you can edit the following tag: image:redis/operator:tag
To apply the operator.yaml, type:
kubectl apply -f operator.yaml
You should receive the following response:
deployment.apps/redis-enterprise-operator created
Now, run kubectl get Deployment and verify that your redis-enterprise-operator deployment is running. A Typical response will look like this:

The mycluster yaml defines the configuration of the newly created resource: Redis Enterprise cluster. This yaml could be renamed your_cluster_name.yaml to keep things tidy, but this isn’t a mandatory step.
This yaml must be edited, however, to reflect the specific configurations of your cluster. Here are the main fields you should review and edit:
- name: “your_cluster_name” e.g (demo-cluster)
- nodes: number_of_nodes_in_the_cluster Must be an uneven number of at least 3 or greater (here’s why).
- uiServiceType: service_type
Service type value can be either ClusterIP or LoadBalancer. This is an optional configuration based on k8s service types. The default is ClusterIP.
- username: <your_email@your_domain.your_suffix>
persistentSpec:
enabled: <false/true>
Check your Redis Software nodes’ enabled/disabled flag for persistency. The default is false.
- storageClassName: “gp2“
This specifies the StorageClass used for your nodes’ persistent disks. This is mandatory when persistency is enabled (for example, AWS uses “gp2” as a default and GKE uses “pd-standard” as a default).
- redisEnterpriseNodeResources: The Compute resources required for each node.
- limits – specifies the max resources for a Redis node.
- requests – specifies the minimum resources for a Redis node.
For example:
limits
cpu: “2000m”
memory: 4Gi
requests
cpu: “2000m”
memory: 4Gi
The default (if unspecified) is 2 cores (2000m) and 4GB (4Gi).
- serviceBrokerSpec –
enabled: <false/true>
This specifies persistency for the Service Broker with an enabled/disabled flag. The default is false.
persistentSpec:
storageClassName: “gp2“
- redisEnterpriseImageSpec: This configuration controls the Redis Enterprise version used, and where it is fetched from. We always recommend running the current GA version.
imagePullPolicy: IfNotPresent
Repository: redis/redis
versionTag: 5.2.0-14 –
The version tag, as it appears on your repository (e.g. on DockerHub).
This is an optional configuration. If omitted, it will default to the latest version.
Step 4 – Create your cluster
Once you have your_cluster_name yaml set, you need to apply it to create your Redis Enterprise cluster:
kubectl apply -f your_cluster_name.yaml
Run kubectl get rec and verify that creation was successful (rec is a shortcut for “RedisEnterpriseClusters”).
You should receive a response similar to the following:
NAME AGE
your_cluster_name 17s
Your cluster will be ready shortly, typically within a few minutes.
To check the cluster status, type the following:
kubectl get pod
You should receive a response similar to the following:
| your_cluster_name-0 | 1/1 | Running | 0 | 1m |
| your_cluster_name-1 | 1/1 | Running | 0 | 1m |
| your_cluster_name-2 | 1/1 | Running | 0 | 1m |
| your_cluster_name-controller-x-x | 1/1 | Running | 0 | 1m |
| Redis-enterprise-operator-x-x | 1/1 | Running | 0 | 5m |
All you have left to do now is create your databases and start using them.
Step 5 – Create a database
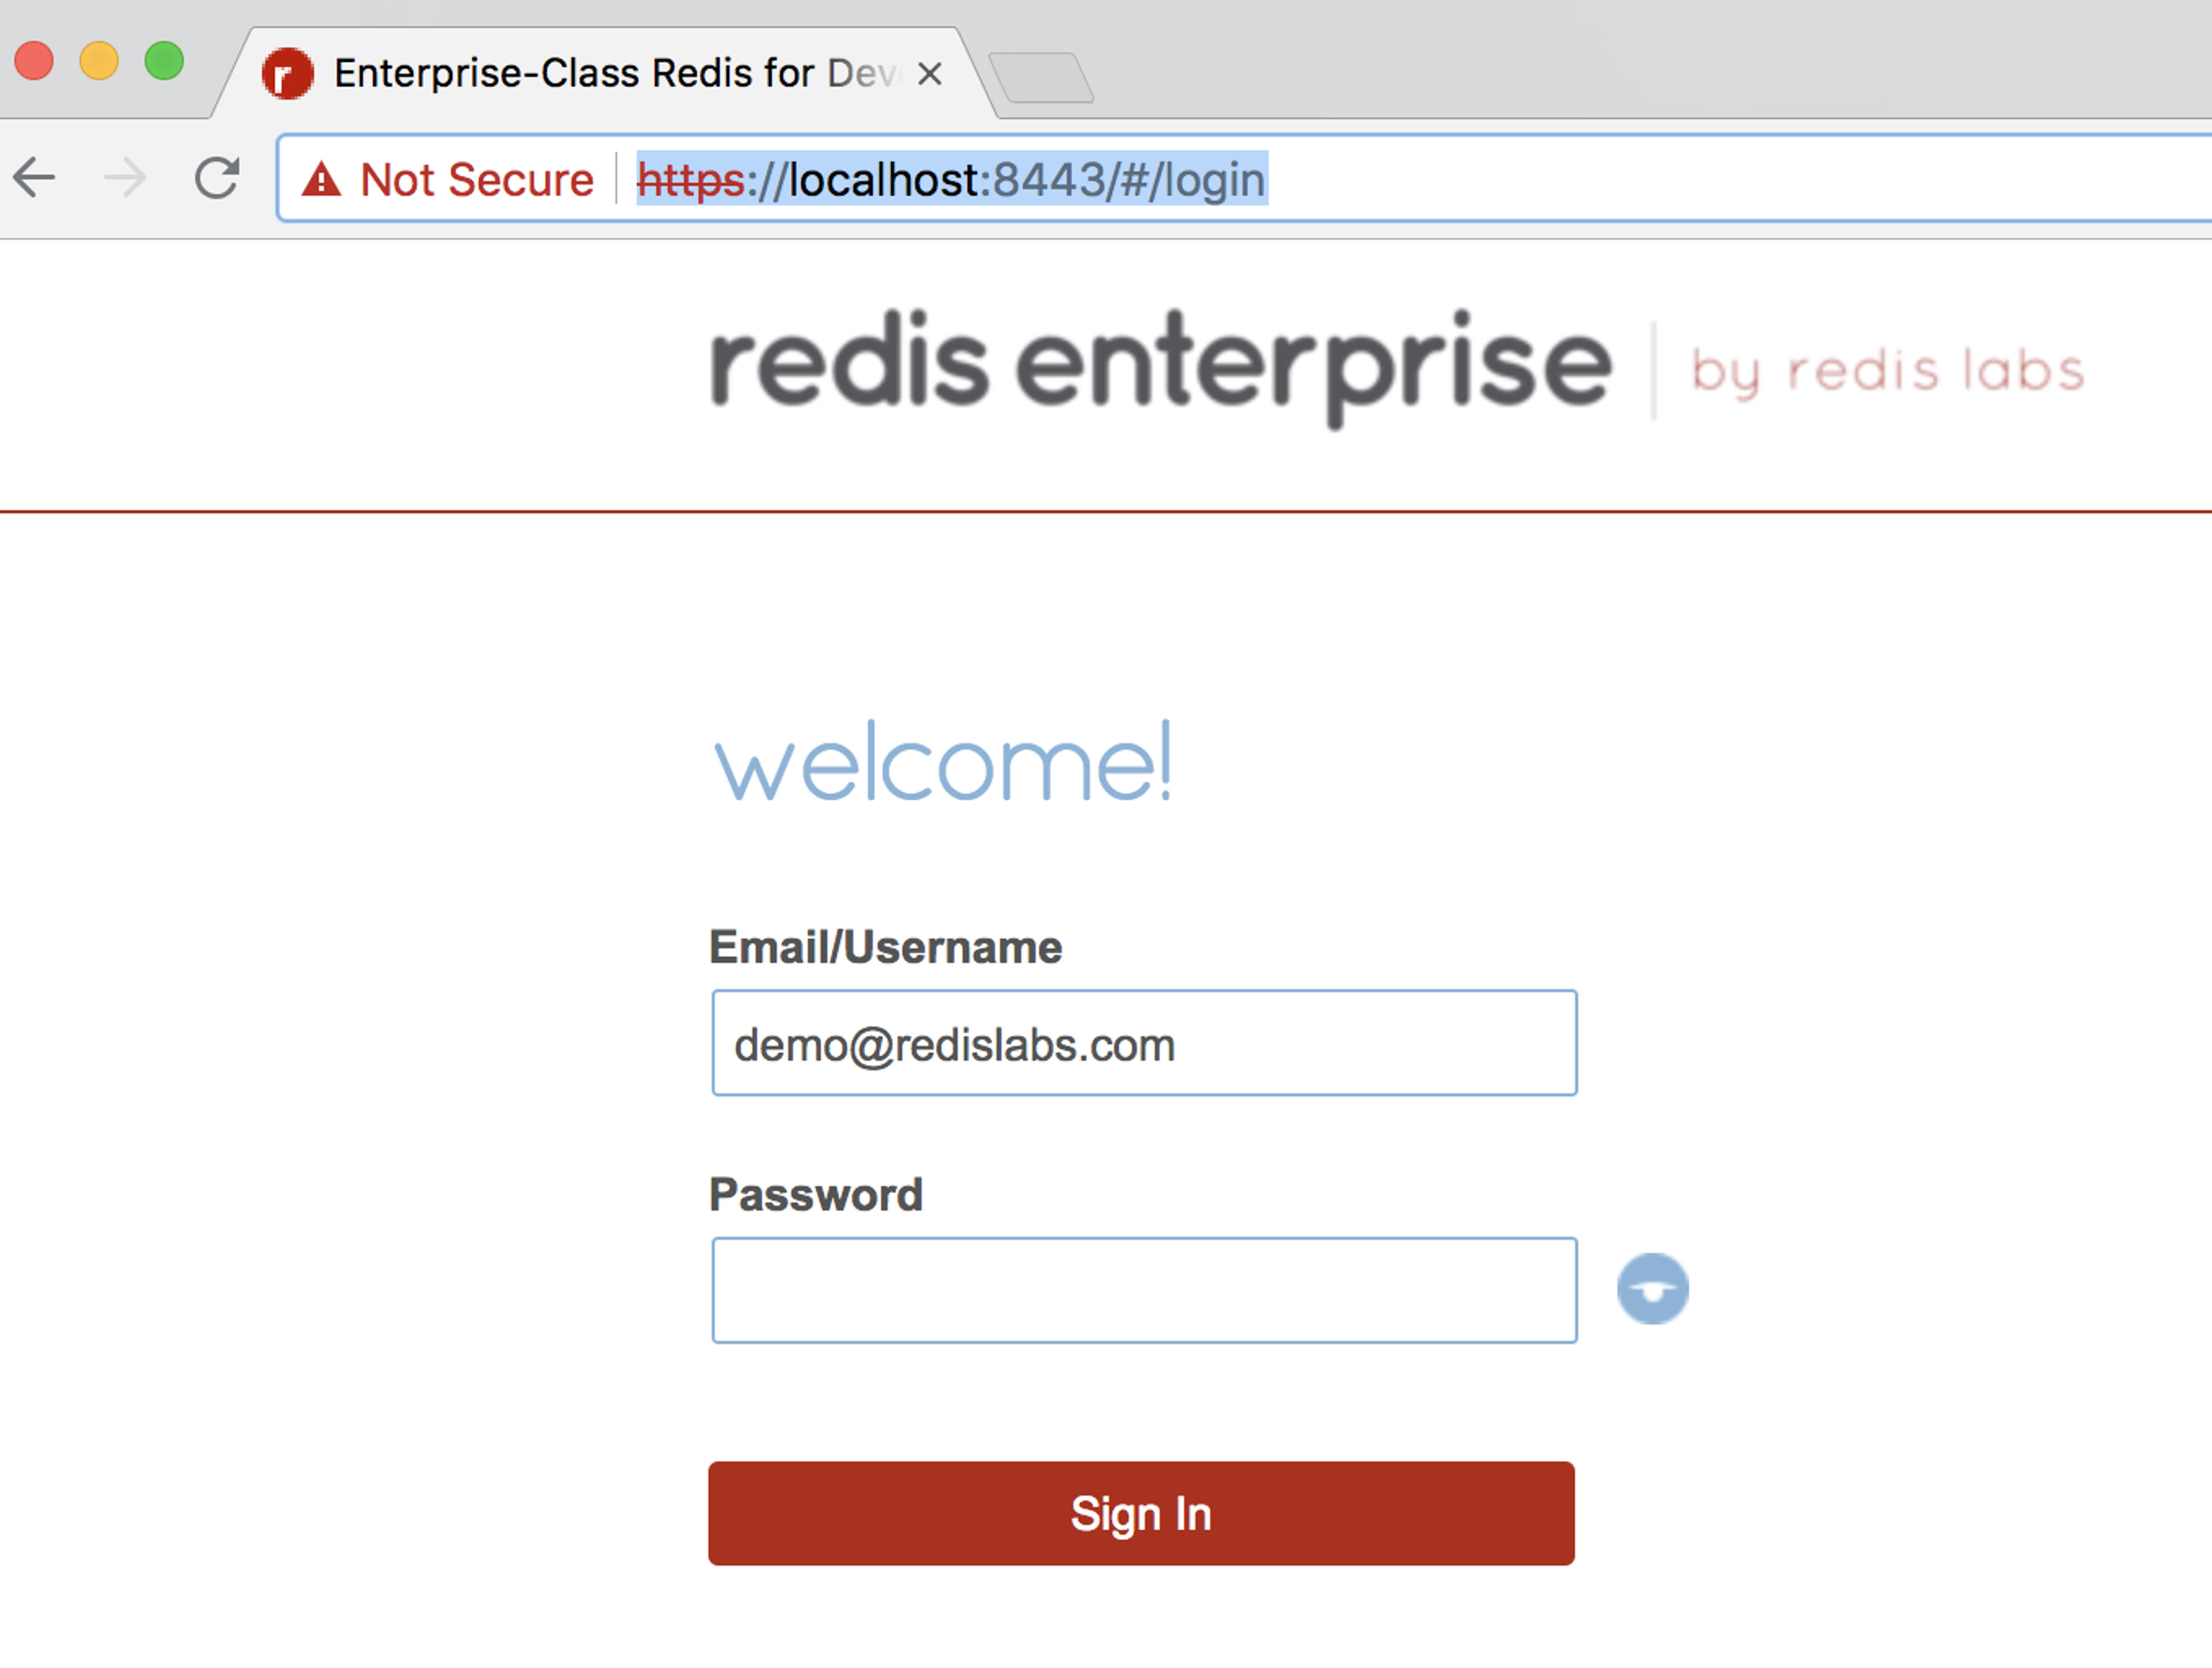
In order to create your database, we will log in to the Redis Enterprise UI.
- First, apply port forwarding to your cluster:
kubectl port-forward your_cluster_name-0 8443:8443
Note: your_cluster_name-0 is one of your cluster pods. You may consider running the port-forward command in the background.
Note: The Openshift UI provides tools for creating additional routing options, including external routes. Thess are covered in RedHat Openshift documentation.
Next, create your database.
- Open a browser window and navigate to localhost:8443
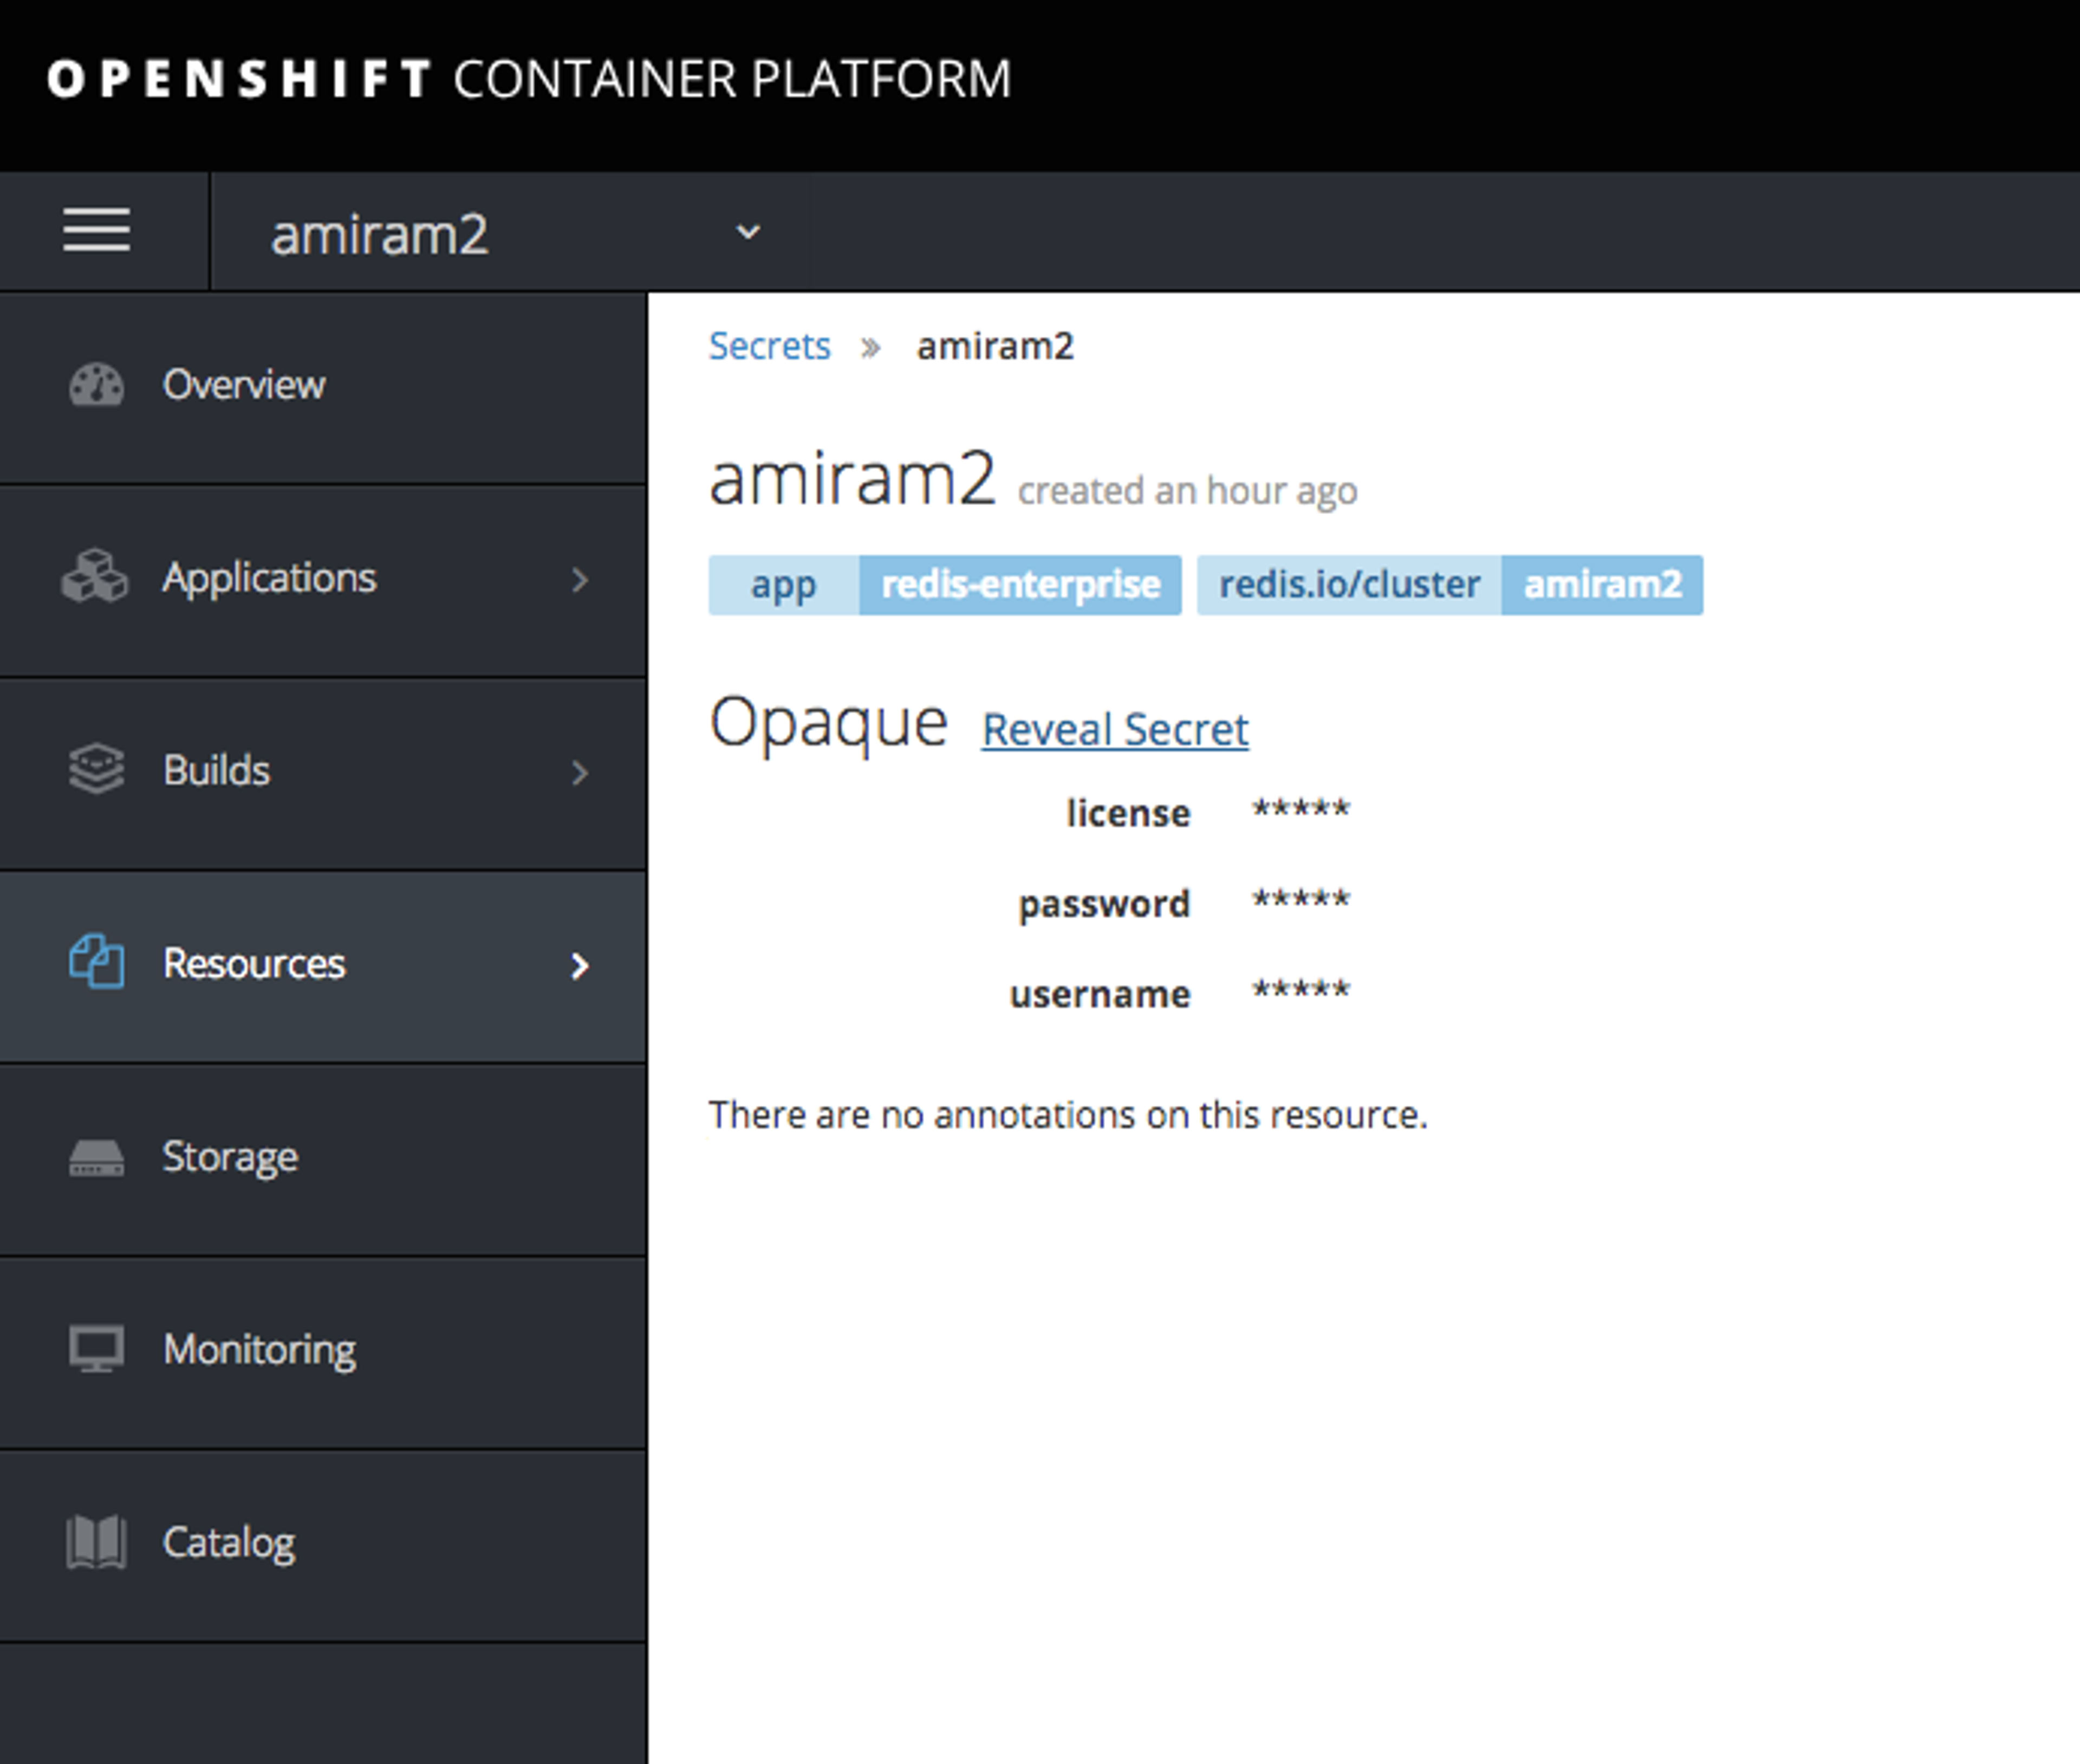
- In order to retrieve your password, navigate to the OpenShift management console, select your project name, go to Resources->Secrets->your_cluster_name
- Retrieve your password by selecting “Reveal Secret.”
- Follow the interface’s instructions to create your database.
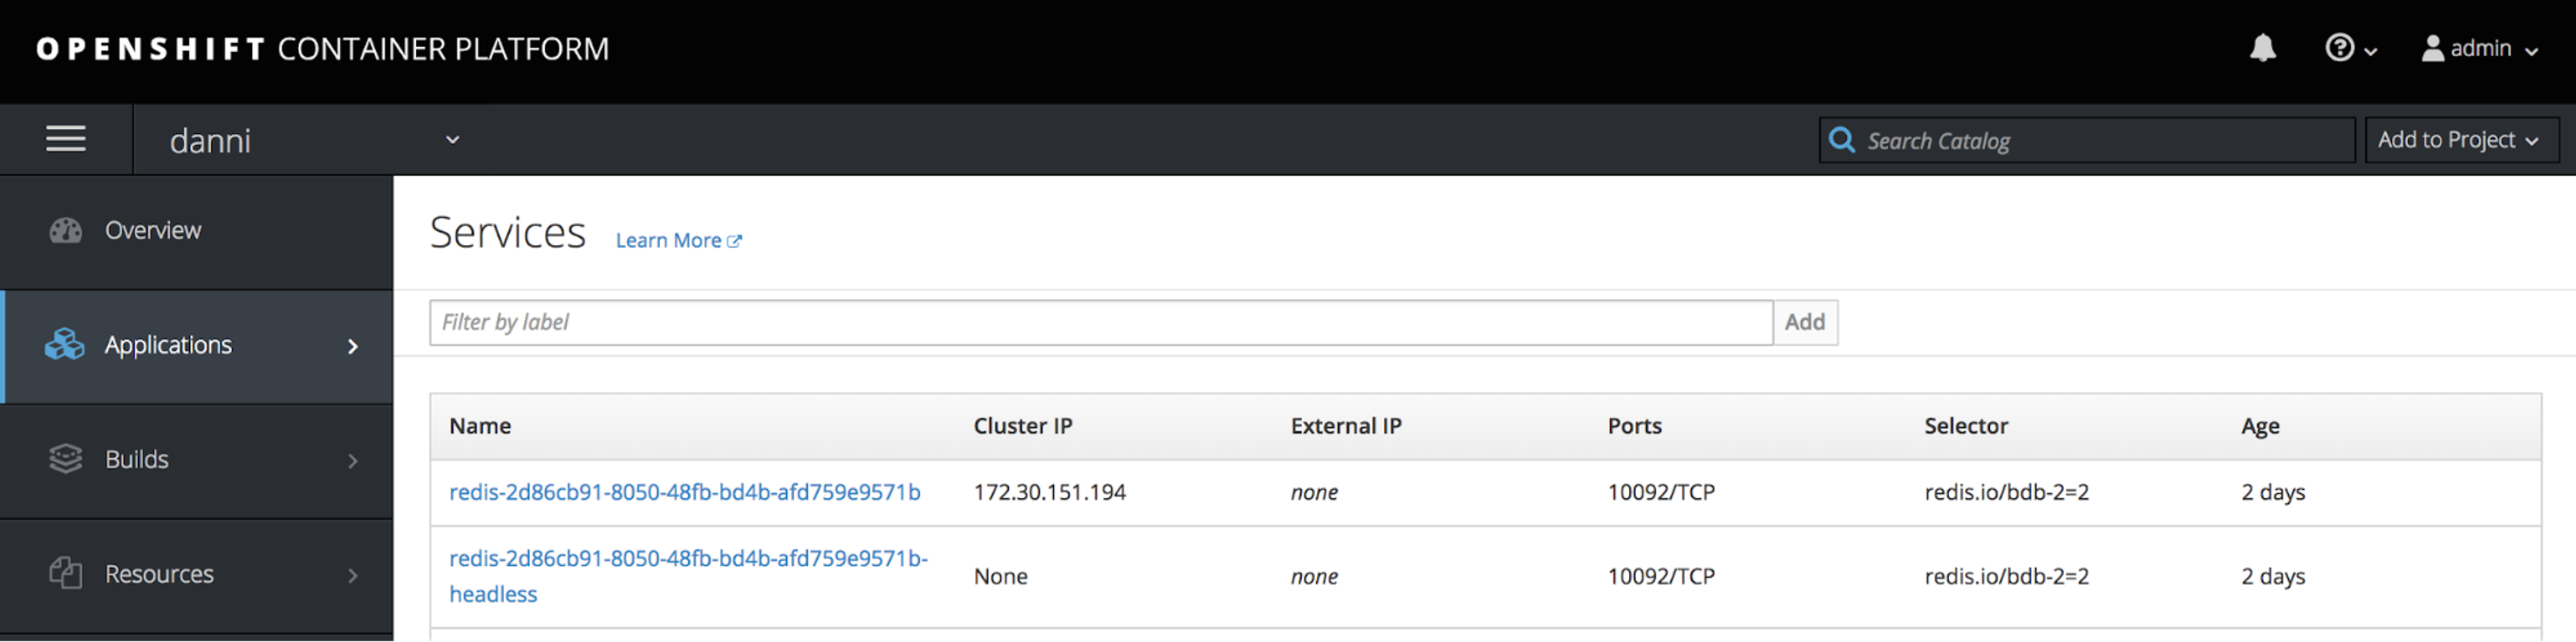
Note: In order to conduct the Ping test through Telnet, you can create a new route to the newly created database port in the same way as described above for the UI port. After you create your database, to go the Openshift management console, select your project name and go to
Applications->Services. You will see 2 newly created services representing the database along with their IP and port information, similar to the screenshot below.
Conclusion
OpenShift simplifies the use of Kubernetes and provides considerable added value. The support for Operator-based installation now makes it much easier to deploy Redis Enterprise clusters. If you would like to learn more about the Redis Enterprise OpenShift release, please contact us.
Get started with Redis today
Speak to a Redis expert and learn more about enterprise-grade Redis today.