Search workspace
Create and manage search indexes, build and save queries, and explore your data in the Redis Insight Search workspace.
The Search workspace in Redis Insight is a dedicated space for working with Redis Search. From a single page you can browse the search indexes in your database, create new indexes from sample or existing data, build and run queries with a schema-aware editor, and save queries to a reusable library.
To open the workspace, select Search in the menu at the top of the screen.

Prerequisites
The Search workspace requires Redis Search. When you open the workspace, Redis Insight checks the connected database and shows a message instead of the workspace if it is not available:
- Redis Search is not available for this database — the connected database does not include Redis Search. The engine is available in Redis Open Source, Redis Software, and Redis Cloud.
- Redis Search 2.0+ required — the Search workspace requires Redis Search 2.0 or later (included with Redis 6 and later). Older query engine versions are not compatible with the commands used here.
Get started
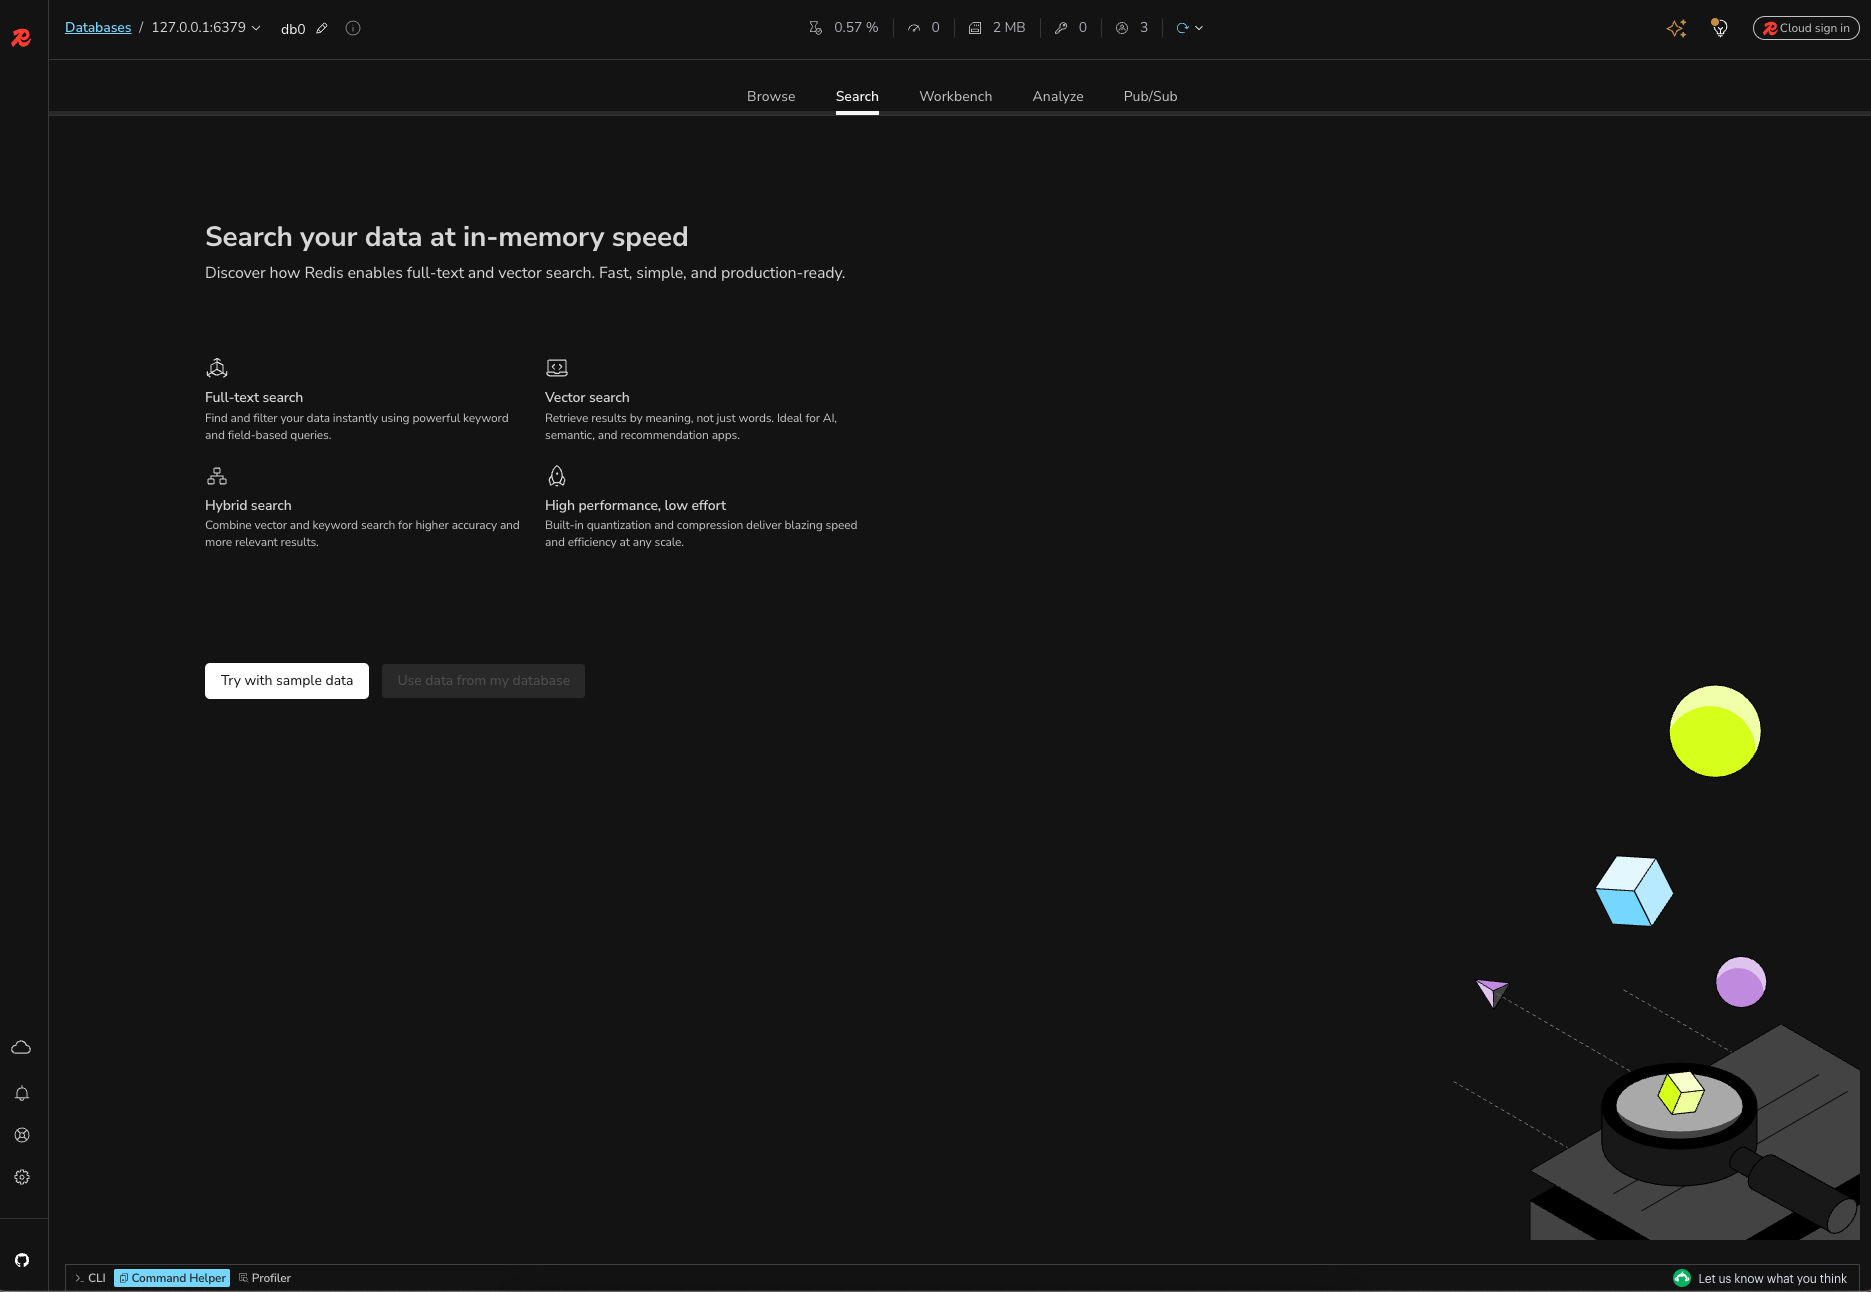
The first time you open the Search workspace for a database that has no search indexes, Redis Insight shows a welcome screen that introduces full-text, vector, and hybrid search. From here you can get started in one of two ways:
- Try with sample data — load a ready-made dataset and its index so you can explore search straight away. See Create an index from sample data.
- Use data from my database — build an index over keys that already exist in your database. See Create an index from existing data.
If your database contains at least one search index, the Search workspace opens to the index list instead.
Search indexes list
The Search workspace lists the search indexes defined in the connected database.
The list shows the following information for each index. Several columns include an info button that explains the column when selected.
| Column | Description |
|---|---|
| Index name | The name of the index. |
| Index prefix | The key prefix that the index matches. Keys whose names start with this prefix are automatically indexed. |
| Index types | The field types used in the index schema (for example, TEXT, TAG, NUMERIC, and VECTOR). |
| Docs | The number of documents currently indexed. |
| Records | The total number of indexed field-value pairs across all documents. (A document with five fields counts as five records.) |
| Terms | The number of unique words extracted from TEXT fields for full-text search. |
| Fields | The total number of fields defined in the index schema. |
The last column (unlabeled) holds the row actions:
- A query button that opens the index in the query editor.
- An ellipsis (...) menu with:
- View index — open the query page for the index with its details side panel showing.
- Browse dataset — switch to the Browse workspace to review the keys that the index covers.
- Delete — drop the index.
Create an index
Select + Create search index to create a new index. You can create an index from sample data or from data that already exists in your database.

From sample data
Choose Use sample data to load a ready-made dataset and the index that goes with it. This is the quickest way to explore how Redis Search works without preparing your own data.
Select one of the bundled datasets:
- E-commerce Discovery — product data for exploring discovery use cases that match intent rather than just text.
- Content recommendations — content data for discovering items by theme or plot.
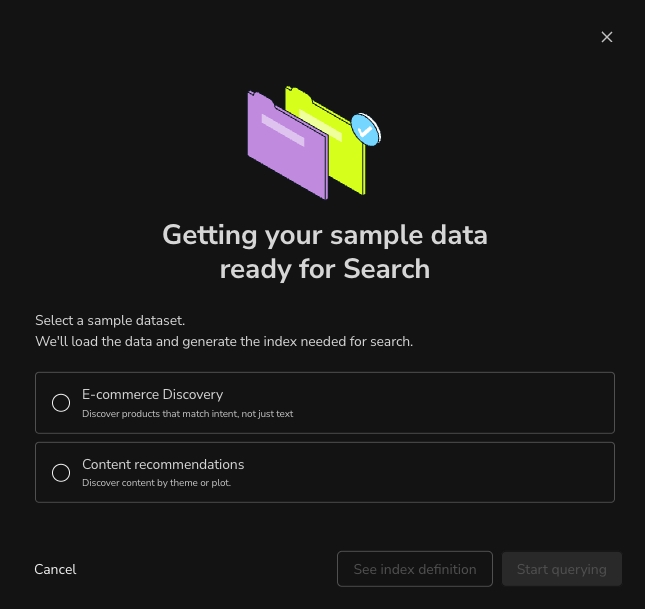
From here you can:
- Select See index definition to review the schema that will be created before you commit to it.
- Select Start querying to load the data, create the index, and open the query editor right away.
From existing data
Choose Use existing data to build an index over keys that already exist in your database. Indexing is available for hash and JSON data structures.
Redis Insight opens the create-index page with a key browser on the left. Select a key to get started: Redis Insight uses it to generate a suggested indexing schema. The index then covers all keys that share the same prefix, not just the key you selected.
After you select a key, Redis Insight inspects it and automatically detects its fields, presenting the suggested schema on the right. You can edit the index name (shown as Define search index: <name>) using the pencil icon next to it, and edit the Index prefix to control which keys the index matches.
The schema is shown in a table with the following columns:
- A selection checkbox — select or clear a field to include or exclude it from the index.
- Field name — the detected field.
- Field sample value — an example value taken from the key.
- Suggested indexing type — the field type Redis Insight recommends.
- A pencil icon — edit the field's type and options.

Configure field types
To add a field, select + Add field; to change a detected field, select its pencil icon. In the field dialog, choose the index type and configure its options:
- Text — full-text searchable fields, with options for weight and phonetic matching (English, French, Portuguese, or Spanish).
- Tag — exact-match fields for filtering and faceting.
- Numeric — numeric fields for range filtering.
- Geo — geospatial fields for location filtering.
- Vector — vector fields for similarity search, with options for the indexing algorithm (
FLATorHNSW), vector type (FLOAT32,FLOAT64,FLOAT16, orBFLOAT16), distance metric (L2,IP, orCOSINE), the number of dimensions, and (forHNSW) algorithm-specific tuning parameters.
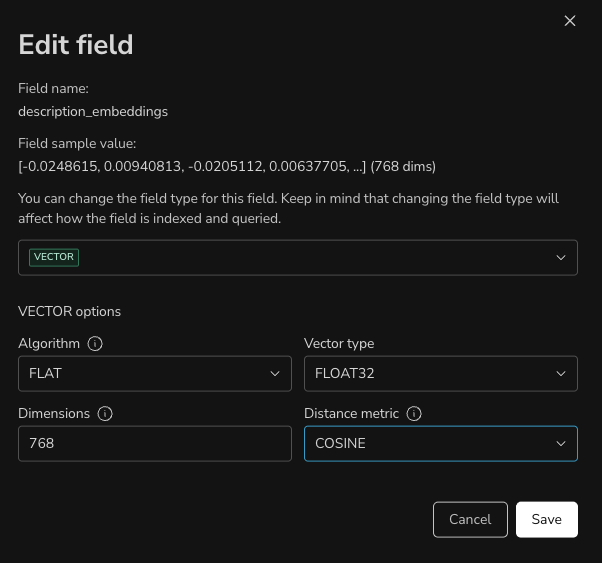
Table view and command view
The create-index page provides two views of your index definition:
- Table view — the visual schema editor described above.
- Command view — the equivalent
FT.CREATEcommand that Redis Insight will run.
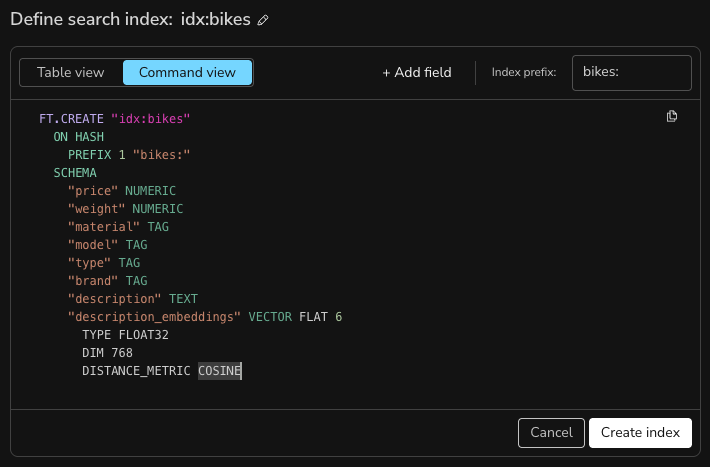
When you are satisfied with the schema, select Create index. Redis Insight confirms when the index is created and your data becomes searchable.
Query an index
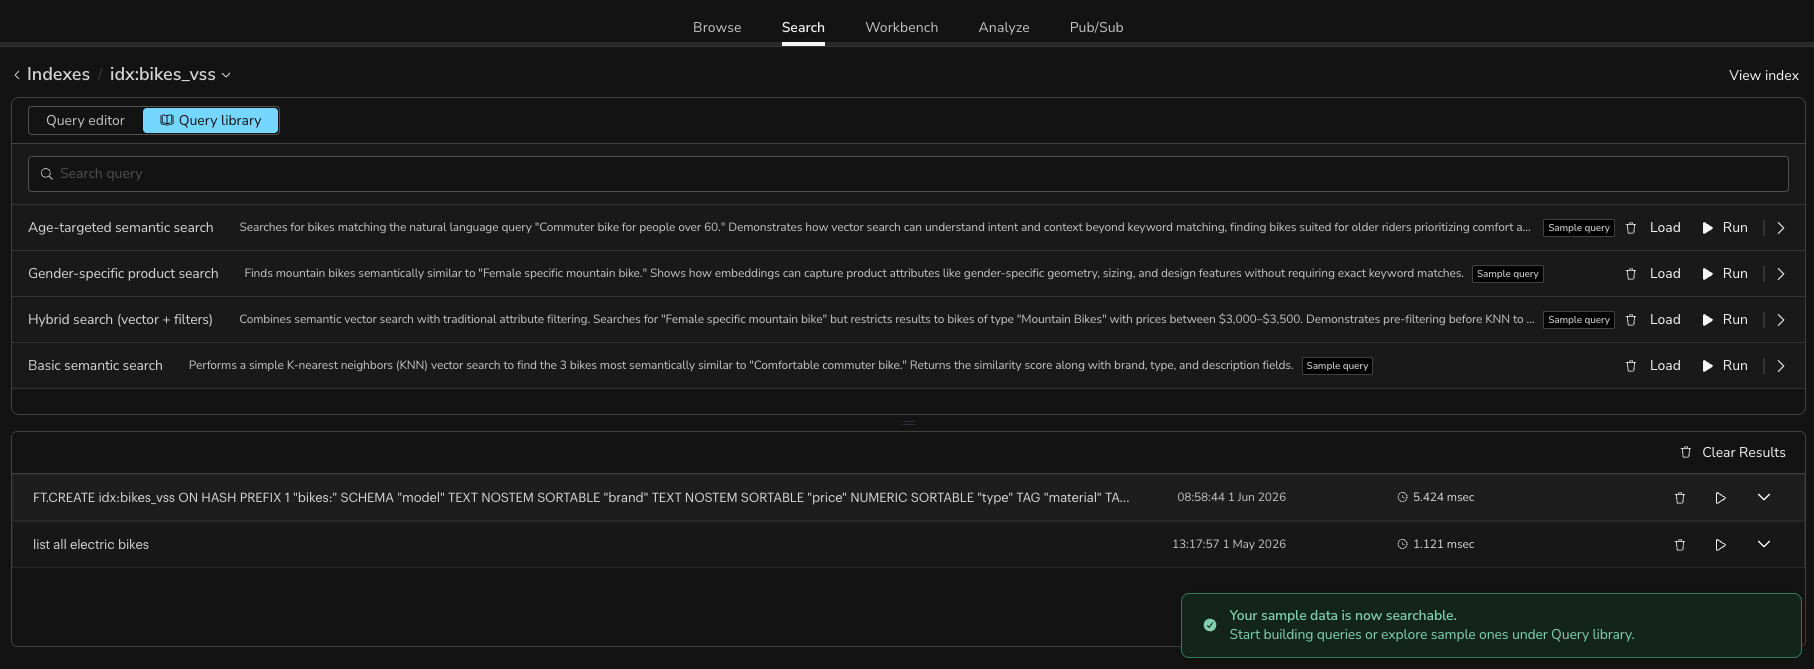
When you open an index, Redis Insight shows the query page. At the top of the page, an index selector (shown as Indexes / <index name>) lets you switch between the indexes in your database, and a View index button opens a side panel with the full index definition and statistics.
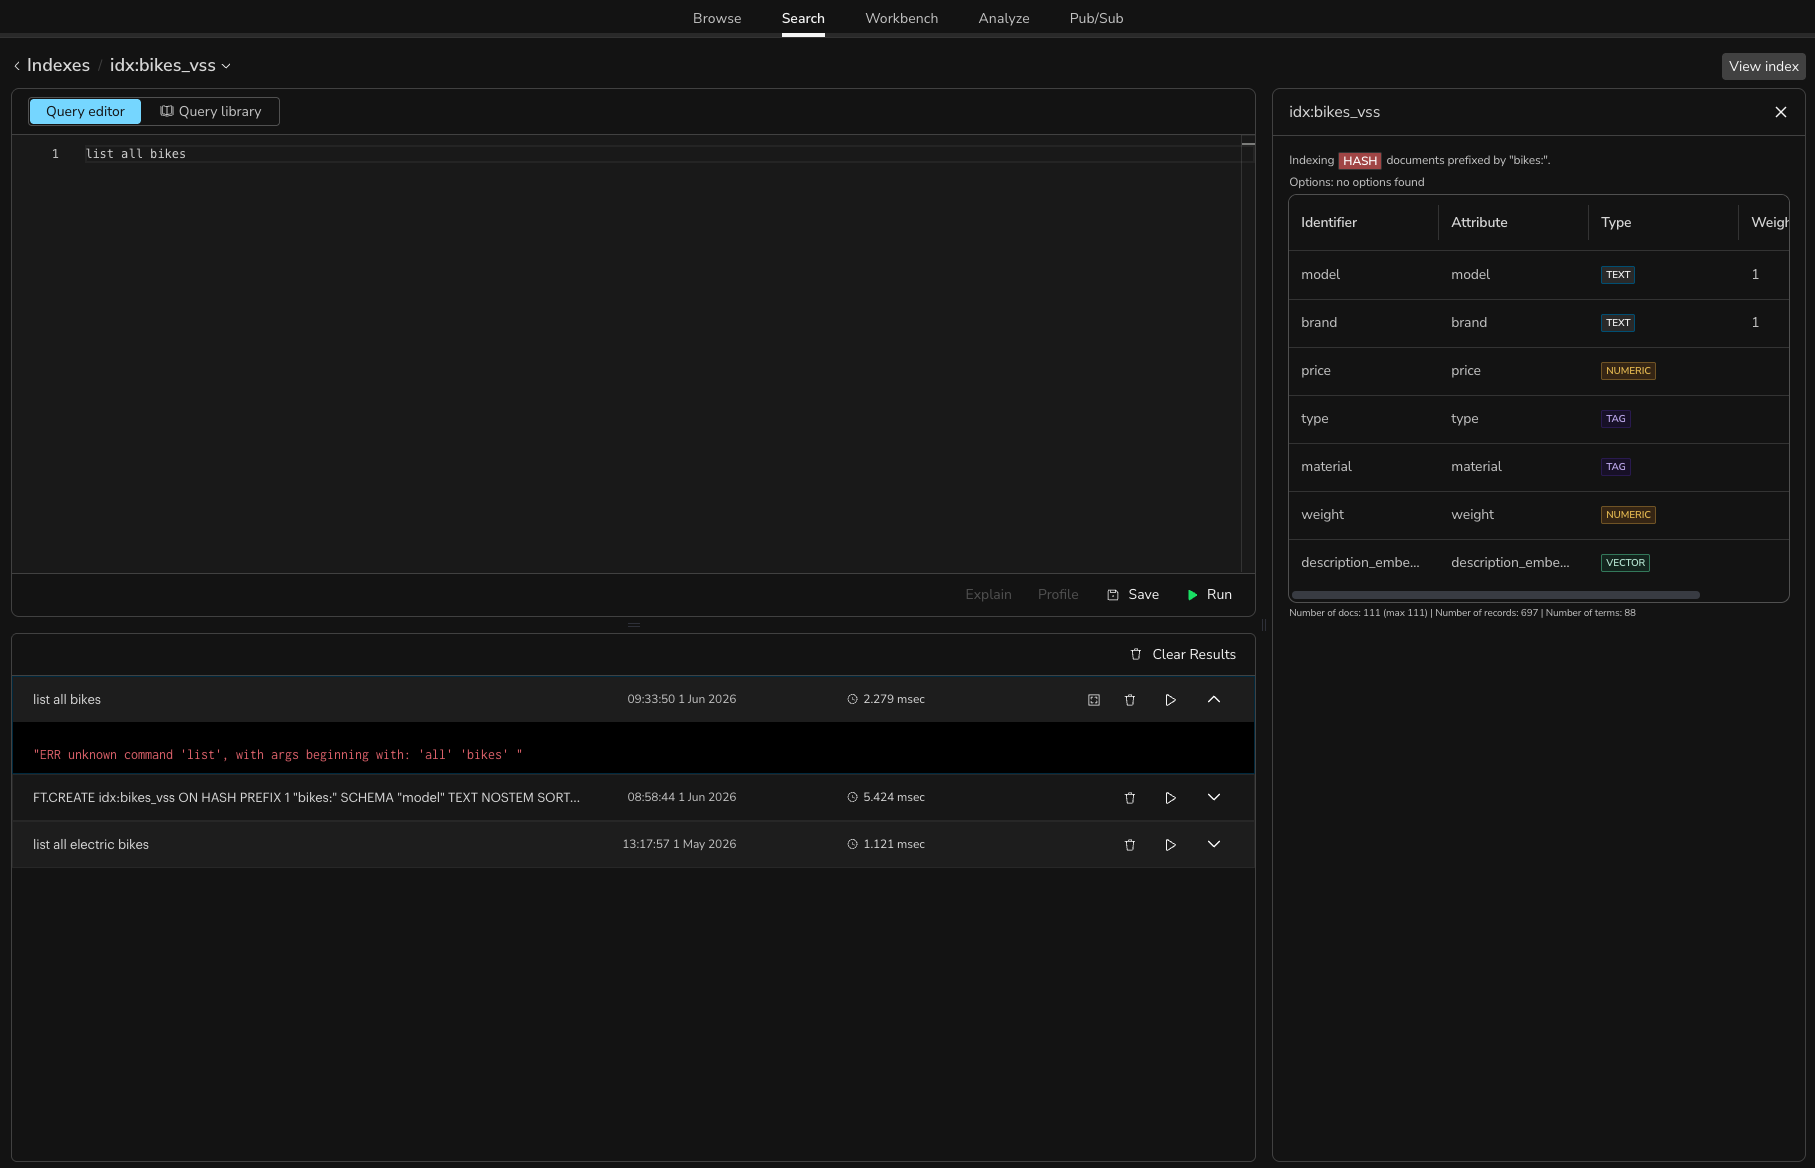
The rest of the page is split into two resizable panes: the query editor on top and the results below. The editor has two tabs, Query editor and Query library.
Query editor
The Query editor tab lets you write and run Redis Query Engine commands (such as FT.SEARCH and FT.AGGREGATE) against the selected index, with syntax highlighting and schema-aware autocomplete. Start typing FT. to see available search commands, index names, and fields based on your current query.
The action bar at the bottom of the editor pane provides the following actions:
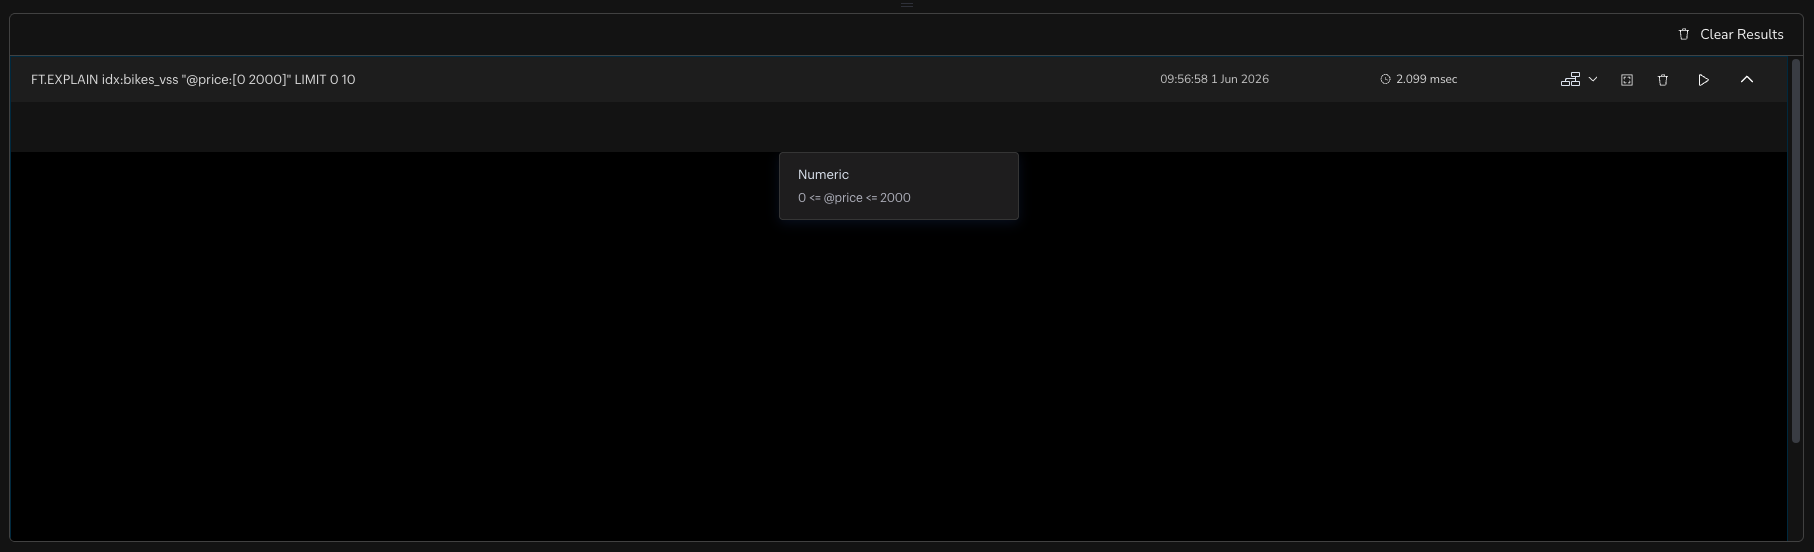
- Explain — show the execution plan for the query (using
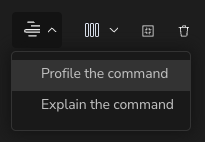
FT.EXPLAIN) so you can understand how it will run. Available forFT.SEARCHandFT.AGGREGATEqueries. - Profile — profile the query (using
FT.PROFILE) to see where time is spent and identify bottlenecks. Available forFT.SEARCHandFT.AGGREGATEqueries. - Save — save the current query to the Query library for reuse.
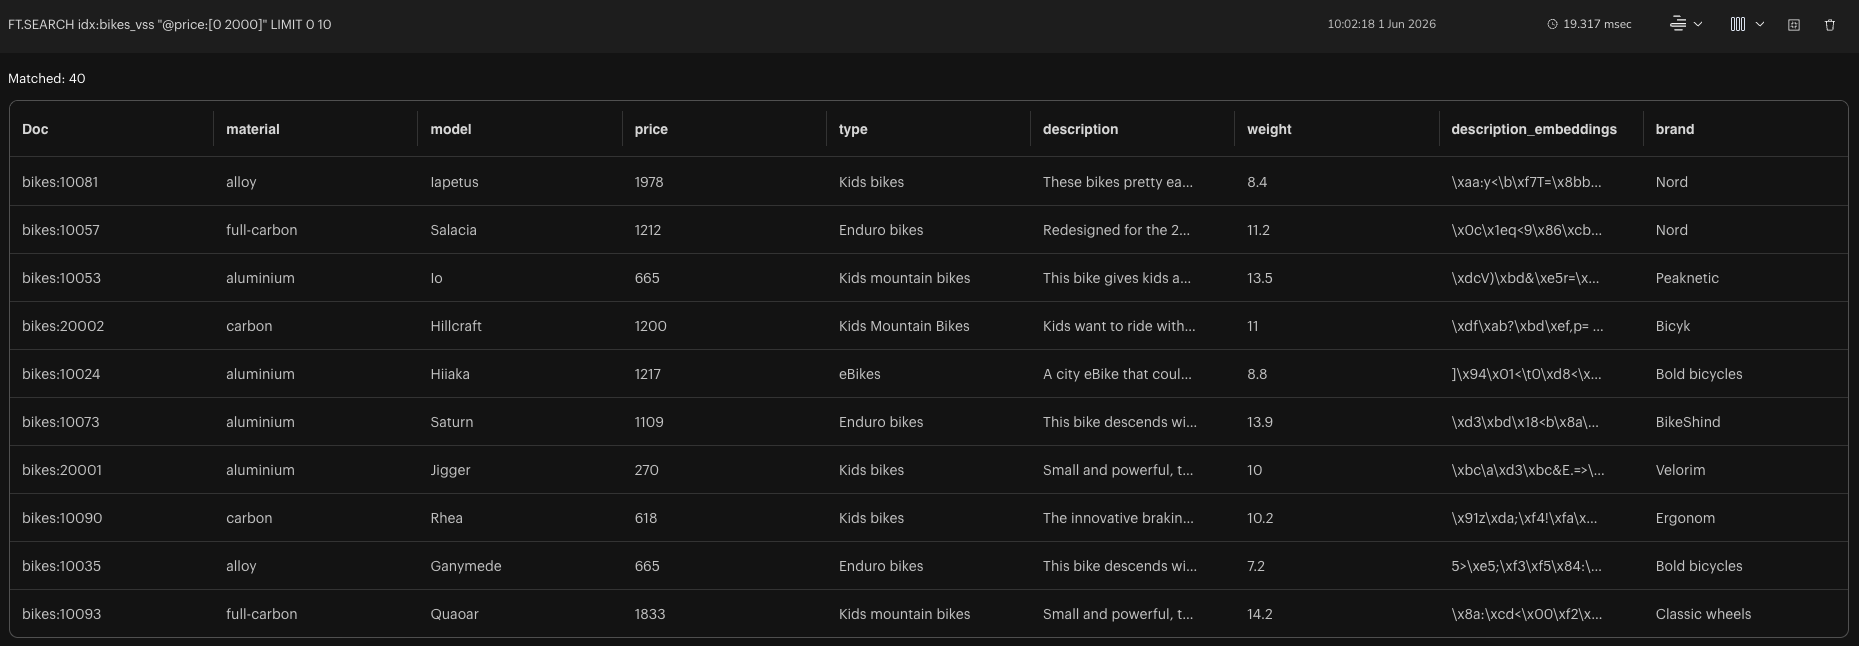
- Run — run the query and view the results in the lower pane.
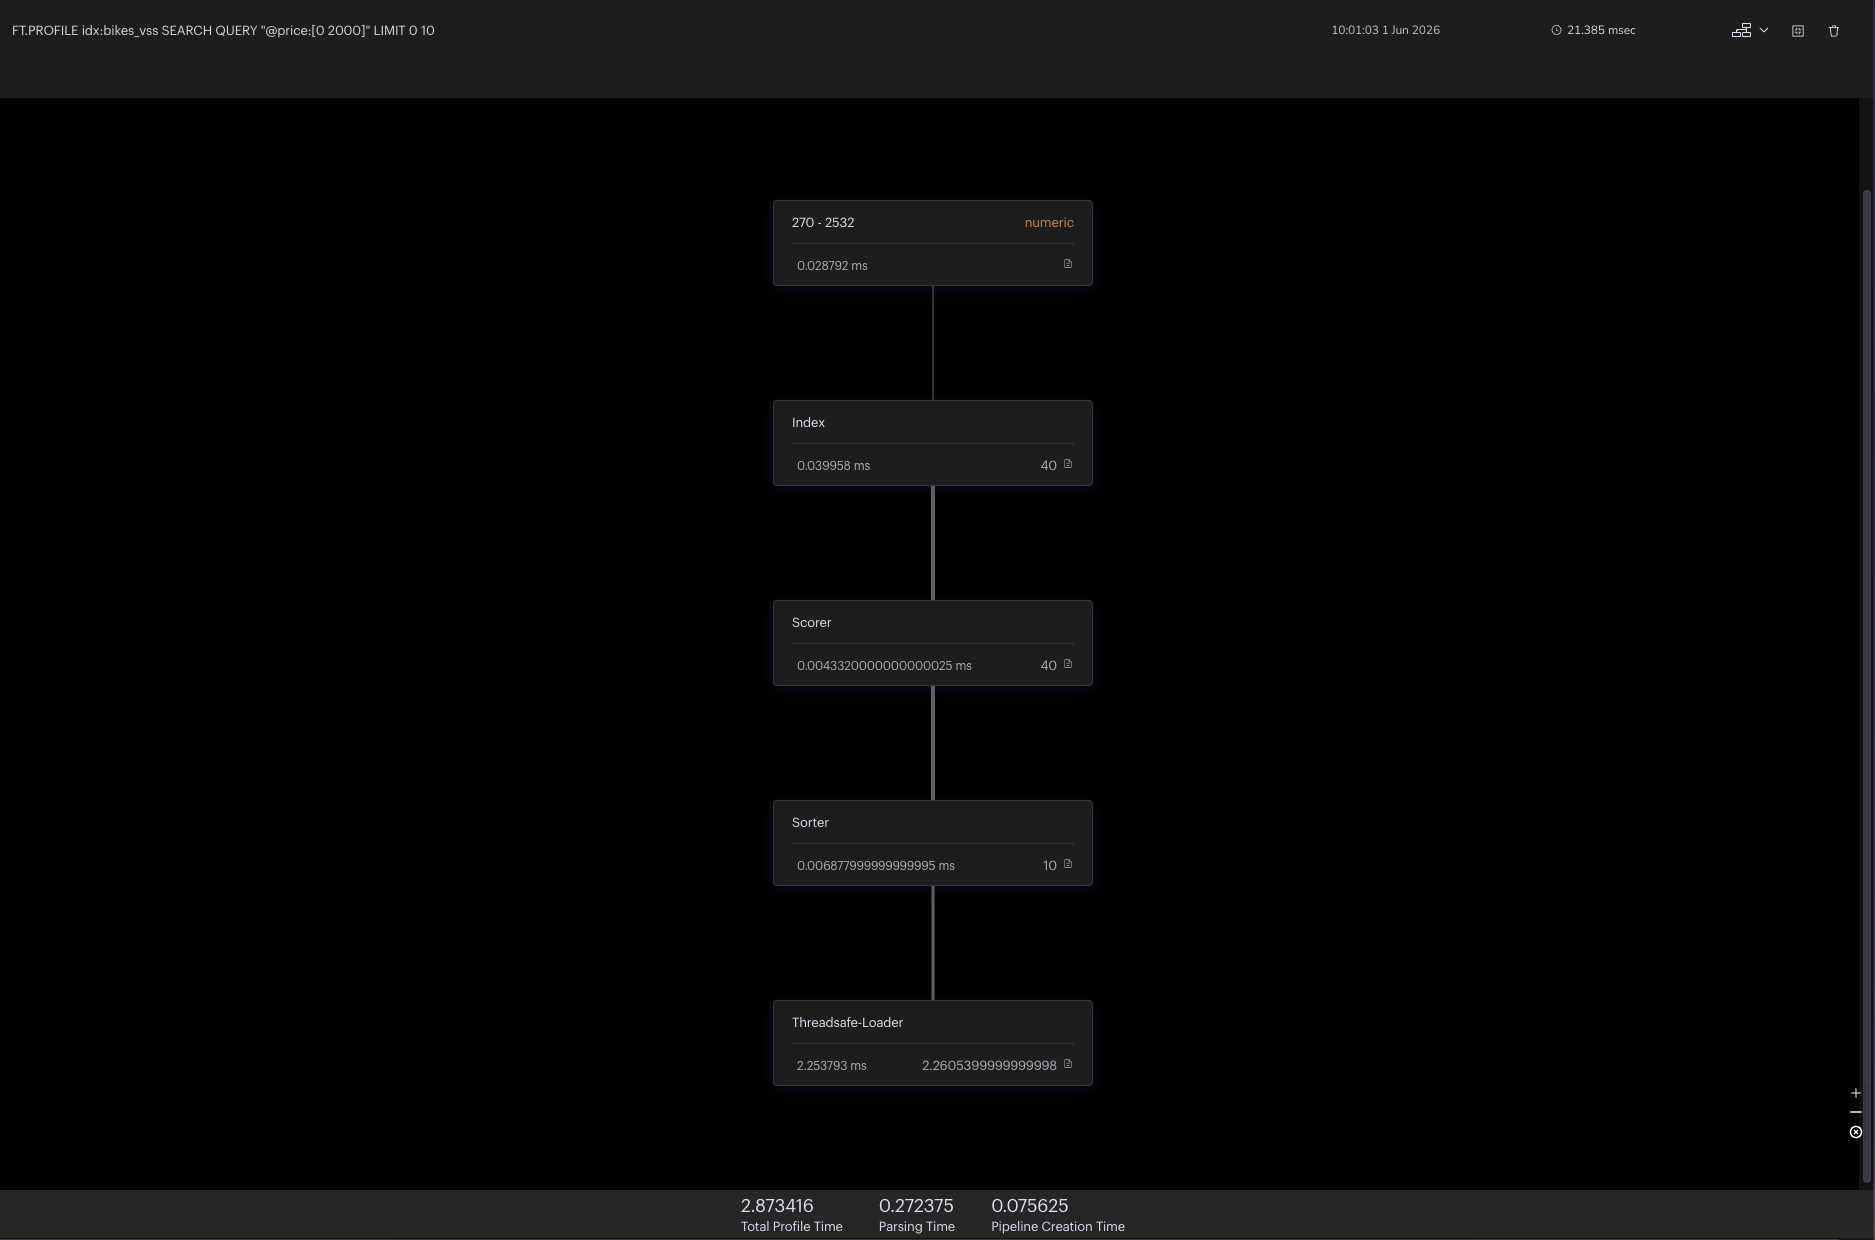
For example, the following query returns the first 10 documents priced under 2000:
FT.SEARCH idx:bikes_vss "@price:[0 2000]" LIMIT 0 10
Select Explain to see how the query runs:
Select Profile to see where time is spent:
Results
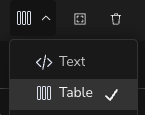
Each command you run appears in the results pane below the editor. You can switch between a Text and a Table view of the results, and re-run, profile, or explain a command directly from its result using the actions on the right.
Query library
The Query library tab keeps saved and sample queries together so you can reuse them quickly. Use the search field at the top to filter the list. From the library you can load a query into the editor, run it directly, or delete it.
To save your own query, write it in the Query editor tab, select Save, and give it a name. It then appears in the library alongside the built-in sample queries.
Navigate between the Browse and Search workspaces
The Browse and Search workspaces are connected so you can move between your raw data and your indexes.
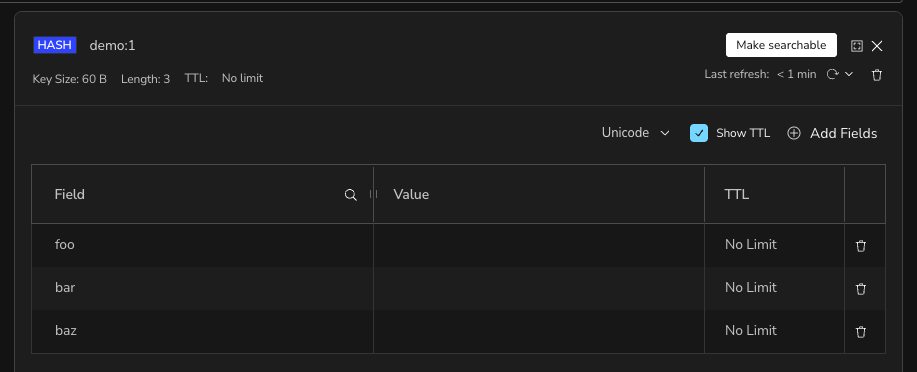
Make data searchable from the Browse workspace
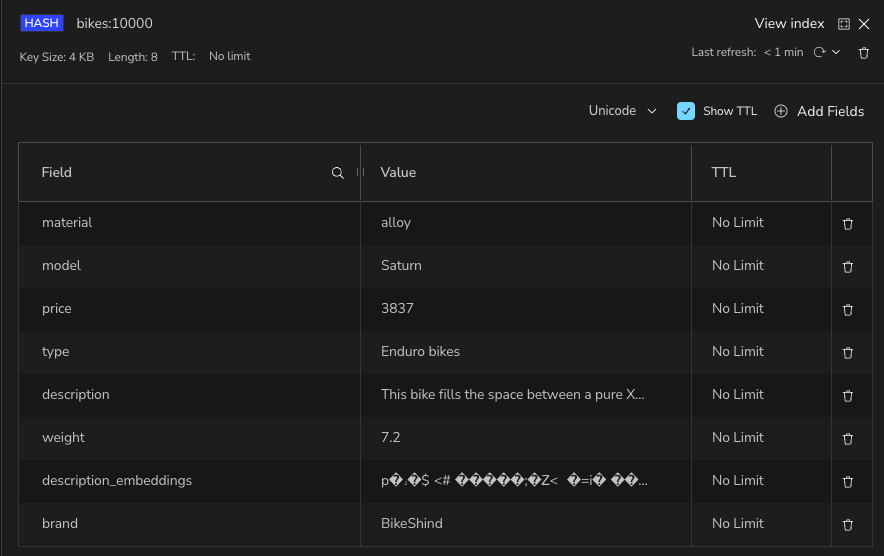
When you view a hash or JSON key in the Browse workspace that is not yet indexed, select Make searchable to create an index for it. A Make this data searchable dialog explains that all keys sharing the key's prefix will be included. Select Continue to go to the Search workspace, where you can review and adjust the schema before creating the index, as described in Create an index from existing data.
View the index for a key
When you view a key that is already indexed, select View index to jump to that index in the Search workspace. If the key belongs to more than one index, choose the index you want from the menu.