Blog
How to Build a Visual Project Management App Using Redis
Task management can be gruelling. For managers, monitoring tasks that are scattered and disconnected from one another remains just as much a norm as a bane in their profession. Being able to instantly understand the progress of projects without having to waste time digging for this information is an invaluable asset to any manager.
Having a project management system that can provide a clear visualization of the progress of each assignment will save time, reduce errors and allow managers to plan their next move with more precision.
Such an application requires a powerful database to effectively display graphs and resources to the user, which is why this Launchpad App used Redis to create its own project management application.
RedisGraph was at the start of this application, due to its ability to simplify the traversal of highly connected data and deliver contextual insights.
Let’s take a look at how they managed to bring this project to life. But before we dive in, make sure to check out our range of exciting apps on the Launchpad.
- What will you build?
- What will you need?
- Architecture
- Getting started
- How it works
1. What will you build?
You’ll build a powerful visual project management application that will help users visualize and categorize tasks whilst highlighting the different relationships between them using Redis. A task can be an idea, goal, epic feature, simple task or bug.
From start to finish, the core objective of this application is to make monitoring clusters of tasks simple and easy. Below we’ll take you through each step,along with the required components and their functionality.
2. What will you need?
- Ruby on Rails: the preferred open-sourced software to build web applications
- RedisGraph: sparses matrices to represent the adjacency matrix in graphs and linear algebra to query the graph.
- PostgreSQL: used as a powerful open-source object-relational database system.
- TailwindCSS: used as a utility first CSS framework that helps to build the user interface.
- Webpack: used as a module bundler that bundles JavaScript files for usage in a browser.
- Docker: deployed as an open platform for developing and running applications.
3. Architecture
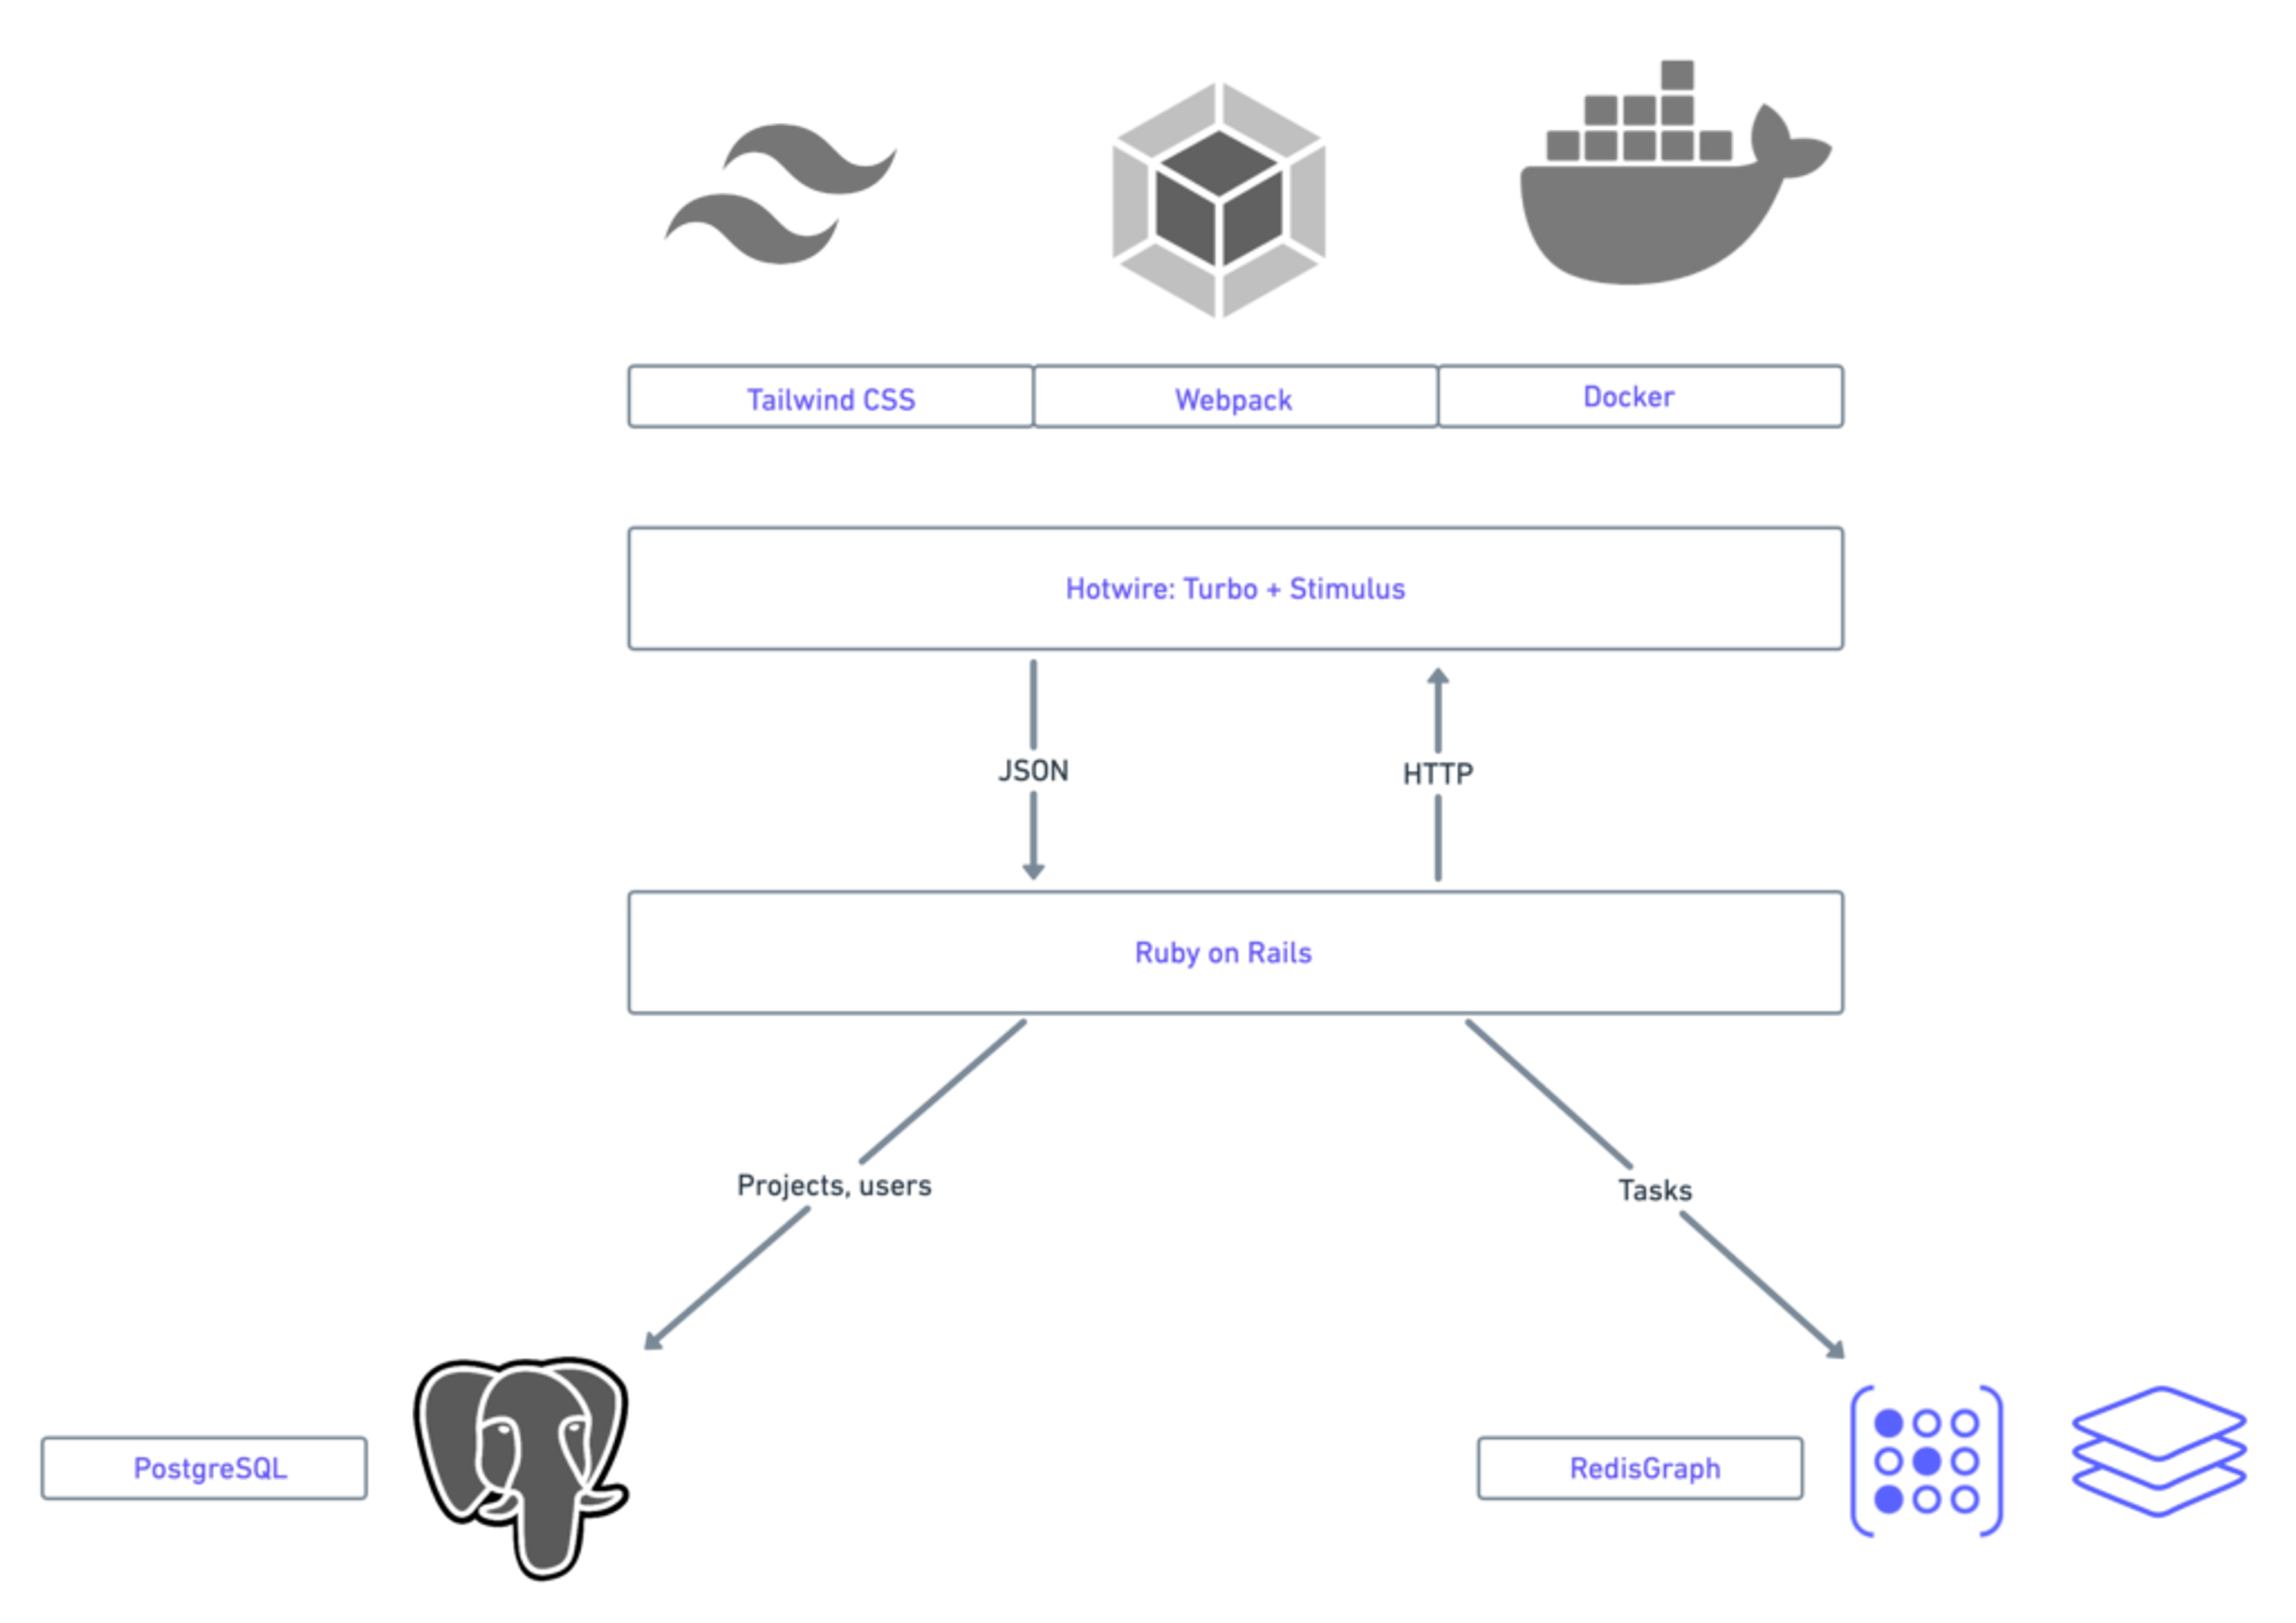
- The application is conceived as a single Ruby on Rails monolith. The app also stores its data relationally by using PostgreSQL and in a graph using RedisGraph.
- Administrative data (such as users and projects) are stored relationally, while storage of tasks and the relationships between them is delegated to the graph storage.
- The graph storage layer features a small custom built DSL, that translates method calls in the style of ActiveRecord into RedisGraph queries.
- Plain HTML and Javascript is the genetic makeup of the app (Stimulus for interactivity and D3.js/cola.js for graph visualization)
- The HTML is rendered server side before being sent to the client. This means that instead of using JSON to transfer data between the server and client, HTML is sent and the only part of the DOM that changes is replaced. Please refer to Turbo and Stimulus documentation for more information.
- Graph data is fetched from a JSON endpoint using D3’s JSON plugin. Hotwire is used as the framework to ensure that its functionality remains efficient.
- Finally, the UI is built using TailwindCSS, Heroicons, Collecticons and QuillJS for the rich text editor.
4. Getting started
Prerequisites
Step 1. Installing the Pre-requisites
Install the below software:
- Docker
- Docker Compose
Step 2. Clone the repository
| git clone https://github.com/redis-developer/code-red |
|---|
First, ensure that you have a working Docker environment. Pull the images and start the containers:
Step 3. Compile the front code:
Step 4. Set up the PostgreSQL database:
Database ‘codered_development’ and ‘codered_test’ gets created.
Once you’ve set this up, load the sample data into the PostgreSQL and Redis databases:
The application should now be available at http://localhost:3000.
5. How it works
Creating tasks
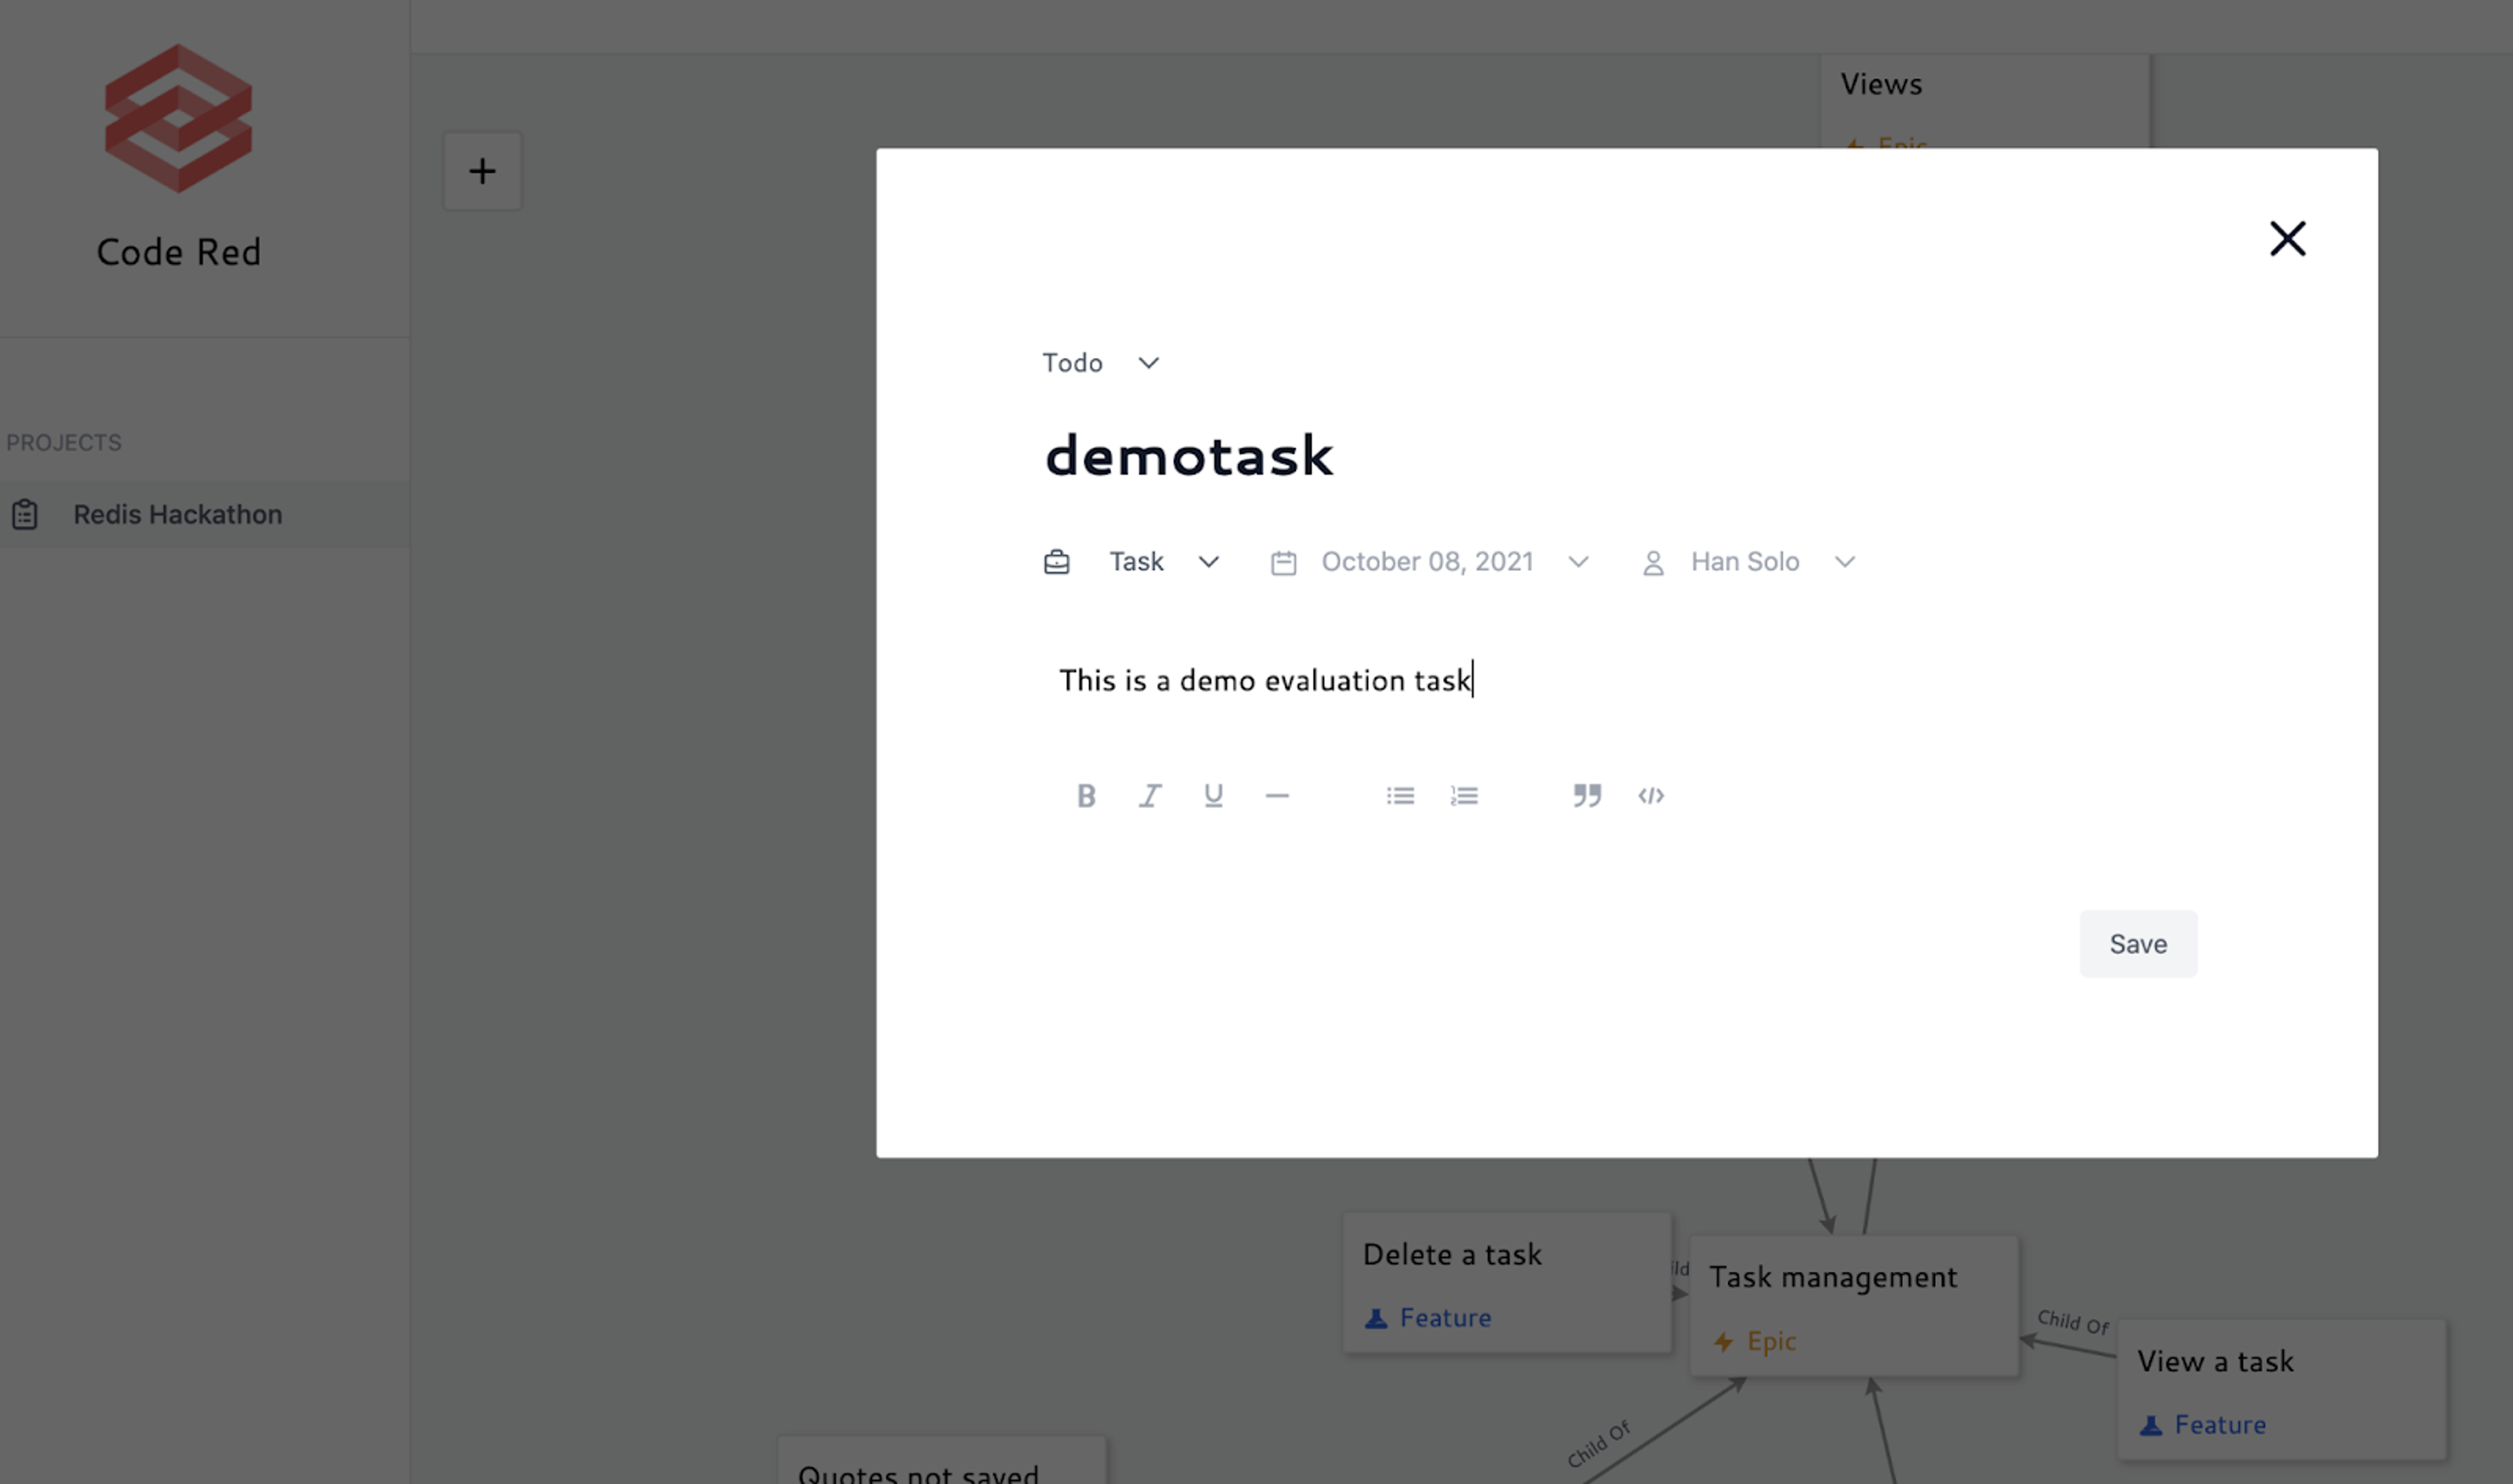
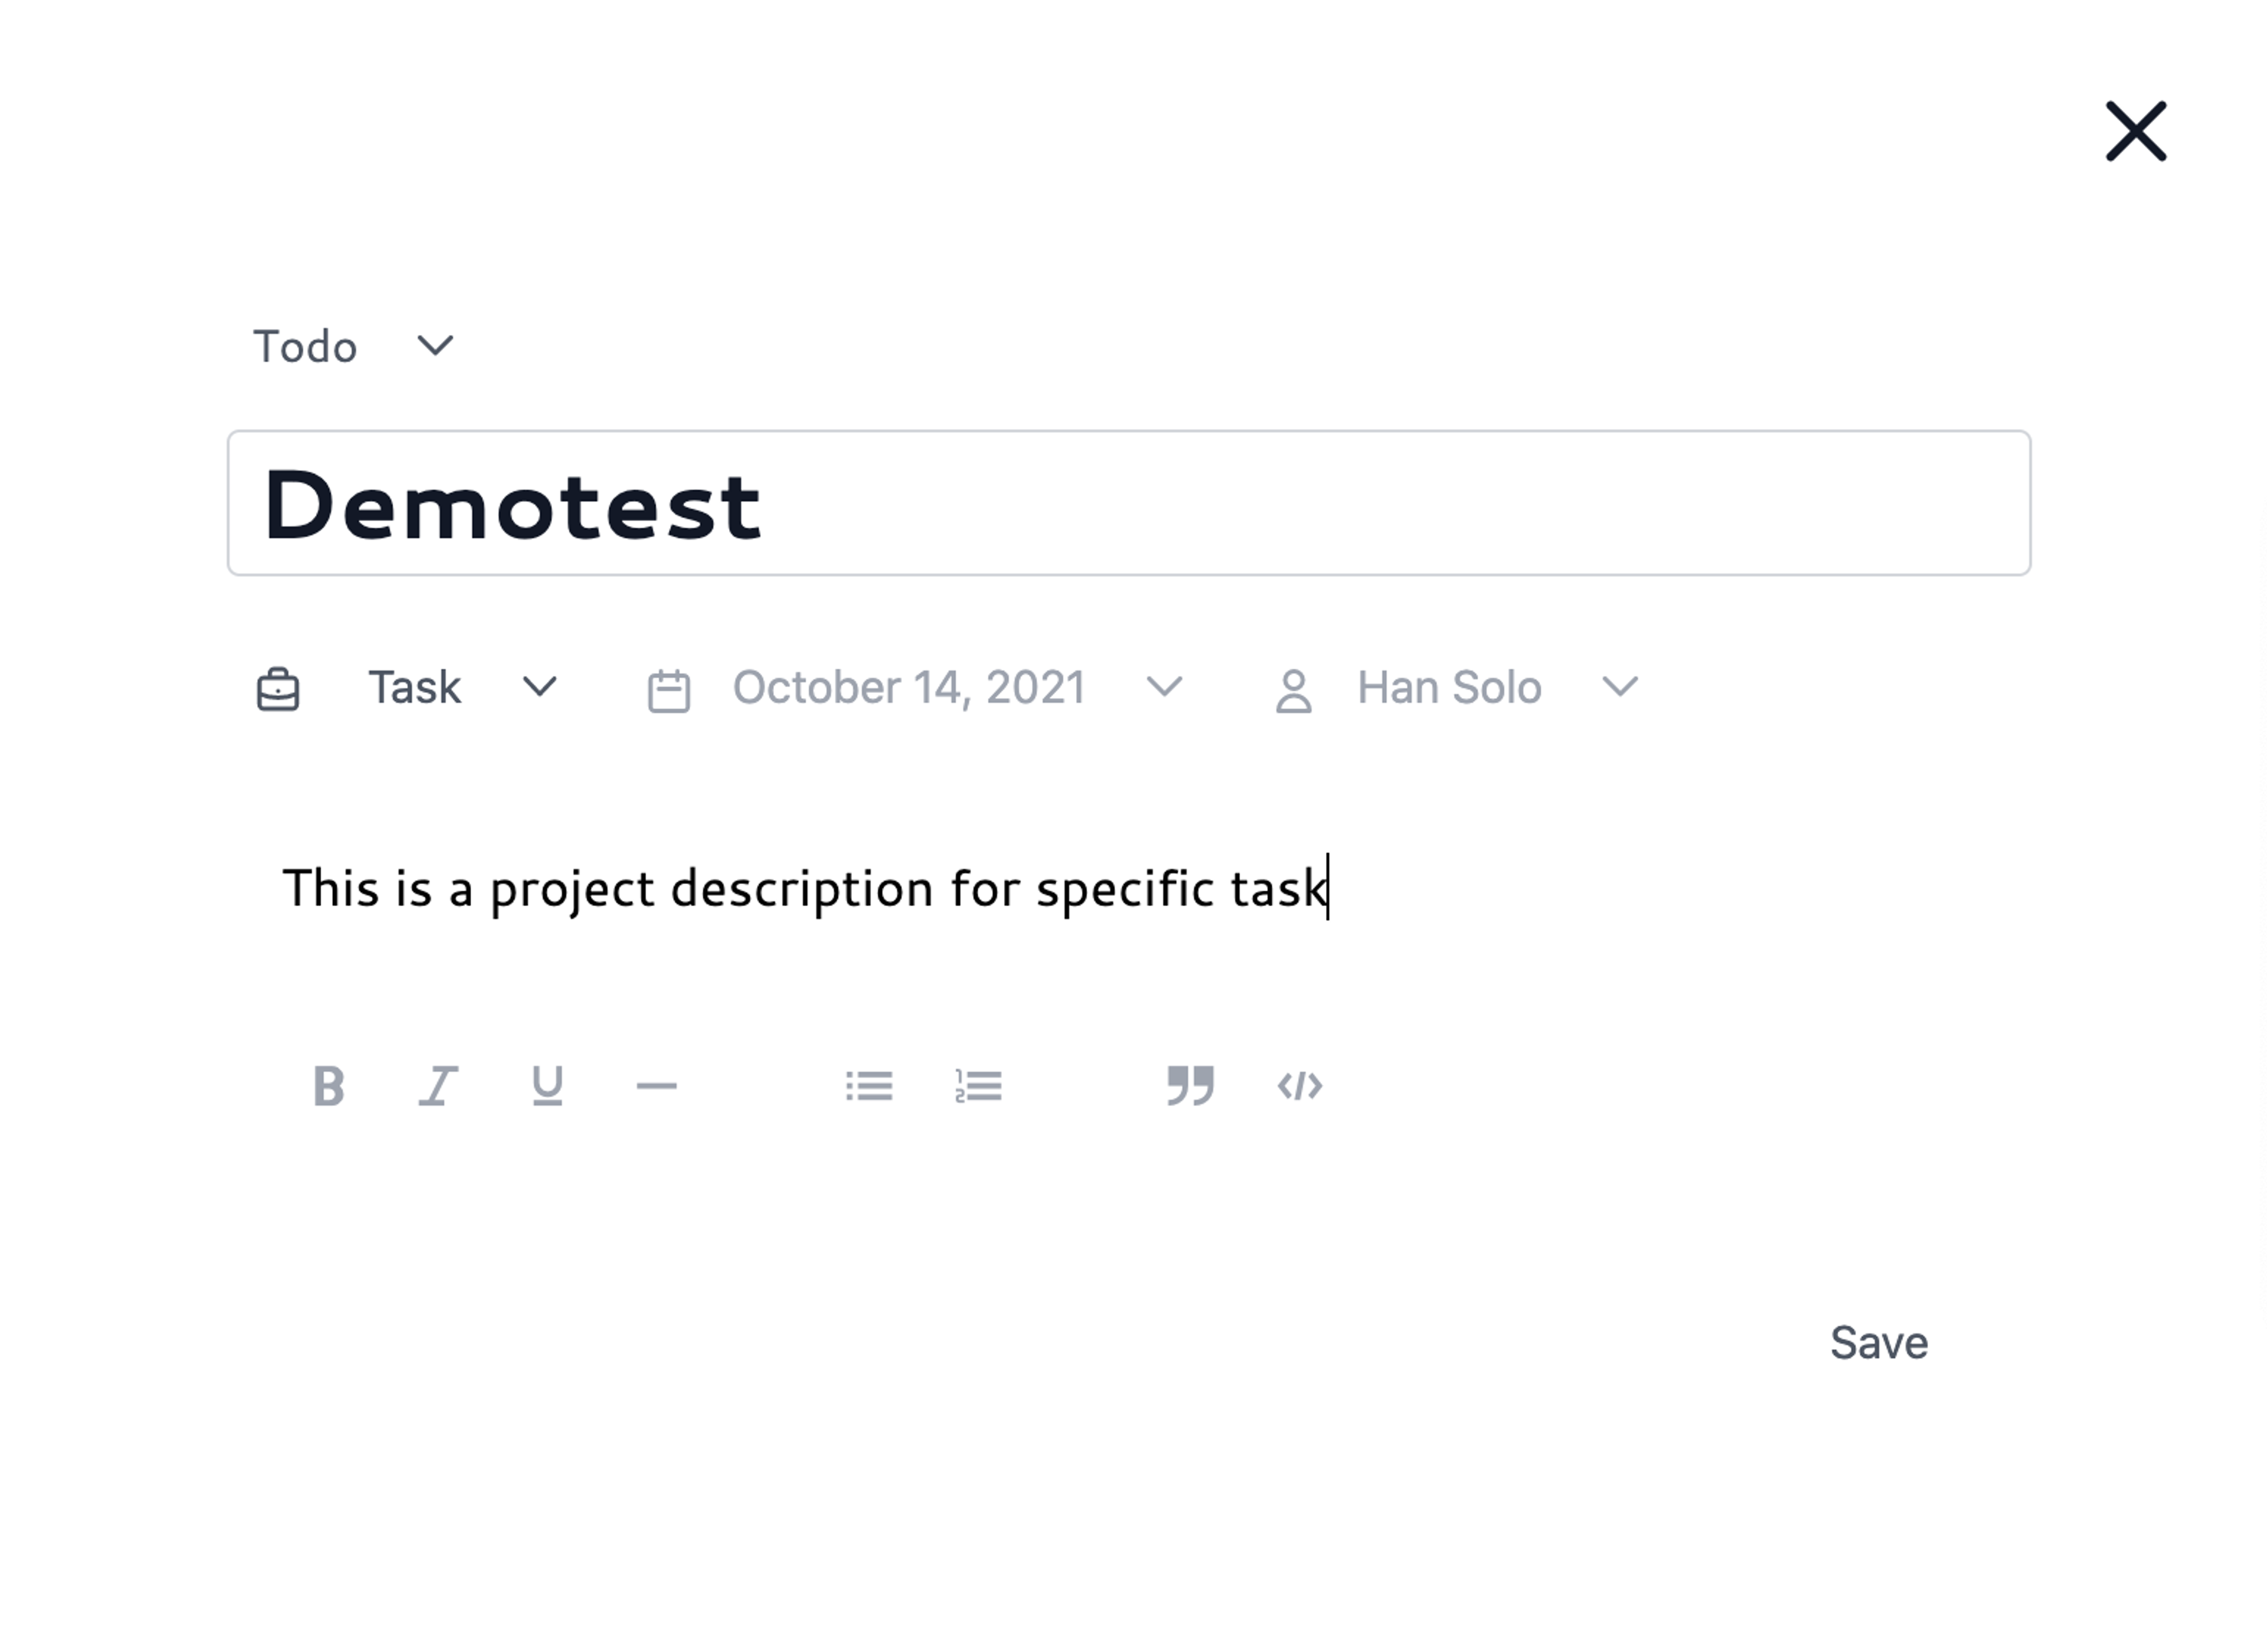
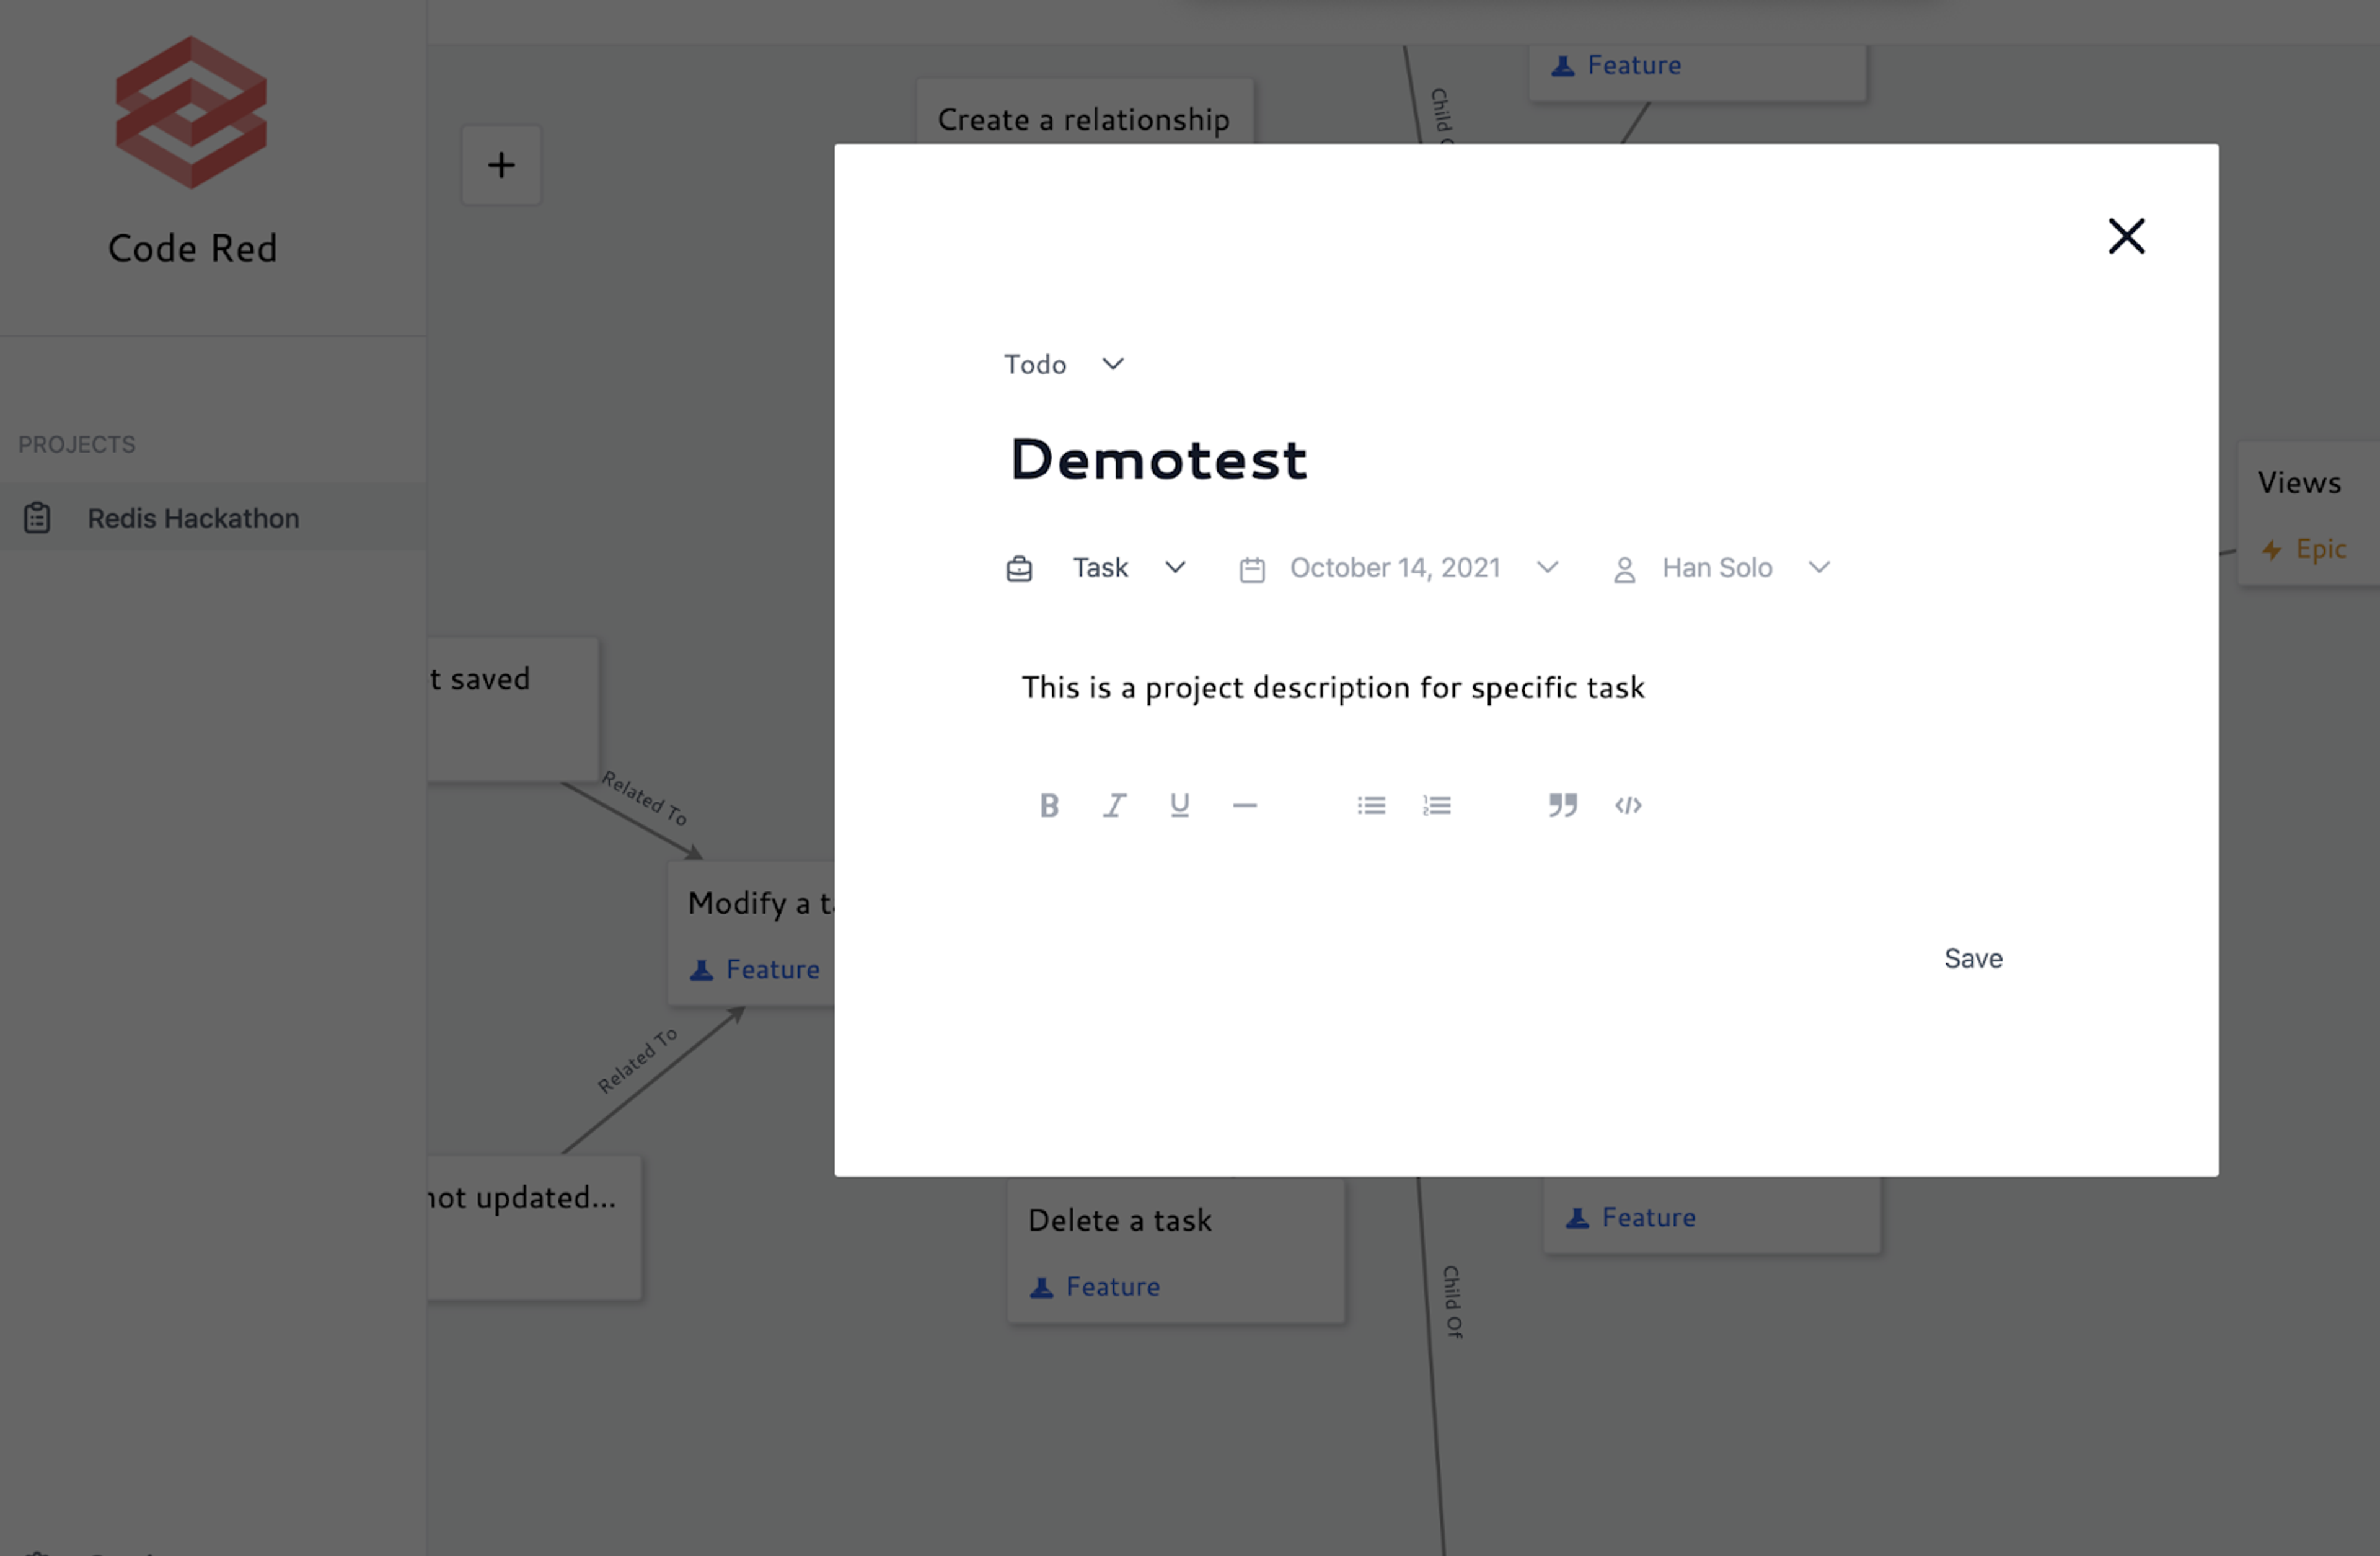
First click on the plus sign on the top left hand side of the screen to create a new task. You’ll then be presented with the below image. At the top you can create a title for the task along with a description in the text box below.
Sitting just below the title you’ll see a panel of drop down menus. On the far left you can decide on the nature of the task. In the middle you can set the due date for the task to be completed and on the far right you can assign the task to a specific individual.
Creating relationships
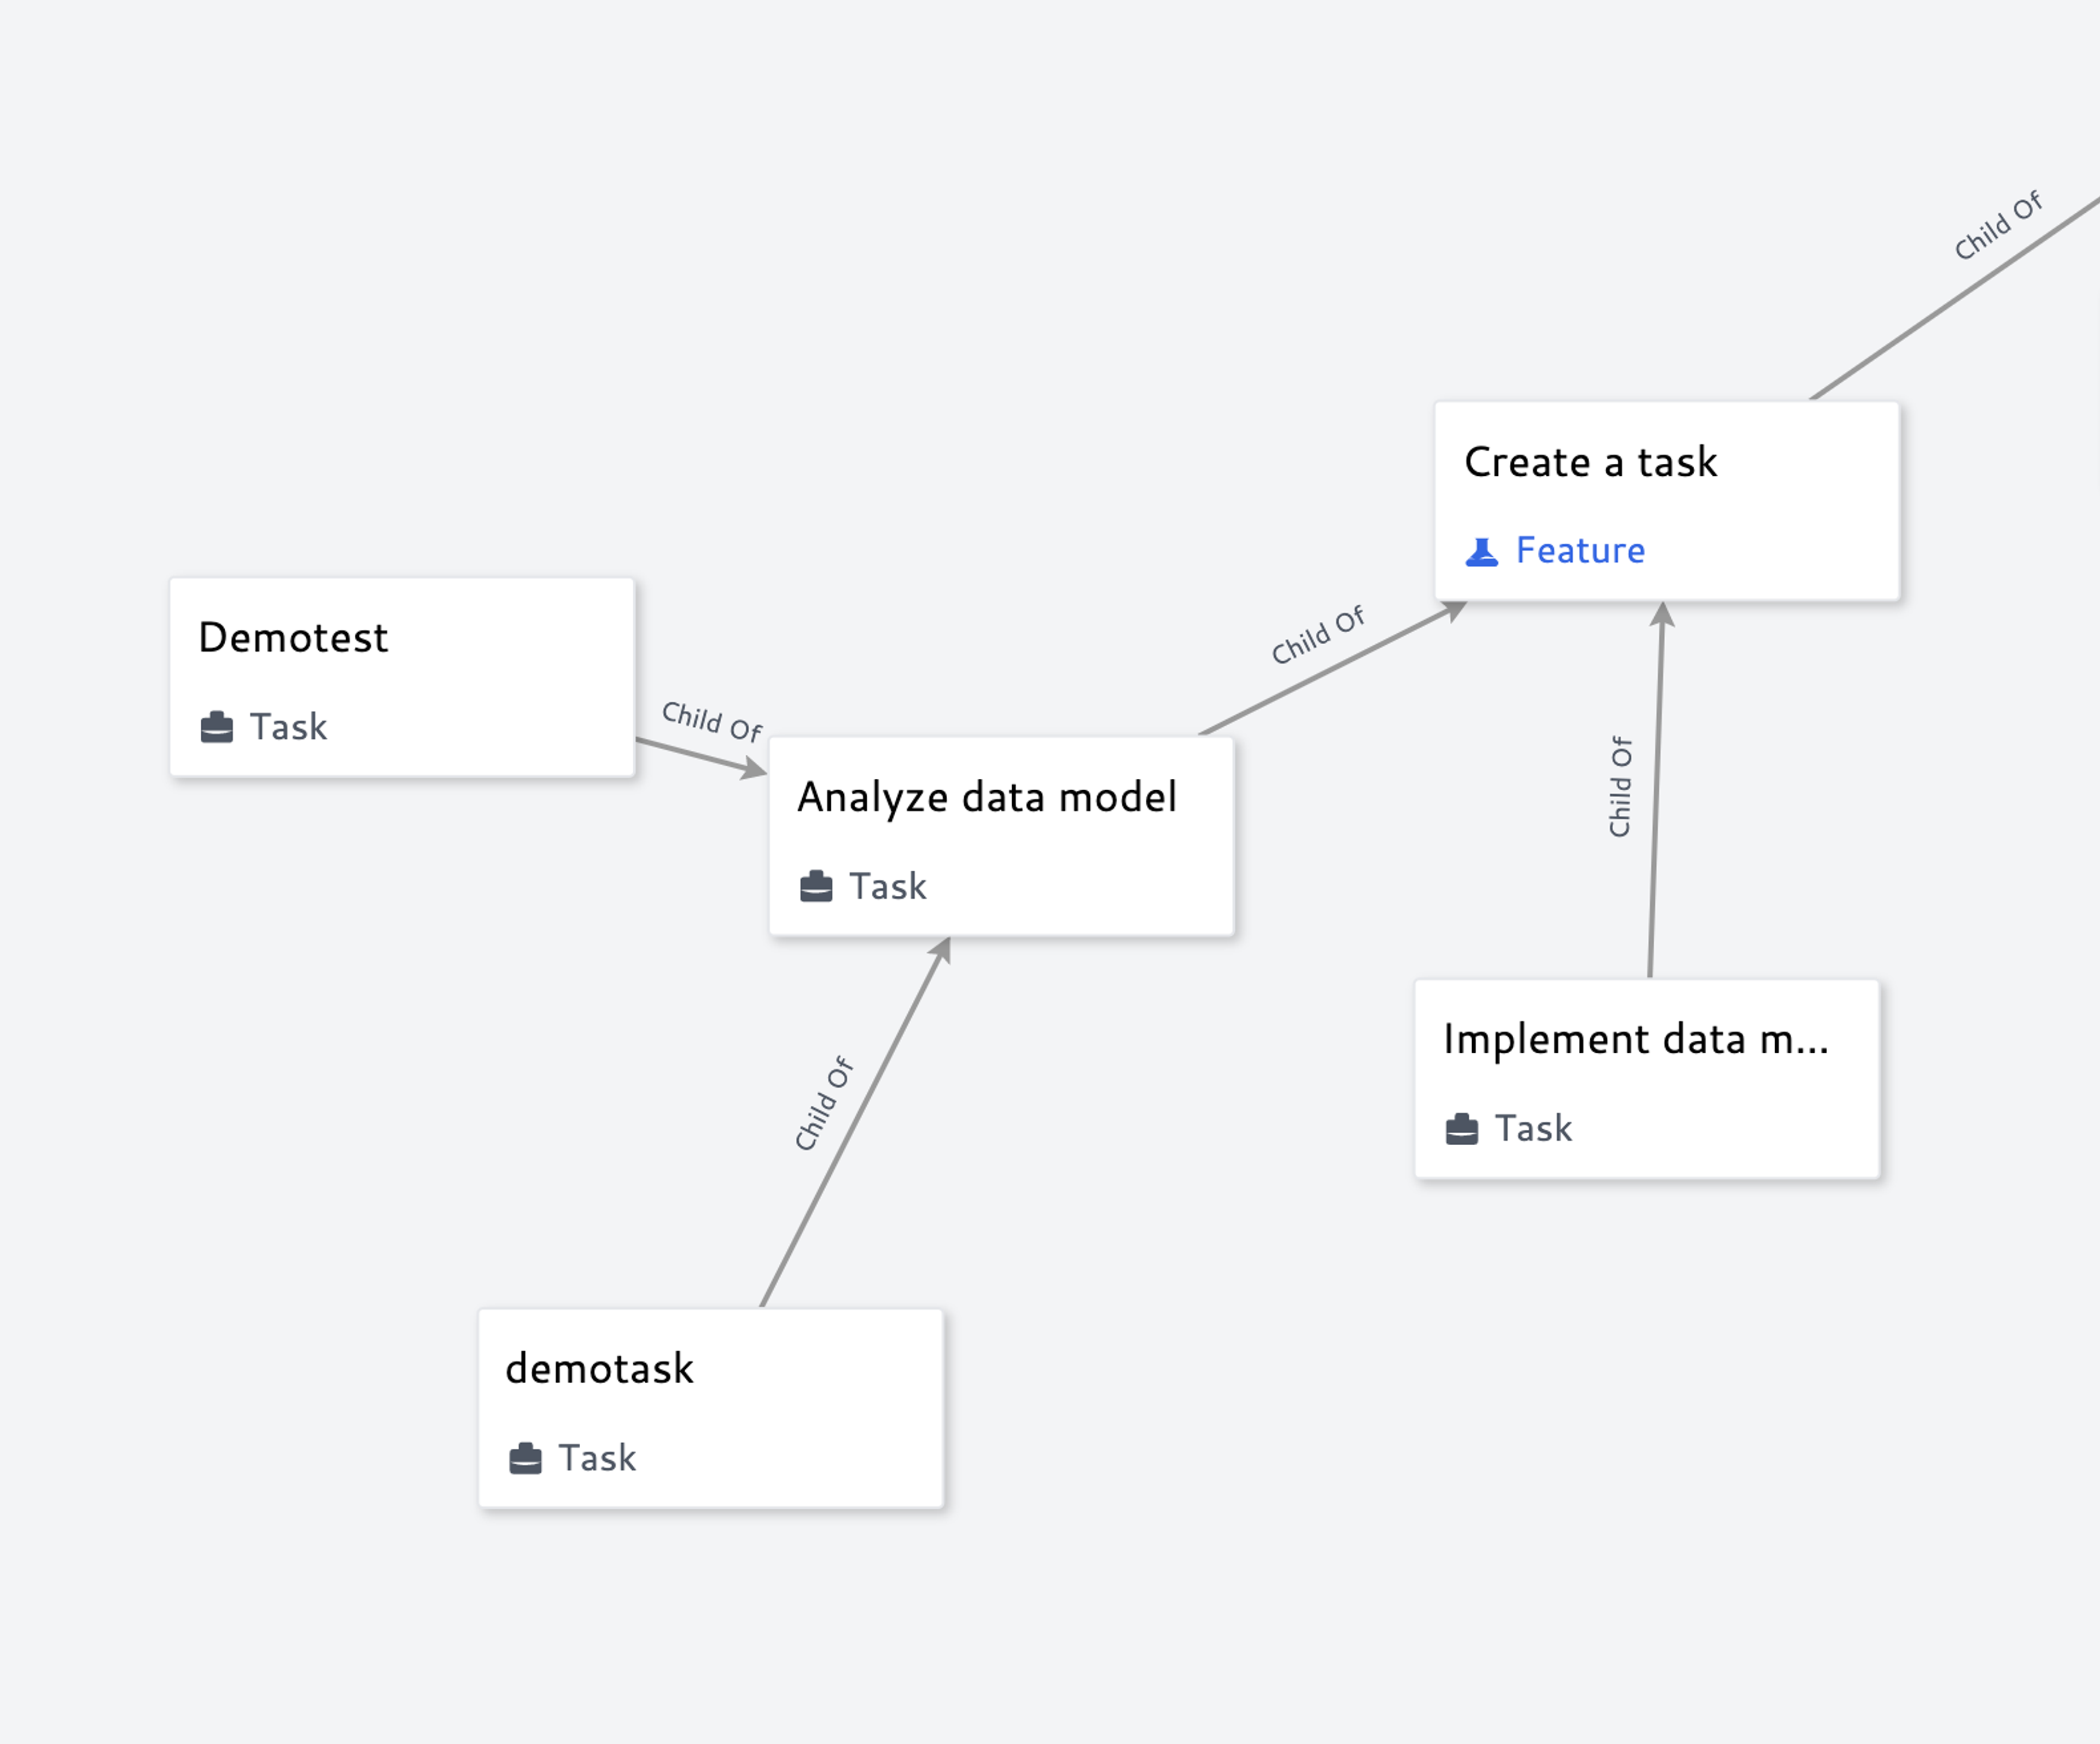
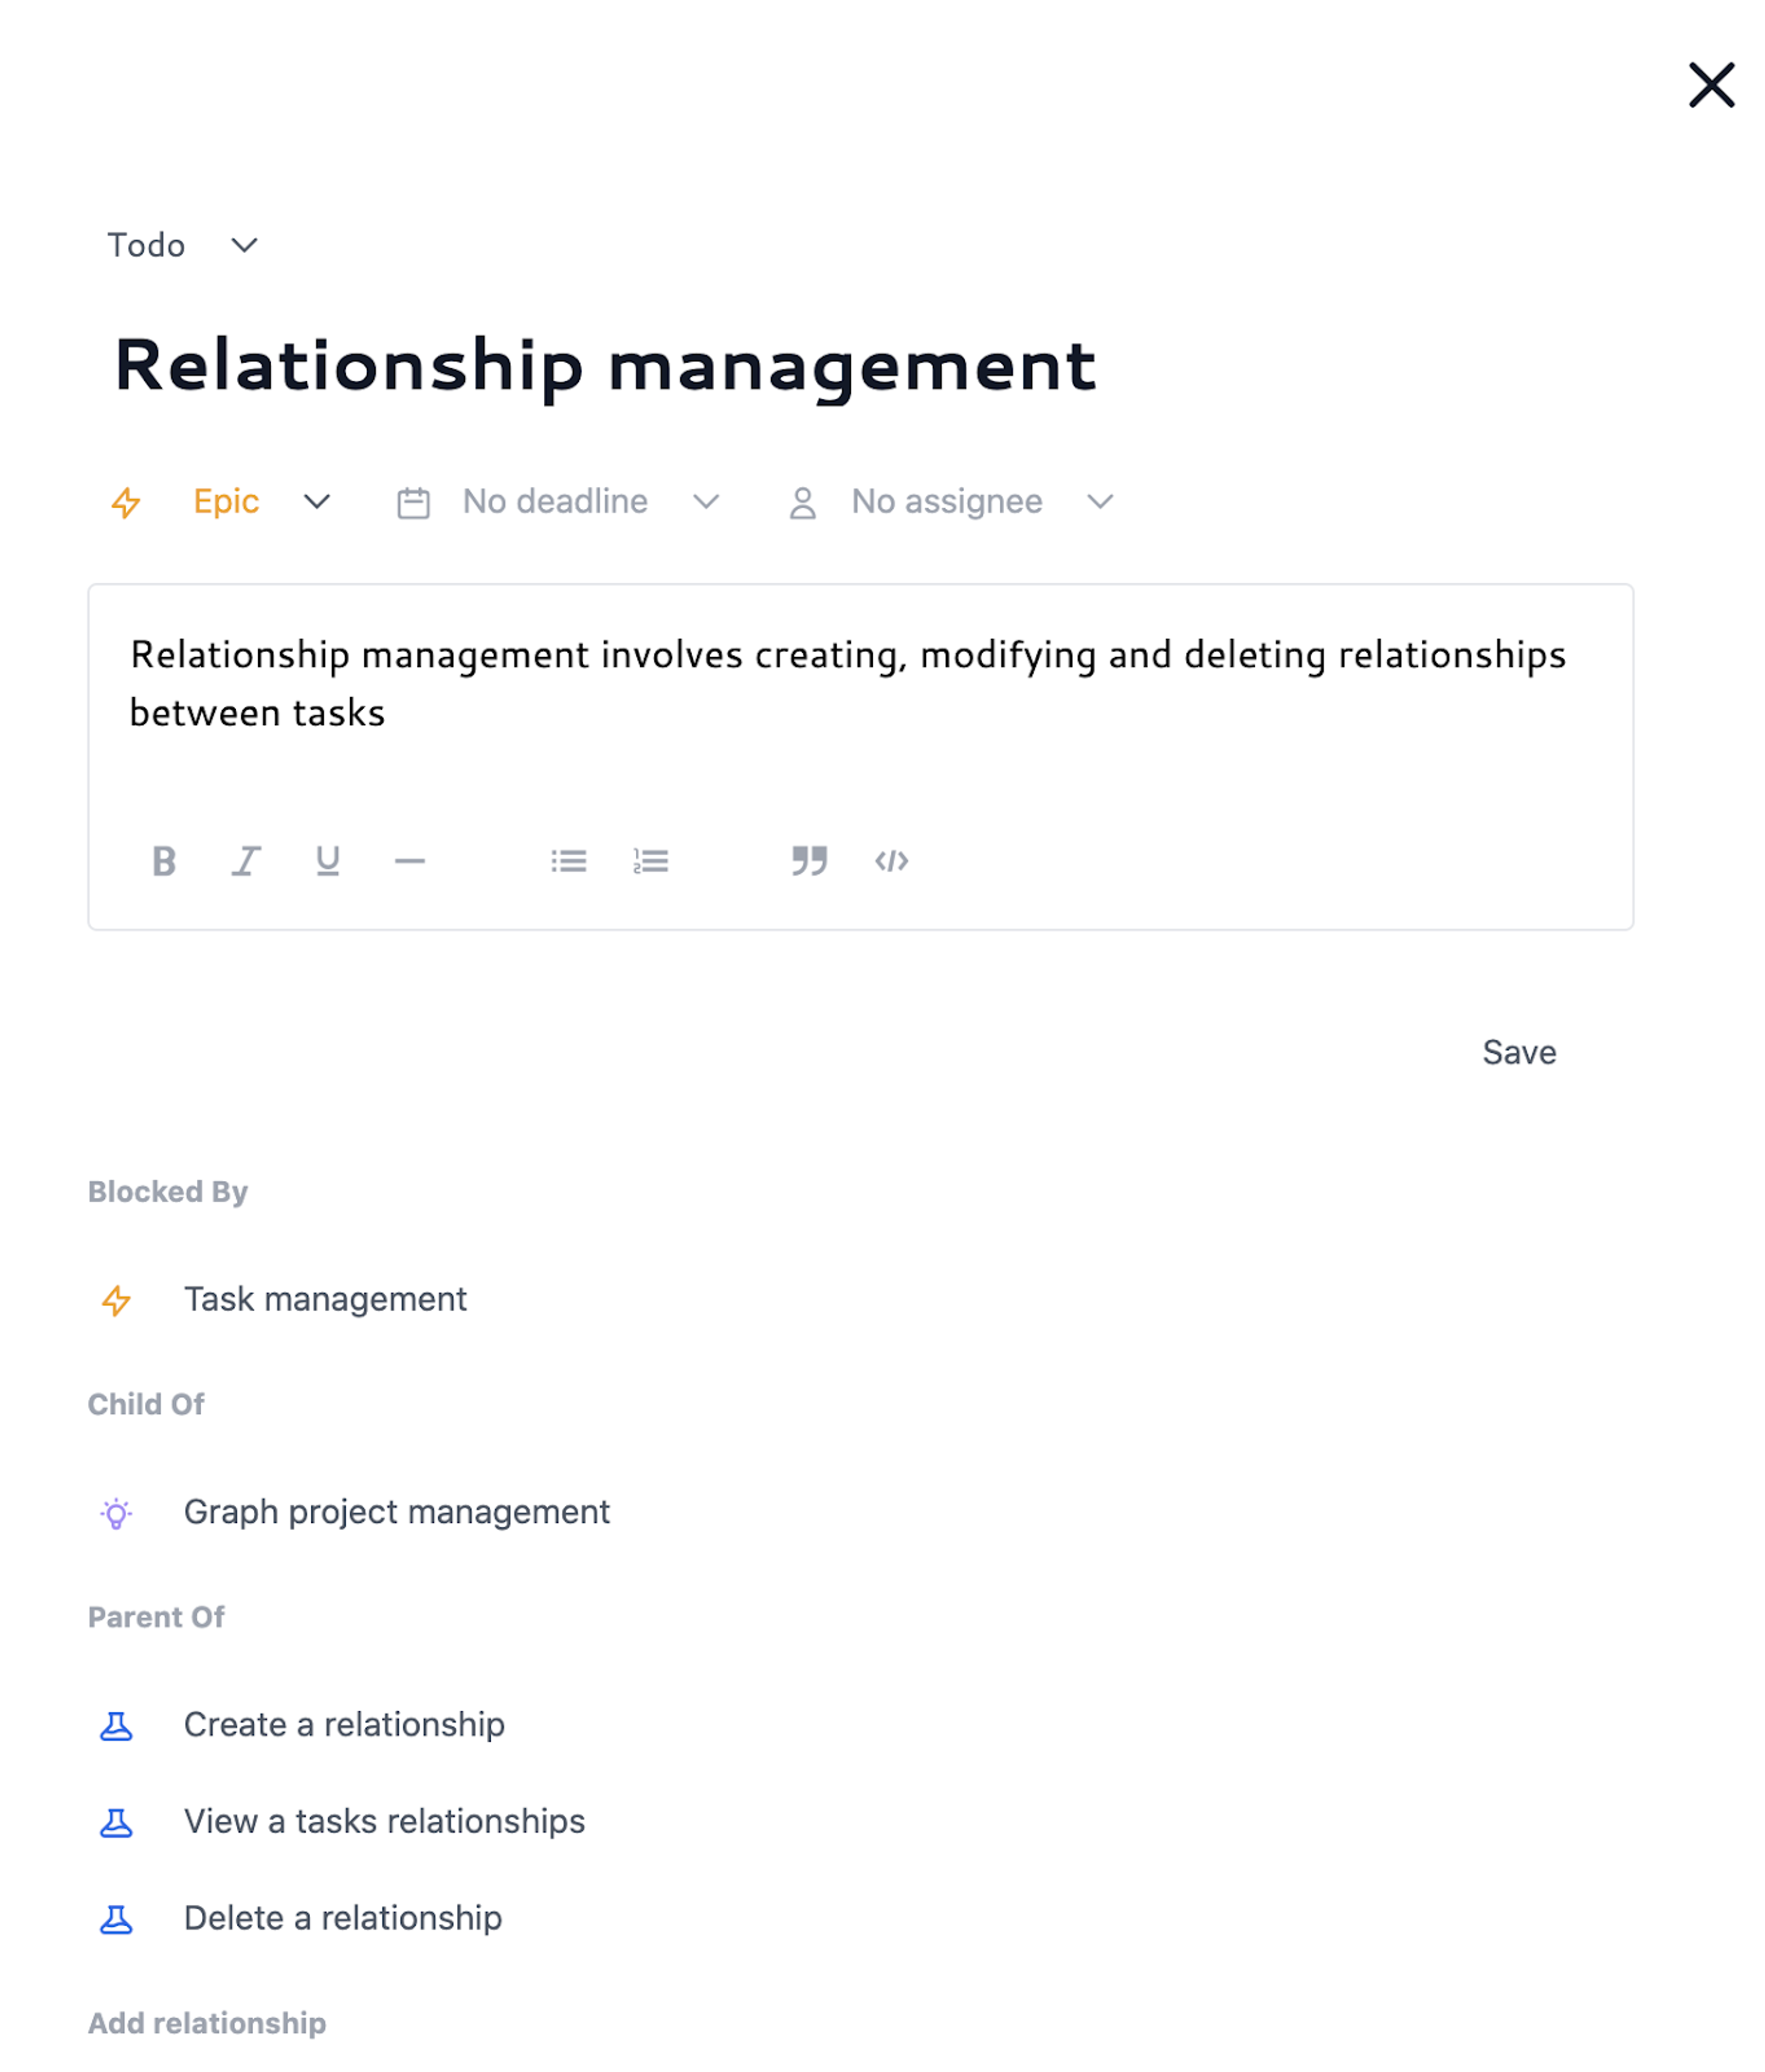
A core benefit of this app is being able to see the relationships between different tasks, as you’ll see from the following image.
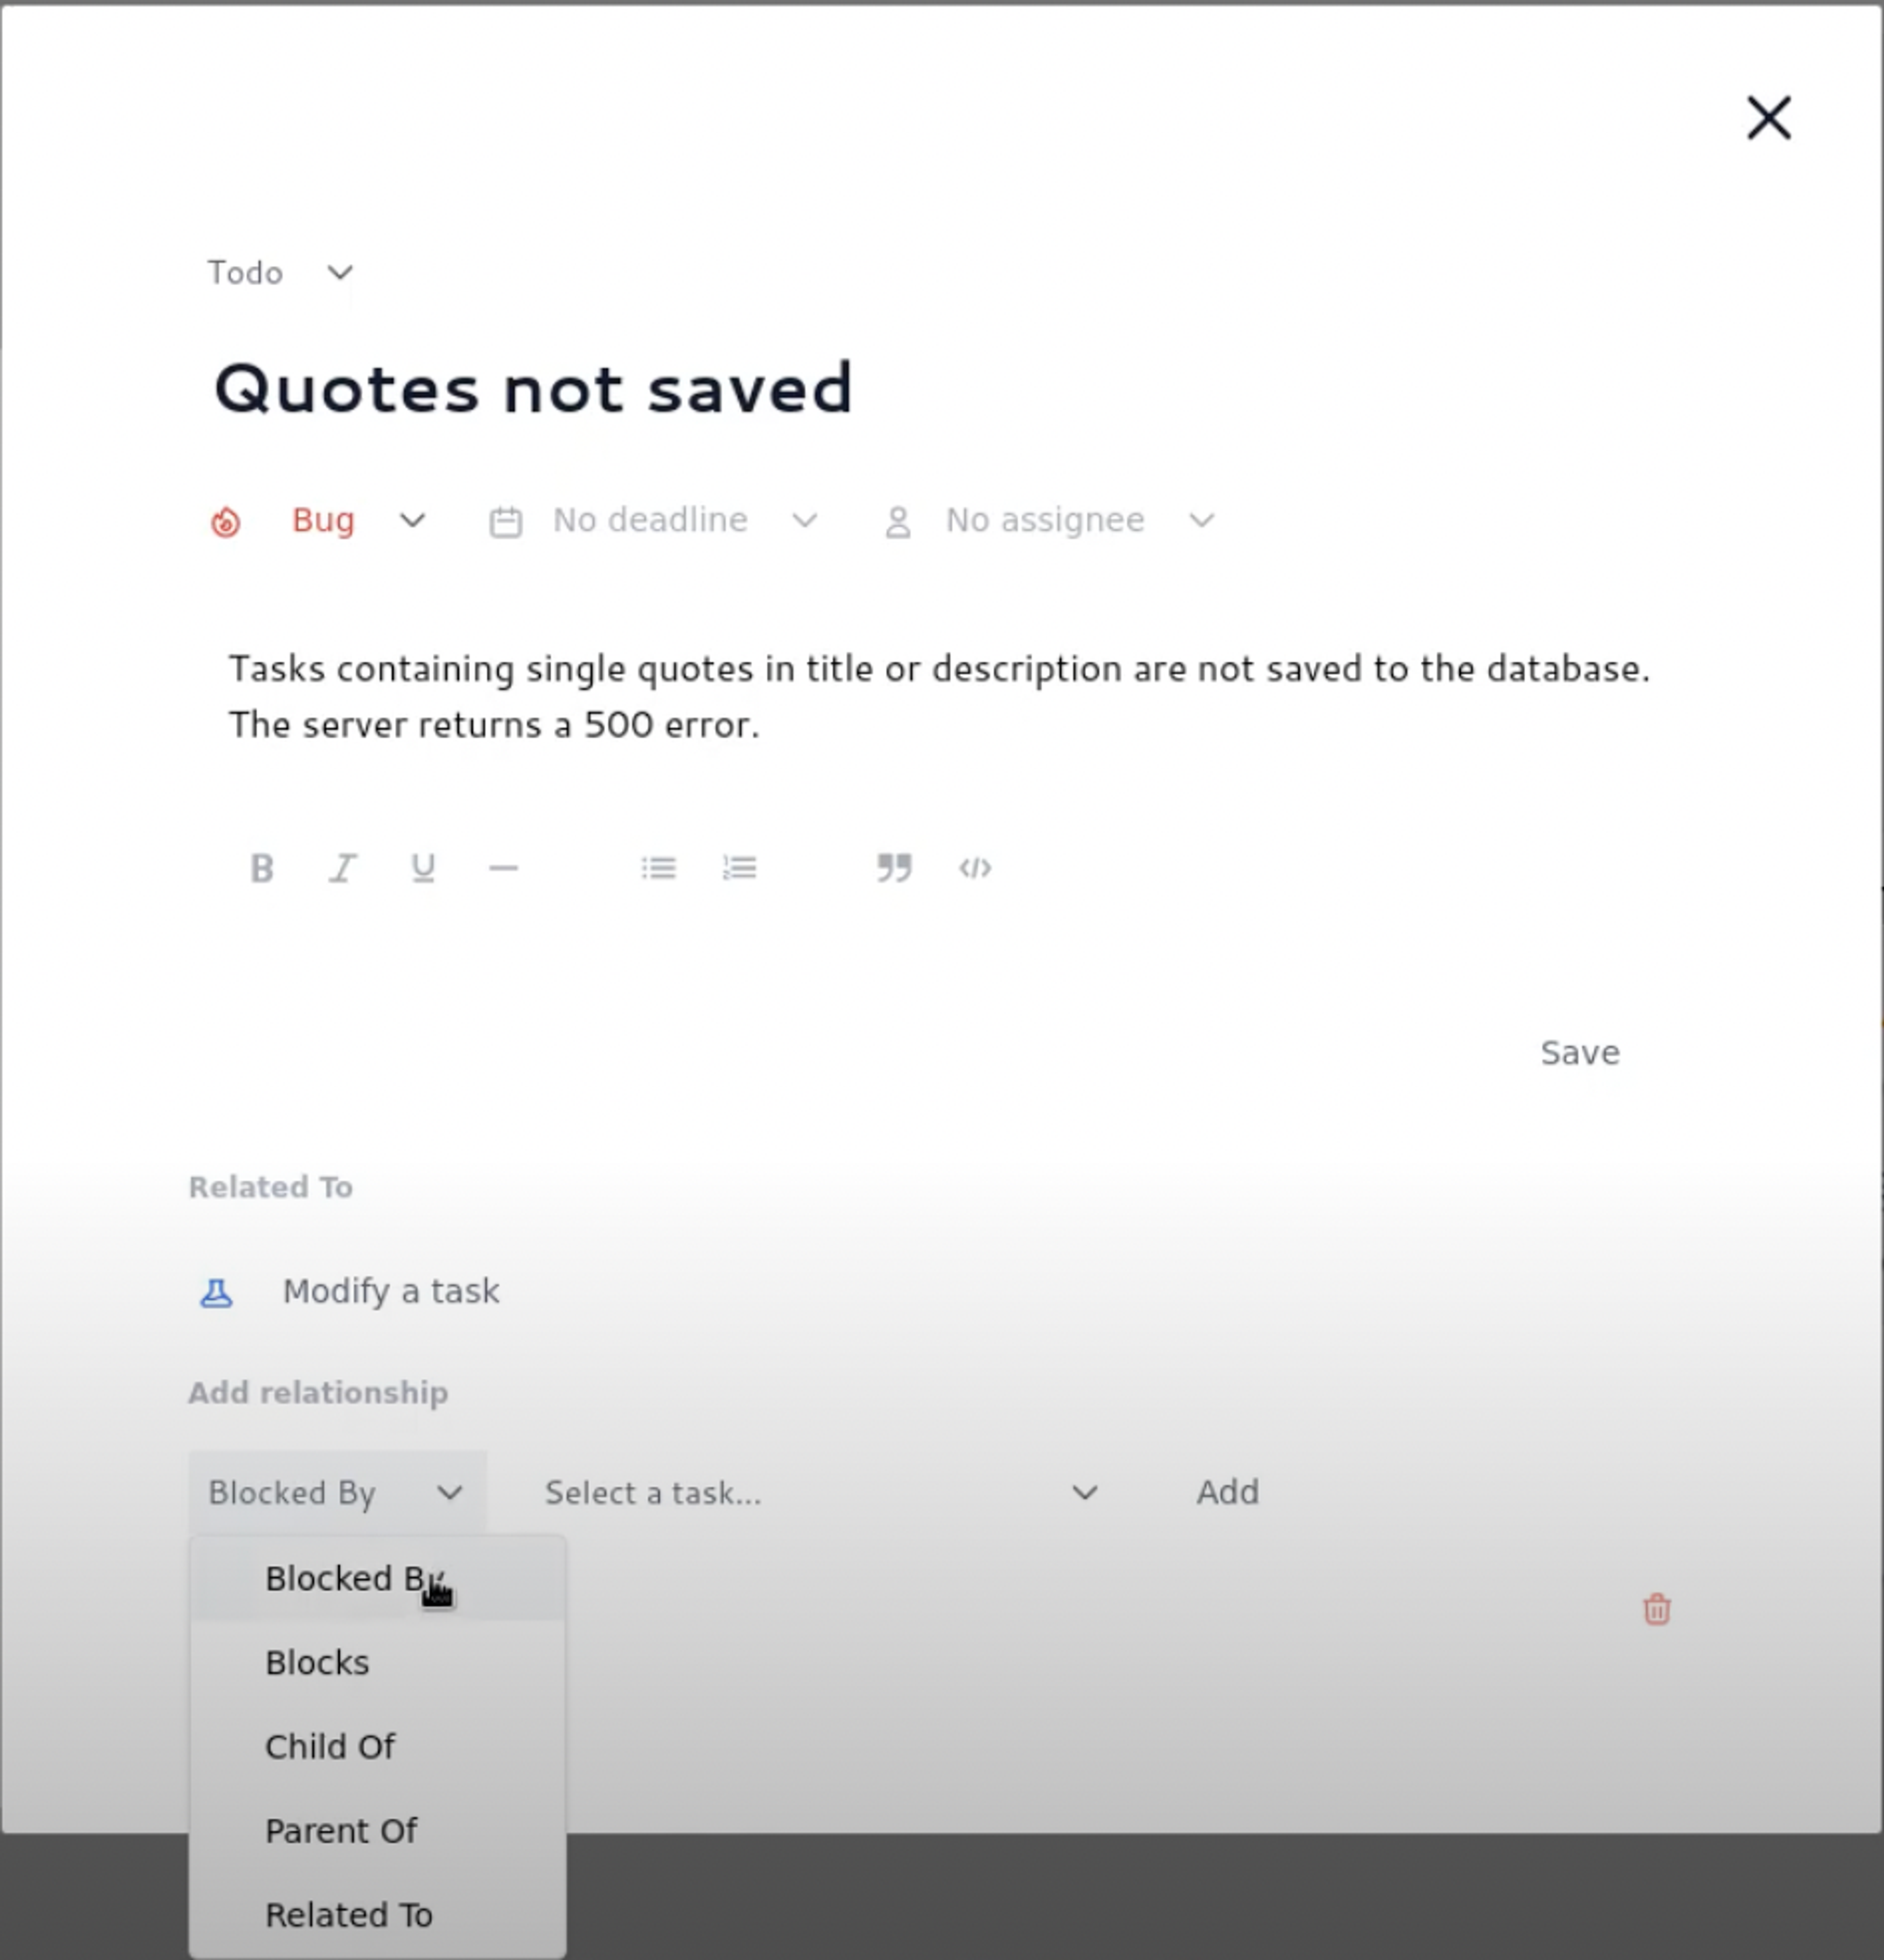
To achieve this, first click on a task to get access to its core menu. From here you’ll see a drop-down menu at the bottom called ‘Add relationship’ (see image below), where you can decide what relationship this task will have with others.
On the right-hand side of this bar, you can choose which task you want the relationship to be shared with.
How to view a task
As a user, you’ll want to view a task. A popup should display the title, description, deadline, status, type and the person who’s assigned the task.
Modifying a task
You can modify the title, description, deadline, status, type and assigned person of the task. Doing so is easy. Click on a task and you’ll have the
Deleting tasks
To delete a task, simply click on the trash icon at the bottom right hand side of the task menu. A confirmation modal should be displayed before the task is deleted.
Fetching relationships
Adding relationships
As a user, you’ll want to create a relationship between two tasks. A relationship should have the following type:
Or
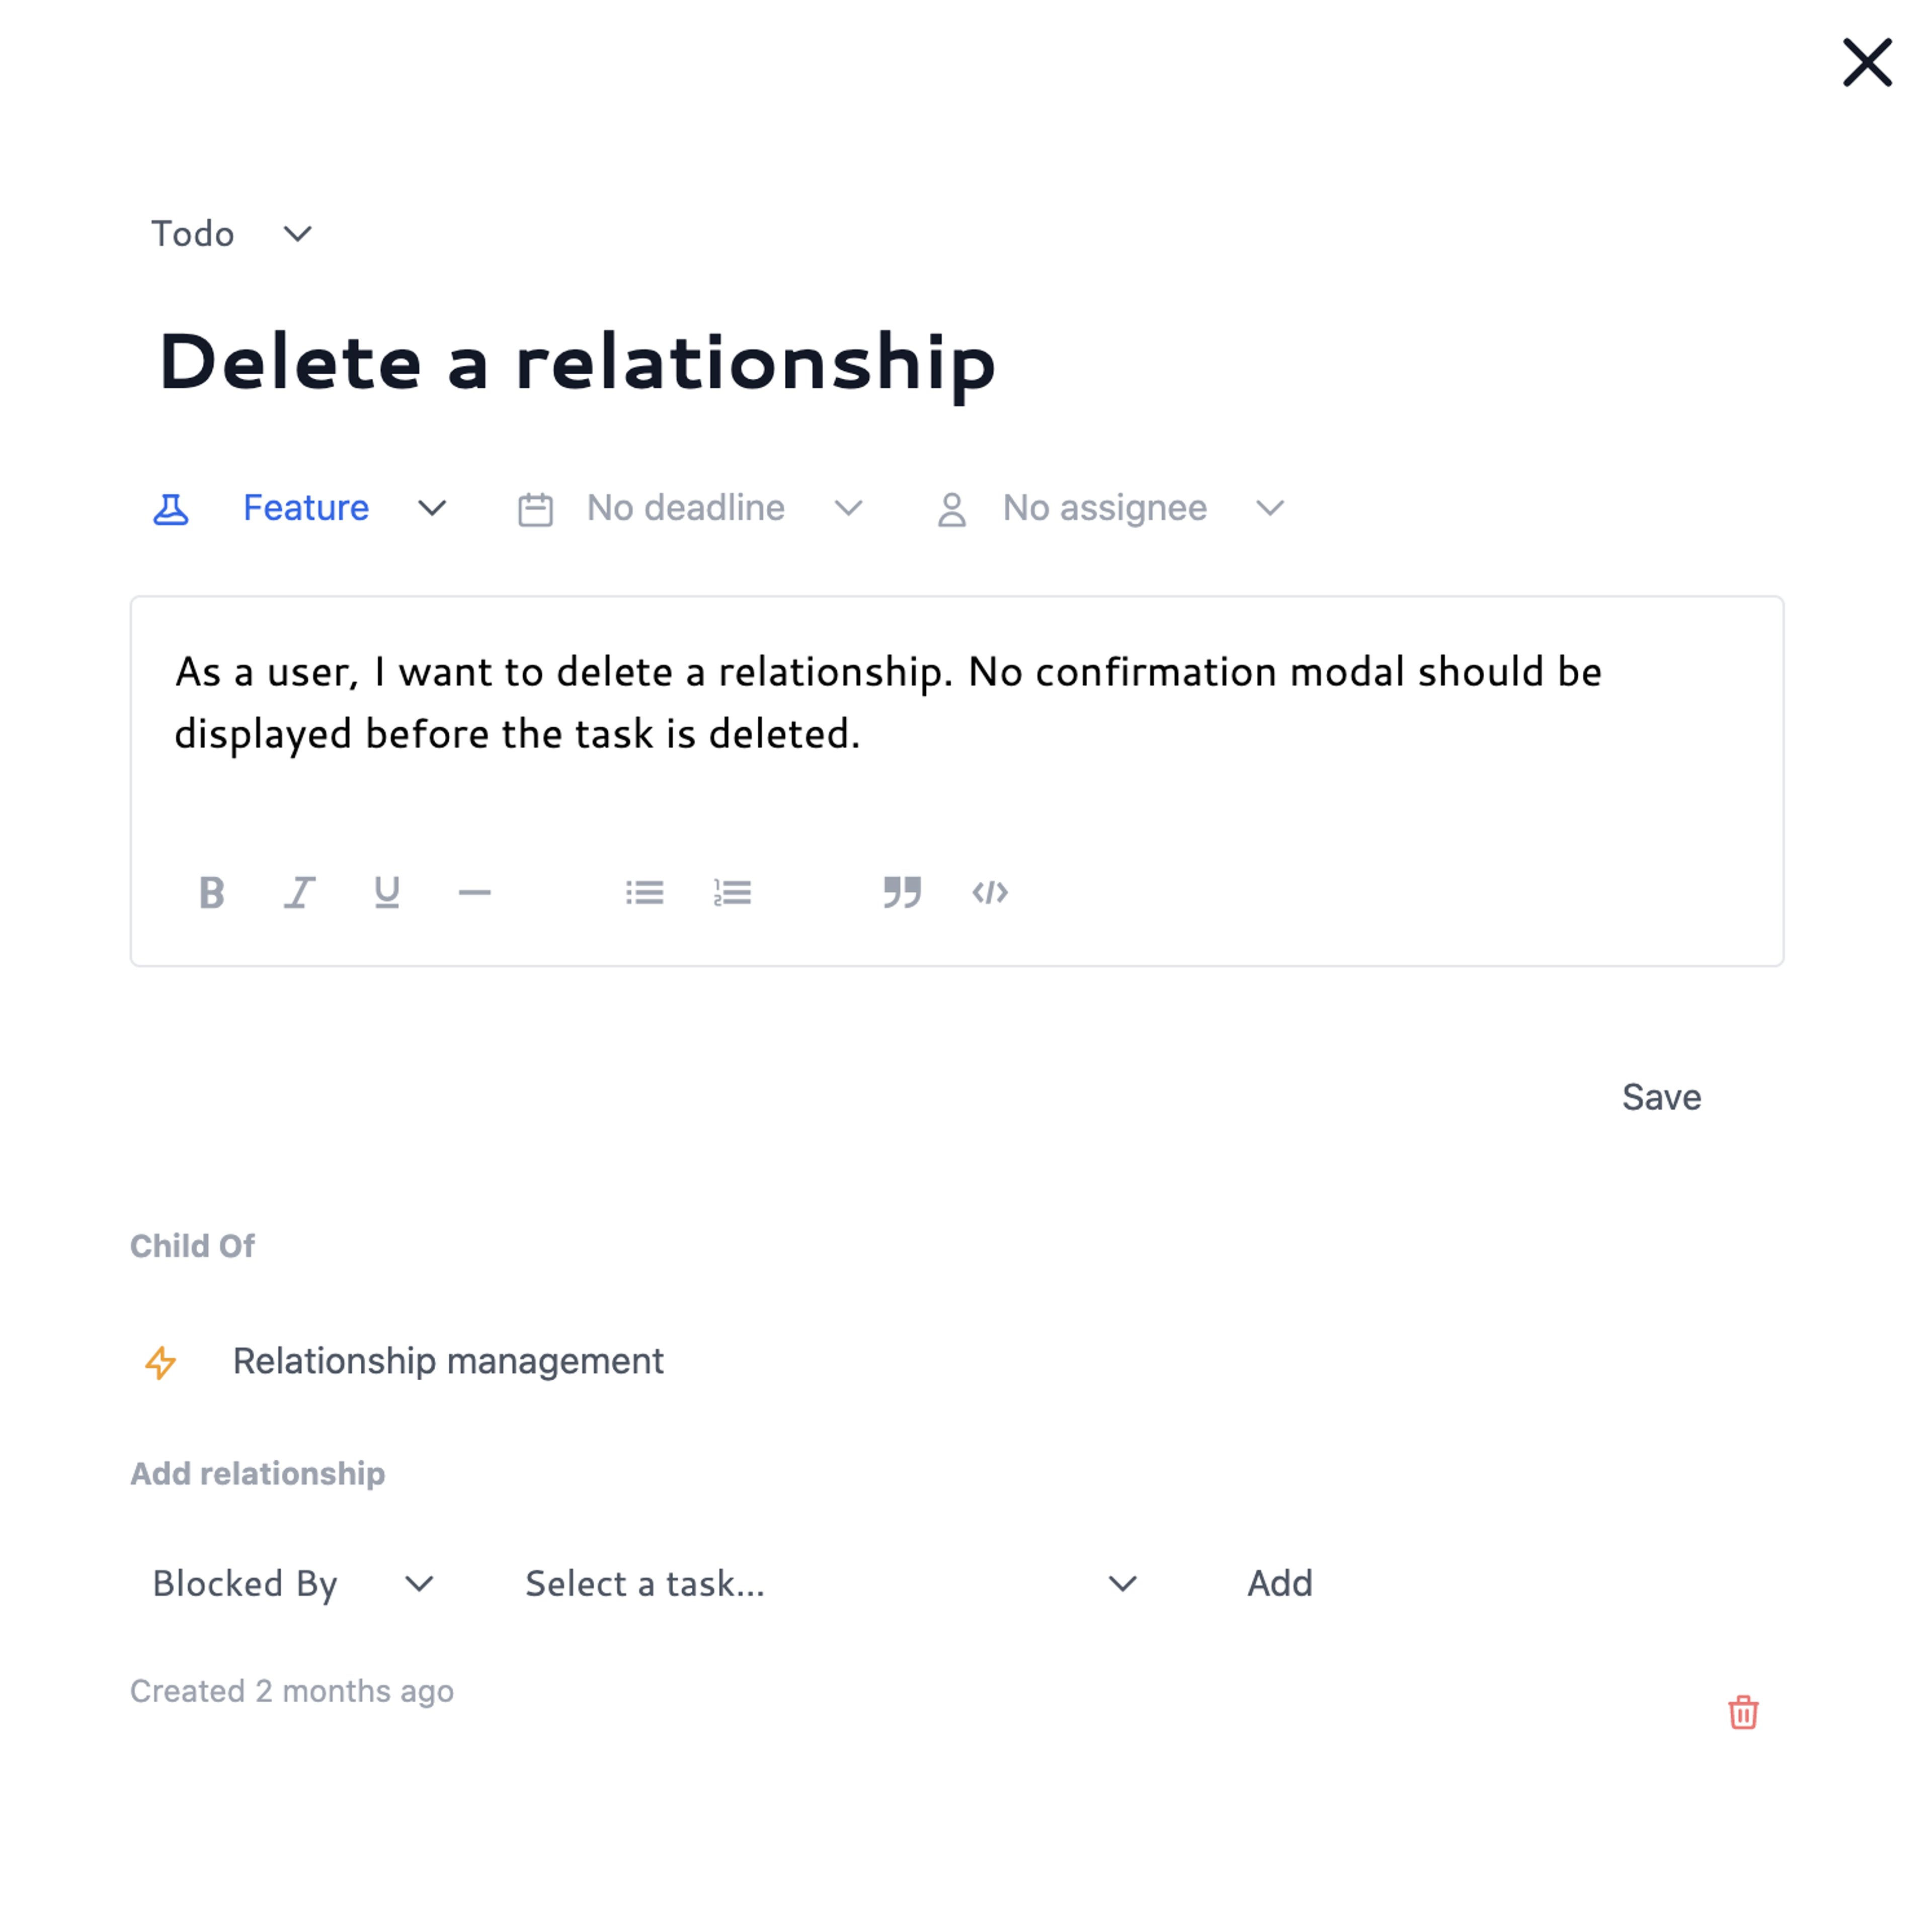
Deleting relationships
At some point you’ll probably want to delete a relationship. No confirmation modal should be displayed before the task is deleted.
How to create projects
Projects are stored relationally in PostgreSQL. A project has the following properties:
id: User identifier
user: Owner of the project
name: Human readable name of the project
The project is linked to a graph (using id as graph name) A graph has many tasks.
How to create tasks
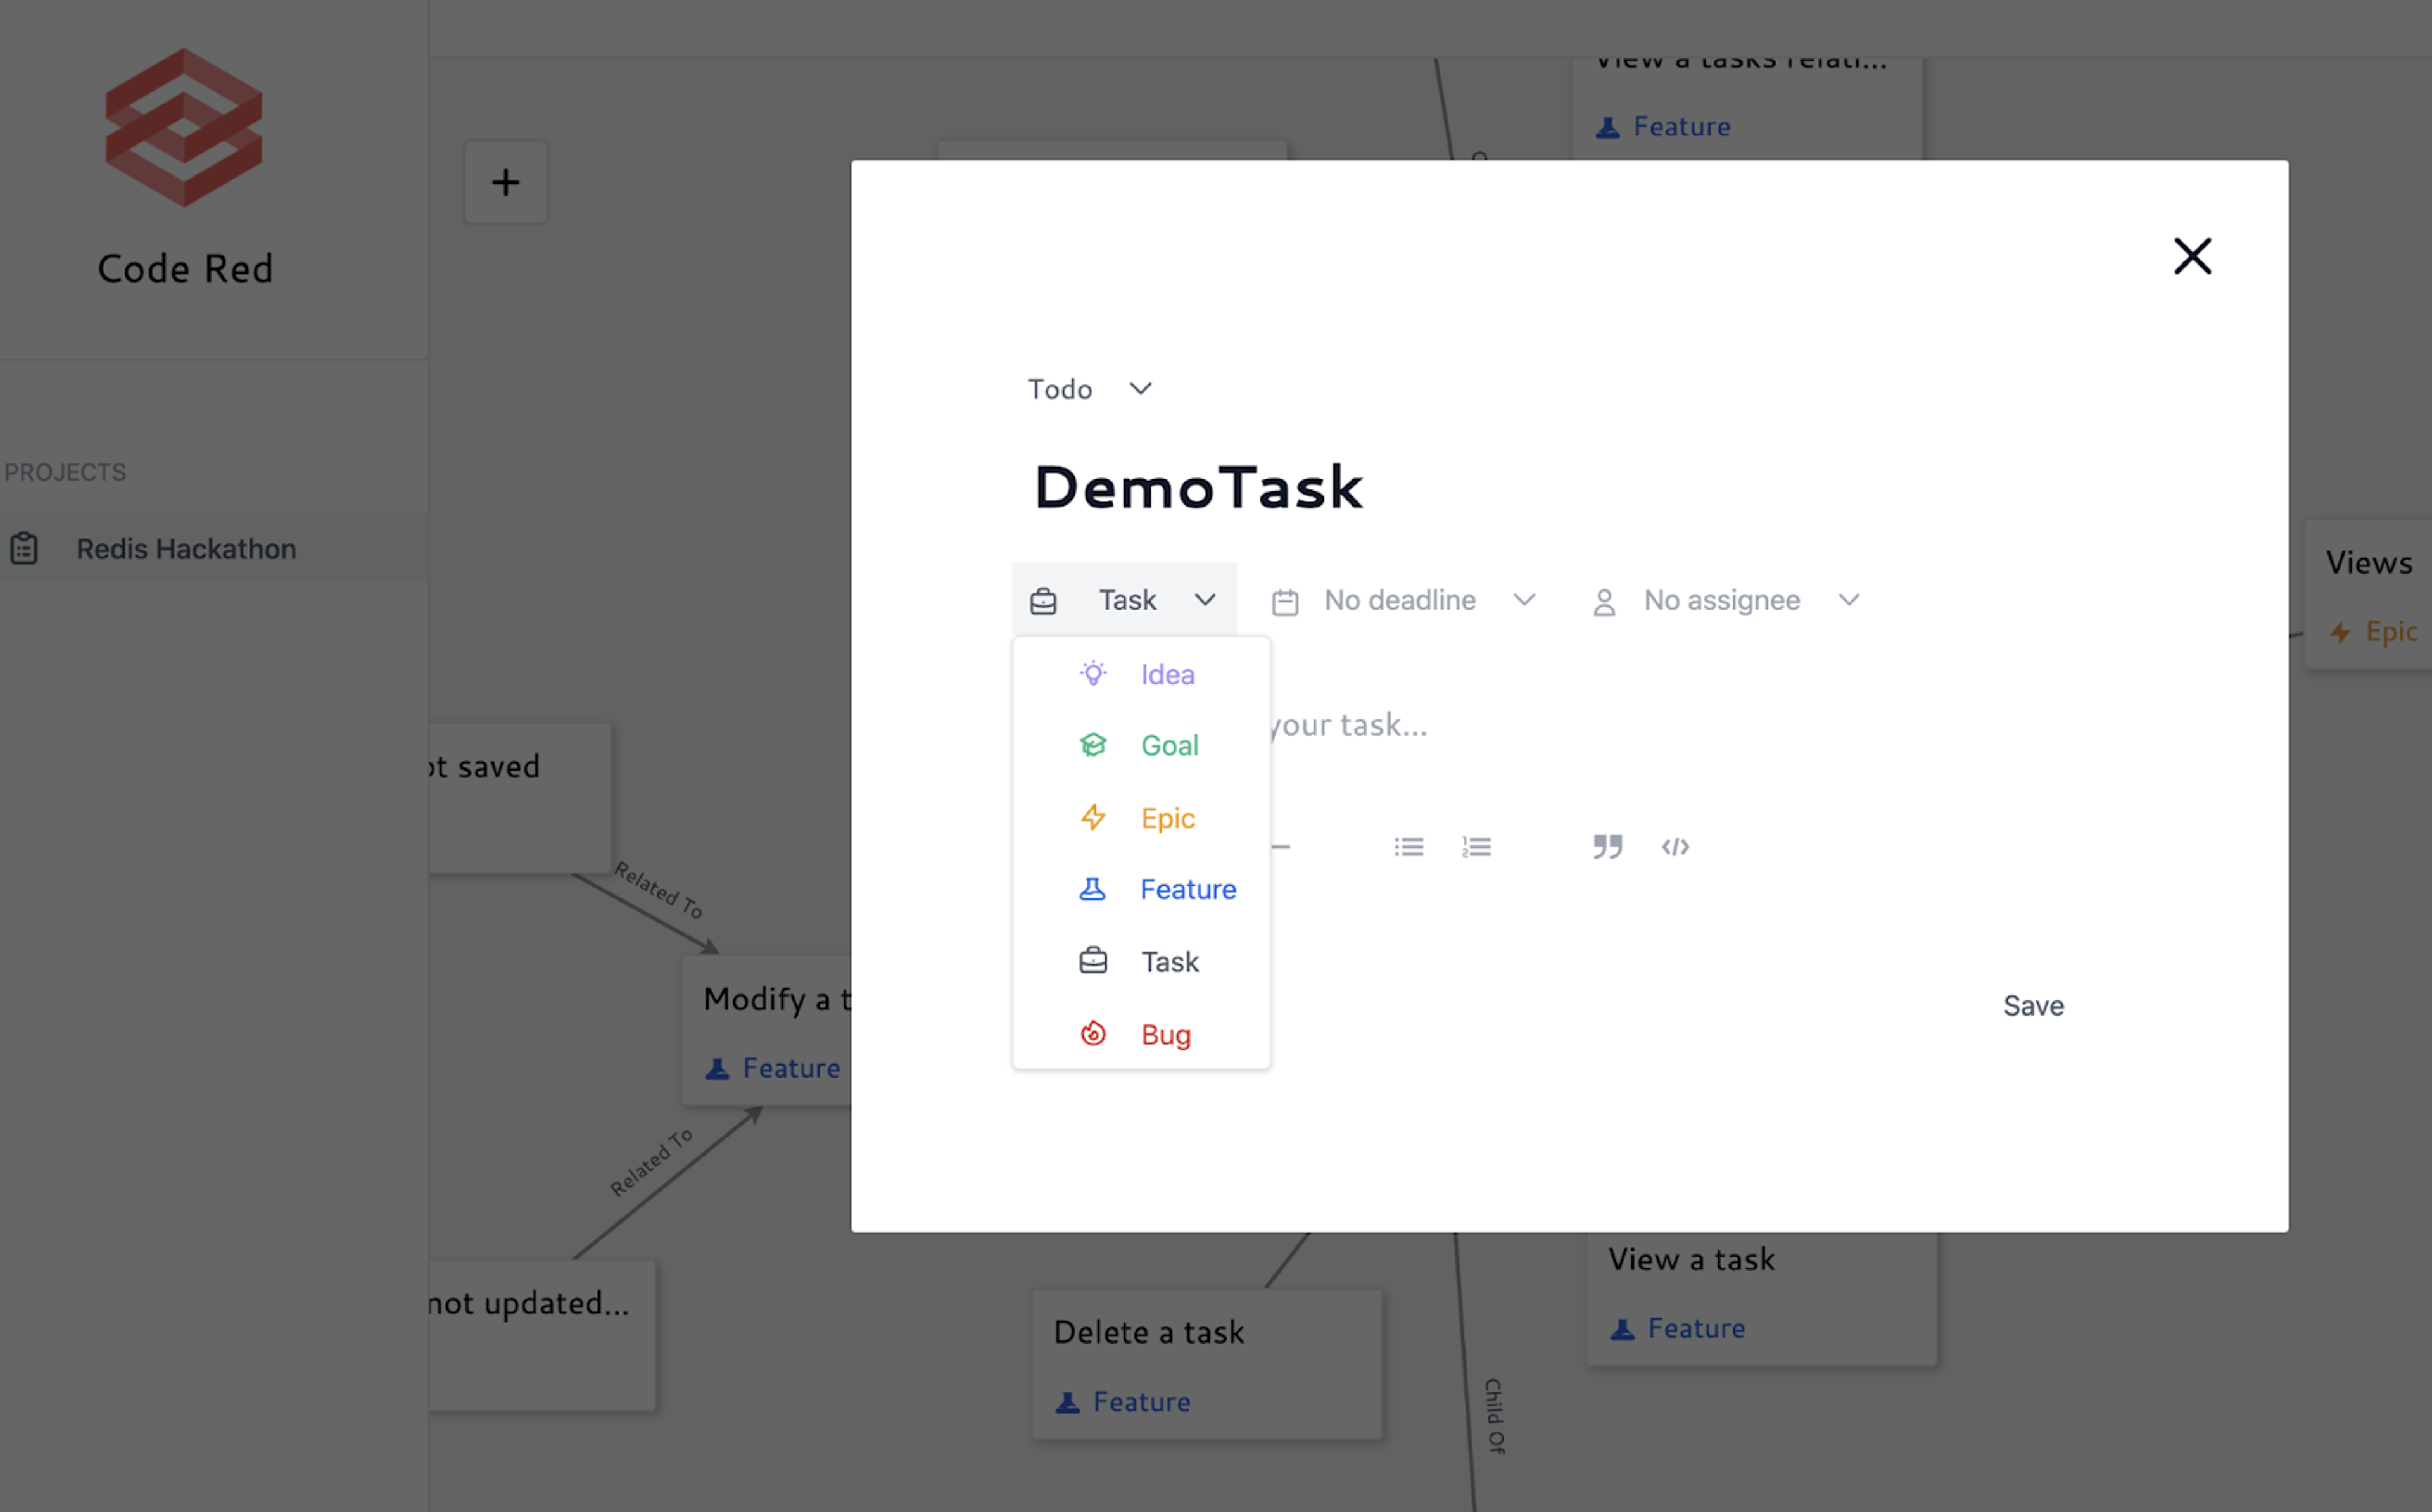
Tasks are stored as nodes in Redis Graph. A task is a graph node and has the following properties:
- Title: Task title
- Description: Rich text, multiline description of the task
- Deadline: Date
- Status: One of Todo, In Progress, Review or Done
- Type: One of Idea, Goal, Epic, Feature, Task or Bug – user: Assignee
A task can be linked to many other tasks by relationships.
How to create relationships
Relationships are stored as edges in Redis Graph. A relationship is a directed graph edge and has the following properties:
from: Source node
type: One of
to: Destination node
Relationships are stored as directed edges, but in the interface both directions are rendered. For example, if Task A is blocked by Task B, Task B will be shown as “blocks Task A”. It’s also possible to add relationships in both directions.
How to fetch tasks
A graph has many tasks, which are fetched using the following Redis Graph query:
How to create/update a task
A task is created and updated with all its properties using the following query:
How to delete a task
A task is deleted using the following query:
How to fetch a relationship
A task’s related nodes are always queried based on relationship type. The related tasks are fetched using the following query:
How to add a relationship
Two tasks are linked to each other using the following query:
How to delete a relationship
Two tasks are unlinked from each other using the following query:
Domain Specific Language (DSL)
A DSL was built to accommodate and simplify graph persistence. Its functionality is to provide a small but robust interface that will be familiar to developers who are used to Active Record’s API. The main class that’s implementing this construction can be found at app/graph/dsl.rb.
Here’s an example of a query:
Conclusion: Empowering managers through task visualization
Disconnected and hidden tasks are a threat to any organization looking to maximize efficiency and outgrow their competitors.
Managers who can leverage an application capable of providing a clear visualization of assignments and their relationships can be more organized, think linearly and make quicker decisions in high-pressure situations.
RedisGraph is a crucial component as it allows data to be transmitted efficiently whilst projecting a visualization of each task and their relationships.
If you want to learn more about this app you can visit it on the Redis Launchpad. And whilst you’re there, make sure to explore all of the other innovative applications that we have available for you.
Who created this application?

Florian Dejonckheere
Florian is an experienced Ruby on Rails developer who works as a software engineer at NephroFlow.
Get started with Redis today
Speak to a Redis expert and learn more about enterprise-grade Redis today.