RedisOM for .NET
Learn how to build with Redis Stack and .NET
Redis OM .NET is a purpose-built library for handling documents in Redis Stack. In this tutorial, we'll build a simple ASP.NET Core Web-API app for performing CRUD operations on a simple Person & Address model, and we'll accomplish all of this with Redis OM .NET.
Prerequisites
- .NET 6 SDK
- Any IDE for writing .NET (Visual Studio, Rider, Visual Studio Code).
- RediSearch must be installed as part of your Redis Stack configuration.
- Optional: Docker Desktop for running redis-stack in docker for local testing.
Skip to the code
If you want to skip this tutorial and just jump straight into code, all the source code is available in GitHub
Run Redis Stack
There are a variety of ways to run Redis Stack. One way is to use the docker image:
docker run -d -p 6379:6379 -p 8001:8001 redis/redis-stack
Create the project
To create the project, just run:
dotnet new webapi -n Redis.OM.Skeleton --no-https --kestrelHttpPort 5000
Then open the Redis.OM.Skeleton.csproj file in your IDE of choice.
Configure the app
Add a REDIS_CONNECTION_STRING field to your appsettings.json file to configure the application. Set that connection string to be the URI of your Redis instance. If using the docker command mentioned earlier, your connection string will be redis://localhost:6379.
Connection string specification
The specification for Redis URIs is located here. You can use :password@host:port or default:password@host:port for connection strings that do not include username.
Create the model
Make sure to add the Redis.OM package to your project. This package makes it easy to create models and query your Redis domain objects.
dotnet add package Redis.OM
Now it's time to create the Person/Address model that the app will use for storing/retrieving people. Create a new directory called Model and add the files Address.cs and Person.cs to it. In Address.cs, add the following:
using Redis.OM.Modeling;

namespace Redis.OM.Skeleton.Model;

public class Address
{
    [Indexed]
    public int? StreetNumber { get; set; }

    [Indexed]
    public string? Unit { get; set; }

    [Searchable]
    public string? StreetName { get; set; }

    [Indexed]
    public string? City { get; set; }

    [Indexed]
    public string? State { get; set; }

    [Indexed]
    public string? PostalCode { get; set; }

    [Indexed]
    public string? Country { get; set; }

    [Indexed]
    public GeoLoc Location { get; set; }
}
Here, you'll notice that except StreetName, marked as Searchable, all the fields are decorated with the Indexed attribute. These attributes (Searchable and Indexed) tell Redis OM that you want to be able to use those fields in queries when querying your documents in Redis Stack. Address will not be a Document itself, so the top-level class is not decorated with anything; instead, the Address model will be embedded in our Person model.
To that end, add the following to Person.cs
using Redis.OM.Modeling;

namespace Redis.OM.Skeleton.Model;

[Document(StorageType = StorageType.Json, Prefixes = new []{"Person"})]
public class Person
{
    [RedisIdField] [Indexed]public string? Id { get; set; }

    [Indexed] public string? FirstName { get; set; }

    [Indexed] public string? LastName { get; set; }

    [Indexed] public int Age { get; set; }

    [Searchable] public string? PersonalStatement { get; set; }

    [Indexed] public string[] Skills { get; set; } = Array.Empty<string>();

    [Indexed(CascadeDepth = 1)] public Address? Address { get; set; }

}
There are a few things to take note of here:
-
[Document(StorageType = StorageType.Json, Prefixes = new []{"Person"})]Indicates that the data type that Redis OM will use to store the document in Redis is JSON and that the prefix for the keys for the Person class will bePerson. -
[Indexed(CascadeDepth = 1)] Address? Address { get; set; }is one of two ways you can index an embedded object with Redis OM. This way instructs the index to cascade to the objects in the object graph,CascadeDepthof 1 means that it will traverse just one level, indexing the object as if it were building the index from scratch. The other method uses theJsonPathproperty of the individual indexed fields you want to search for. This more surgical approach limits the size of the index. -
the
Idproperty is marked as aRedisIdField. This denotes the field as one that will be used to generate the document's key name when it's stored in Redis.
Create the Index
With the model built, the next step is to create the index in Redis. The most correct way to manage this is to spin the index creation out into a Hosted Service, which will run when the app spins up.
Create a HostedServices directory and add IndexCreationService.cs to that. In that file, add the following, which will create the index on startup.
using Redis.OM.Skeleton.Model;

namespace Redis.OM.Skeleton.HostedServices;

public class IndexCreationService : IHostedService
{
    private readonly RedisConnectionProvider _provider;
    public IndexCreationService(RedisConnectionProvider provider)
    {
        _provider = provider;
    }

    public async Task StartAsync(CancellationToken cancellationToken)
    {
        await _provider.Connection.CreateIndexAsync(typeof(Person));
    }

    public Task StopAsync(CancellationToken cancellationToken)
    {
        return Task.CompletedTask;
    }
}
Next, add the following to Program.cs to register the service on startup:
builder.Services.AddHostedService<IndexCreationService>();
Inject the RedisConnectionProvider
Redis OM uses the RedisConnectionProvider class to handle connections to Redis and provides the classes you can use to interact with Redis. To use it, simply inject an instance of the RedisConnectionProvider into your app. In your Program.cs file, add:
builder.Services.AddSingleton(new RedisConnectionProvider(builder.Configuration["REDIS_CONNECTION_STRING"]));
This will pull your connection string out of the config and initialize the provider. The provider will now be available in your controllers/services to use.
Create the PeopleController
The final puzzle piece is to write the actual API controller for our People API. In the controllers directory, add the file PeopleController.cs, the skeleton of the PeopleControllerclass will be:
using Microsoft.AspNetCore.Mvc;
using Redis.OM.Searching;
using Redis.OM.Skeleton.Model;

namespace Redis.OM.Skeleton.Controllers;

[ApiController]
[Route("[controller]")]
public class PeopleController : ControllerBase
{

}
Inject the RedisConnectionProvider
To interact with Redis, inject the RedisConnectionProvider. During this dependency injection, pull out a RedisCollection<Person> instance, which will allow a fluent interface for querying documents in Redis.
private readonly RedisCollection<Person> _people;
private readonly RedisConnectionProvider _provider;
public PeopleController(RedisConnectionProvider provider)
{
    _provider = provider;
    _people = (RedisCollection<Person>)provider.RedisCollection<Person>();
}
Add route for creating a Person
The first route to add to the API is a POST request for creating a person, using the RedisCollection, it's as simple as calling InsertAsync, passing in the person object:
[HttpPost]
public async Task<Person> AddPerson([FromBody] Person person)
{
    await _people.InsertAsync(person);
    return person;
}
Add route to filter by age
The first filter route to add to the API will let the user filter by a minimum and maximum age. Using the LINQ interface available to the RedisCollection, this is a simple operation:
[HttpGet("filterAge")]
public IList<Person> FilterByAge([FromQuery] int minAge, [FromQuery] int maxAge)
{
    return _people.Where(x => x.Age >= minAge && x.Age <= maxAge).ToList();
}
Filter by GeoLocation
Redis OM has a GeoLoc data structure, an instance of which is indexed by the Address model, with the RedisCollection, it's possible to find all objects with a radius of particular position using the GeoFilter method along with the field you want to filter:
[HttpGet("filterGeo")]
public IList<Person> FilterByGeo([FromQuery] double lon, [FromQuery] double lat, [FromQuery] double radius, [FromQuery] string unit)
{
    return _people.GeoFilter(x => x.Address!.Location, lon, lat, radius, Enum.Parse<GeoLocDistanceUnit>(unit)).ToList();
}
Filter by exact string
When a string property in your model is marked as Indexed, e.g. FirstName and LastName, Redis OM can perform exact text matches against them. For example, the following two routes filter by PostalCode and name demonstrate exact string matches.
[HttpGet("filterName")]
public IList<Person> FilterByName([FromQuery] string firstName, [FromQuery] string lastName)
{
    return _people.Where(x => x.FirstName == firstName && x.LastName == lastName).ToList();
}

[HttpGet("postalCode")]
public IList<Person> FilterByPostalCode([FromQuery] string postalCode)
{
    return _people.Where(x => x.Address!.PostalCode == postalCode).ToList();
}
Filter with a full-text search
When a property in the model is marked as Searchable, like StreetAddress and PersonalStatement, you can perform a full-text search, see the filters for the PersonalStatement and StreetAddress:
[HttpGet("fullText")]
public IList<Person> FilterByPersonalStatement([FromQuery] string text){
    return _people.Where(x => x.PersonalStatement == text).ToList();
}

[HttpGet("streetName")]
public IList<Person> FilterByStreetName([FromQuery] string streetName)
{
    return _people.Where(x => x.Address!.StreetName == streetName).ToList();
}
Filter by array membership
When a string array or list is marked as Indexed, Redis OM can filter all the records containing a given string using the Contains method of the array or list. For example, our Person model has a list of skills you can query by adding the following route.
[HttpGet("skill")]
public IList<Person> FilterBySkill([FromQuery] string skill)
{
    return _people.Where(x => x.Skills.Contains(skill)).ToList();
}
Updating a person
Updating a document in Redis Stack with Redis OM can be done by first materializing the person object, making your desired changes, and then calling Save on the collection. The collection is responsible for keeping track of updates made to entities materialized in it; therefore, it will track and apply any updates you make in it. For example, add the following route to update the age of a Person given their Id:
[HttpPatch("updateAge/{id}")]
public IActionResult UpdateAge([FromRoute] string id, [FromBody] int newAge)
{
    foreach (var person in _people.Where(x => x.Id == id))
    {
        person.Age = newAge;
    }
    _people.Save();
    return Accepted();
}
Delete a person
Deleting a document from Redis can be done with Unlink. All that's needed is to call Unlink, passing in the key name. Given an id, we can reconstruct the key name using the prefix and the id:
[HttpDelete("{id}")]
public IActionResult DeletePerson([FromRoute] string id)
{
    _provider.Connection.Unlink($"Person:{id}");
    return NoContent();
}
Run the app
All that's left to do now is to run the app and test it. You can do so by running dotnet run, the app is now exposed on port 5000, and there should be a swagger UI that you can use to play with the API at http://localhost:5000/swagger. There's a couple of scripts, along with some data files, to insert some people into Redis using the API in the GitHub repo
Viewing data in with Redis Insight
You can either install the Redis Insight GUI or use the Redis Insight GUI running on http://localhost:8001/.
You can view the data by following these steps:
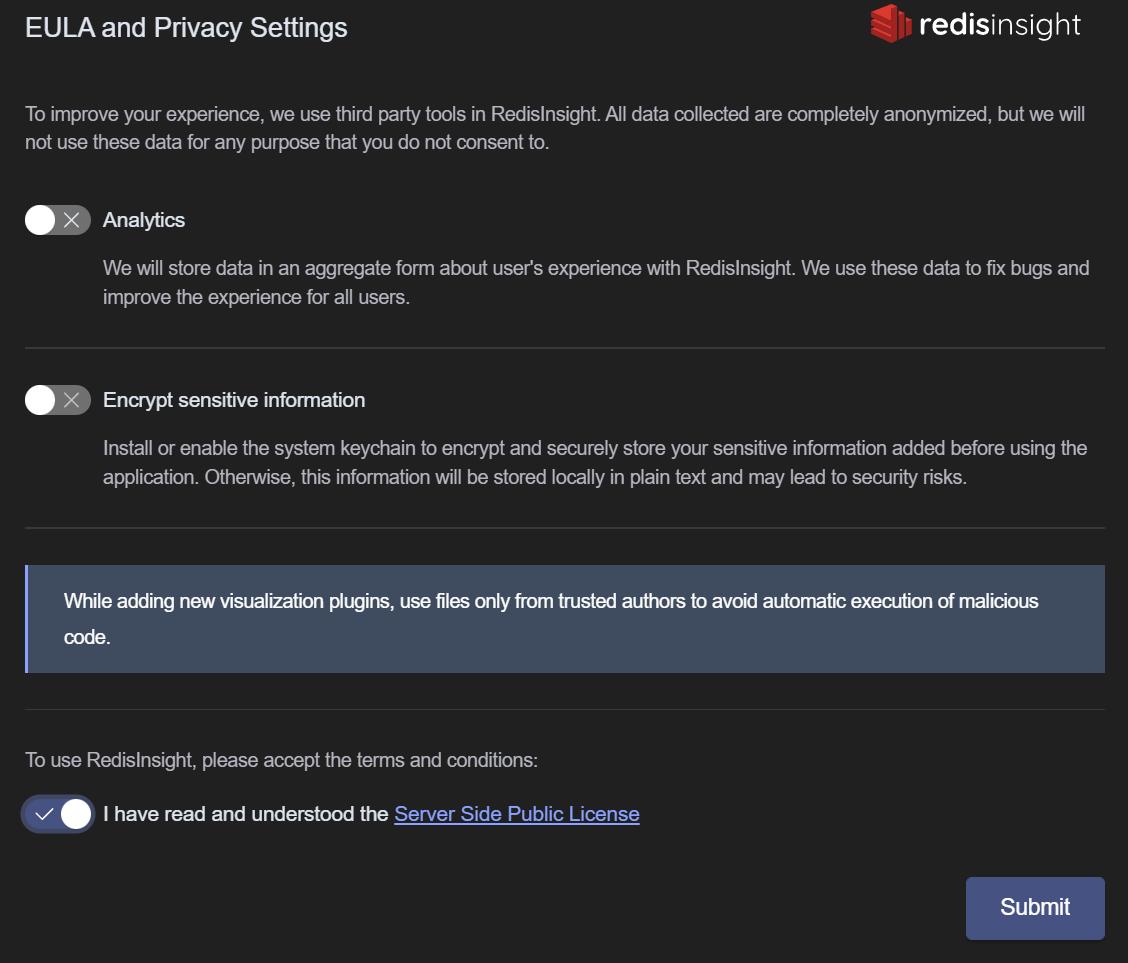
- Accept the EULA
- Click the Add Redis Database button

- Enter your hostname and port name for your redis server. If you are using the docker image, this is
localhostand6379and give your database an alias
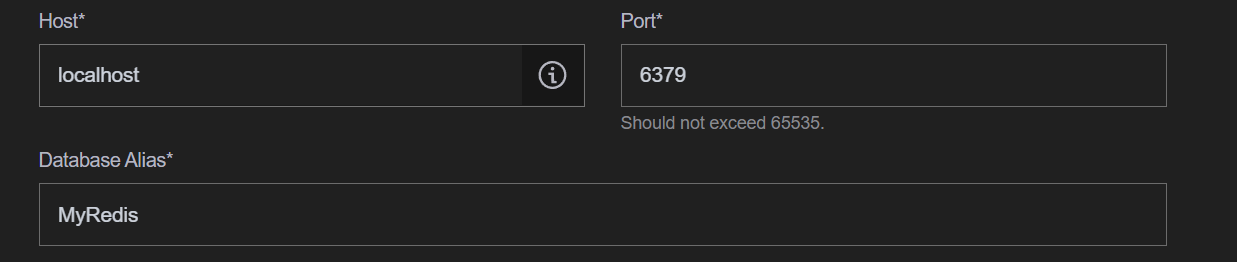
- Click
Add Redis Database.
Resources
The source code for this tutorial can be found in GitHub.