Create a Context Retriever service
Create a Context Retriever service in Redis Cloud to expose schema-first retrieval tools to AI agents.
| Redis Cloud |
|---|
Redis Context Retriever helps teams expose operational context to AI agents through schema-first retrieval. This guide walks you through creating and configuring a Context Retriever service in Redis Cloud.
Prerequisites and limitations
To create a Redis Context Retriever service, you will need a Redis Cloud database that already has relevant data. If you don't have one, see Create a database. If your source data lives in a relational database, use Redis Data Integration (RDI) to ingest it into a Redis Cloud database first.
Agent Memory does not support the following databases during public preview:
- Redis Flex databases
- Active-Active databases
Create a Context Retriever service
From the Redis Cloud console, select Context Retriever from the left-hand menu.
If you have not already created a Context Retriever service, you'll see a page with an introduction to Context Retriever. Otherwise, select New service to go to the Context Retriever introduction page.

From here, you can either:
- Select Get started to follow a step-by-step guide using the
ctxctlCLI, which is installed with the Context Surfaces Python Client. - Select Create custom service to manually configure your own context retriever settings.
For this guide, select Create custom service.
General settings
The General settings section defines basic properties of your service.
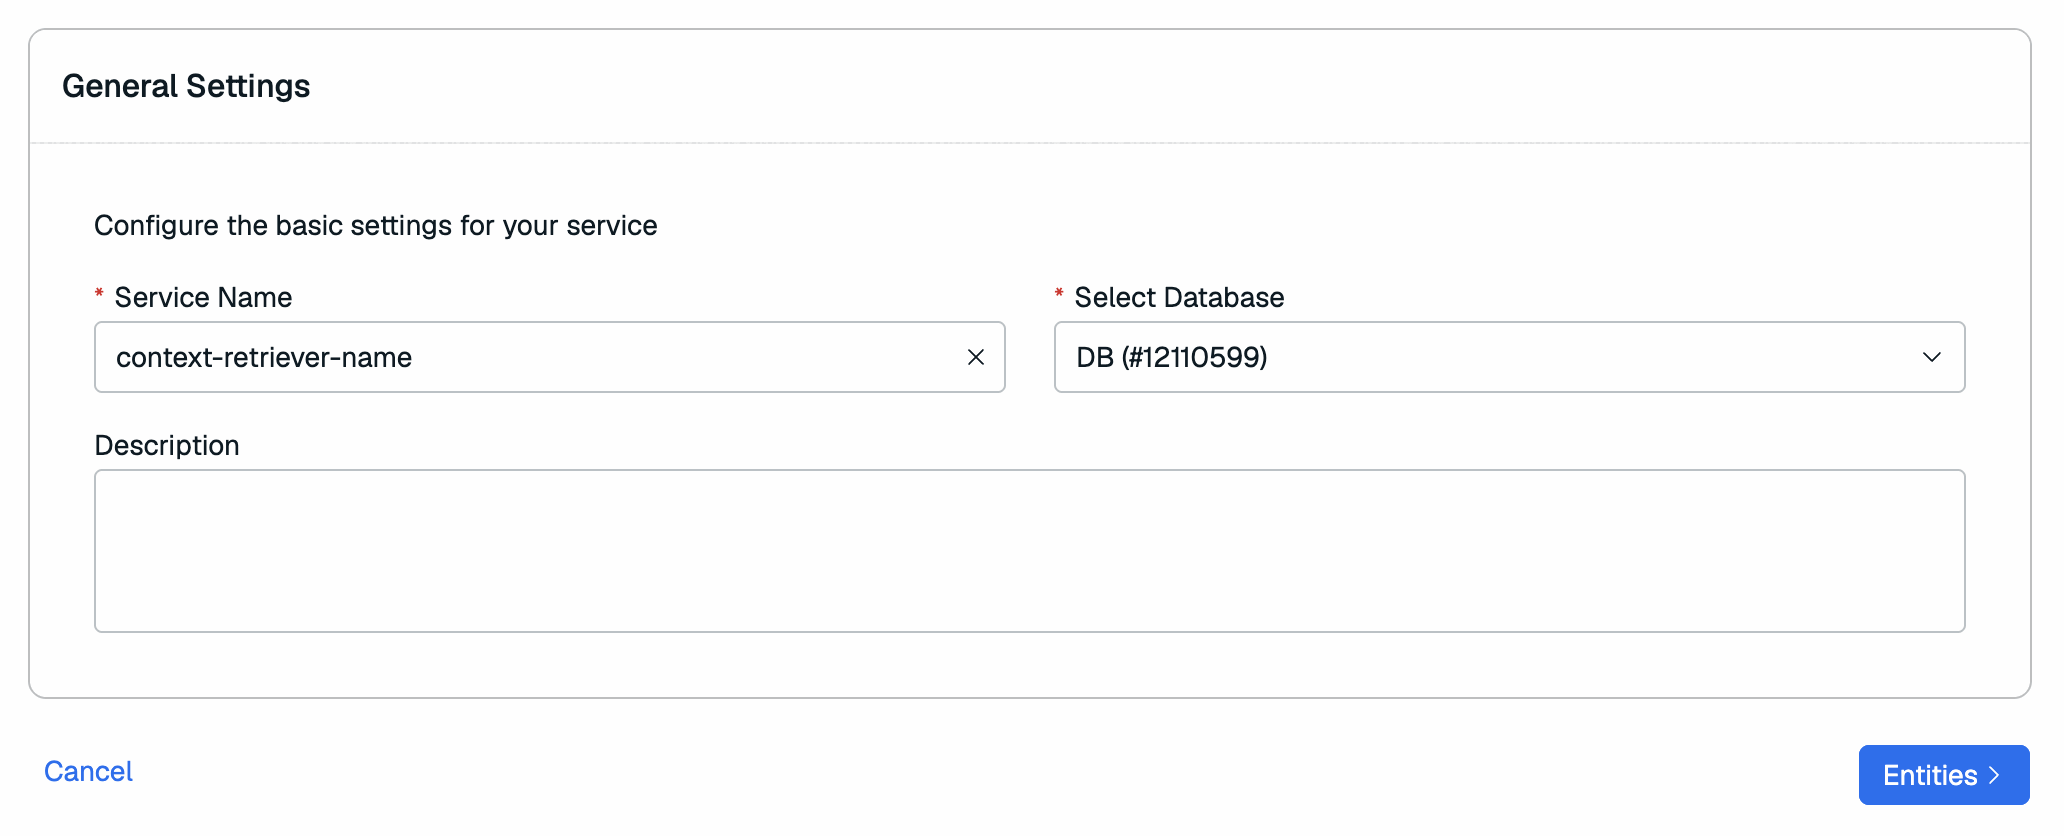
| Setting name | Description |
|---|---|
| Service name | Enter a name for your Context Retriever service. We recommend you use a name that describes your service's purpose. |
| Select database | Select the Redis Cloud database to use for this service from the list. |
| Description | Enter a description for your context retriever. |
Select Entities to continue.
Define entities
In the Define Entities step, you'll define the objects that Context Retriever will use to generate retrieval tools.
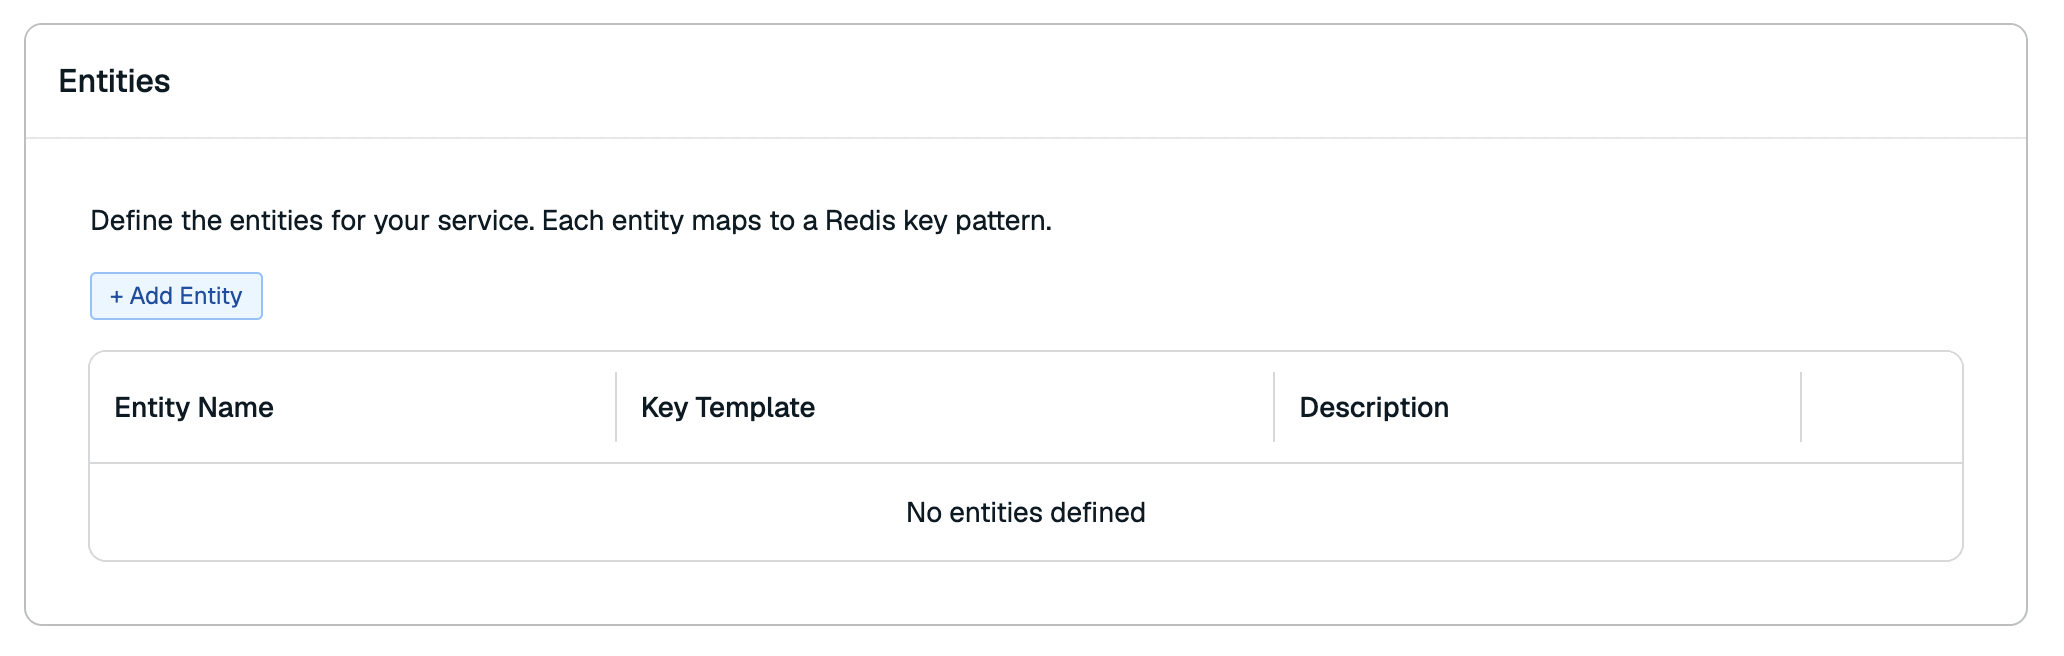
Select Add Entity to add an entity.

-
In the Entity name field, enter the name of one of the business objects that is in your database.
For example, your database might have a bunch of product information with keys like
product:1orproduct:2. In this case, the entity name would be "Product". -
In the Key Template field, enter the key template for your entity. Use
{id}to denote where in the key pattern the ID is located.For the example above, the key template would be
product:{id}. -
You can also enter a description to describe the entity.
-
Select the checkmark to confirm the entity.
After you are done adding all of the entities, select Fields to continue.
Configure fields
In the Configure fields step, you'll define the fields of each entity and the relationships between them.
From here, you can either:
-
Select Auto-detect fields to scan your database automatically using a model that will detect the fields for you.
You'll need to agree to let the model scan your key names and schemas to automatically populate the fields.
Note:If you use Auto-detect fields, make sure that the fields and relationships that the model generates are accurate. -
Select Manually enter fields to manually enter the fields yourself.
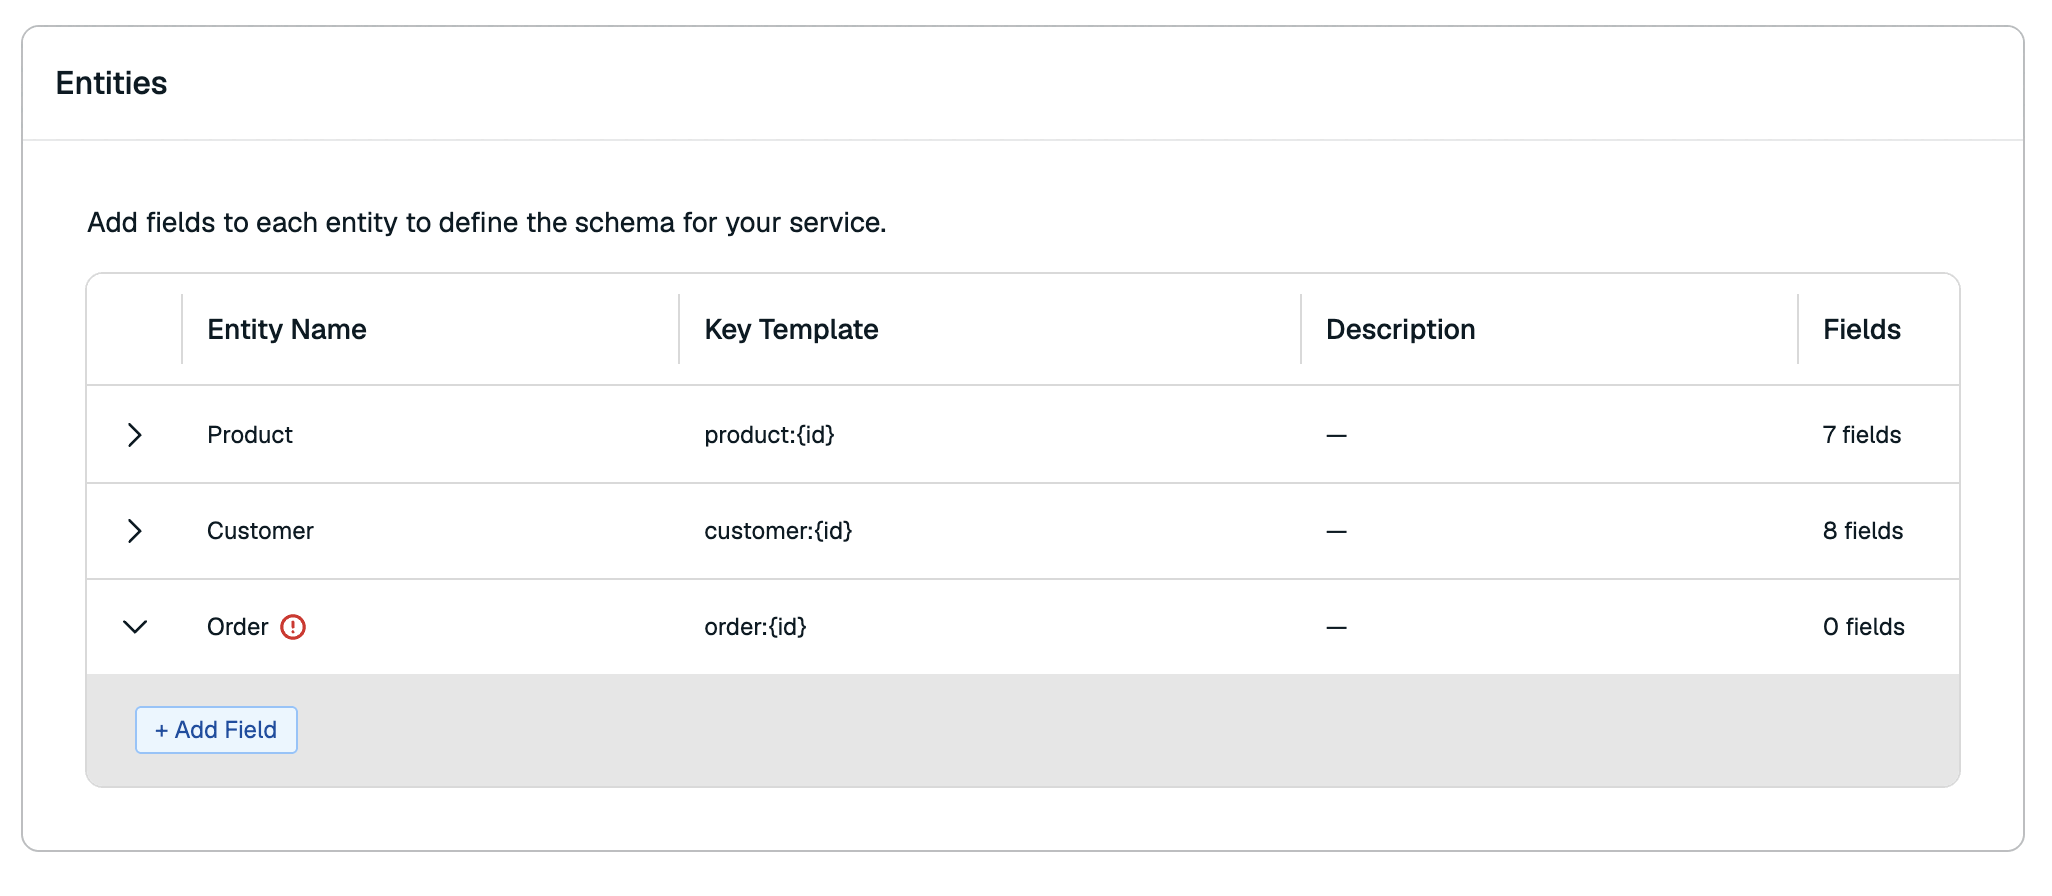
Expand each entry to view the currently defined fields for that entry. Select Add field to add a field.

- Enter the field name in the Field cell.
- Select the PK checkbox if the field is a primary key. You must have at least one primary key.
- If the field is related to any other defined entities, select it from the Related Entity dropdown. This is usually set if the field contains primary keys of another entity.
- Select the field's Type from the dropdown.
- In the Index cell, select one or more index types to enable searching and filtering on that field.
- You can also add a description in the Description cell.
After you set all fields for all of your entities, select Create to create your Context Retriever service.
Next steps
After your service is created, you can call the MCP tools Context Retriever exposes from your agent. See the Context Surfaces Python Client for more information on how to call your tools.
You can also view your service.