Learn

Create a Redis database on Google Kubernetes Engine
Ajeet Raina
Author
Ajeet Raina, Former Developer Growth Manager at Redis

Step 1. Prerequisites#

Step 2. Ensure that gcloud is installed on your local Linux system:#

$ gcloud -v
Google Cloud SDK 320.0.0
alpha 2020.12.04
app-engine-go 1.9.71
app-engine-java 1.9.84
app-engine-python 1.9.91
app-engine-python-extras 1.9.91

Step 3. Create a 5 Node GKE cluster:#

$ gcloud container clusters create testredis  --subnetwork default --num-nodes 5 --machine-type e2-standard-8 --enable-basic-auth --region us-east1

Step 4. Create a new namespace#

[node1 kubelabs]$ kubectl create namespace demo
namespace/demo created

Step 5. Switch context to the newly created namespace#

$ kubectl config set-context --current --namespace=demo
Context "kubernetes-admin@kubernetes" modified.

Step 6. Deploy the operator bundle#

To deploy the default installation with kubectl, the following command will deploy a bundle of all the YAML declarations required for the operator. You can download the bundle YAML file via this link:

$ kubectl apply -f bundle.yaml
role.rbac.authorization.k8s.io/redis-enterprise-operator created
rolebinding.rbac.authorization.k8s.io/redis-enterprise-operator created
serviceaccount/redis-enterprise-operator created
customresourcedefinition.apiextensions.k8s.io/redisenterpriseclusters.app.redislabs.com created
deployment.apps/redis-enterprise-operator created
customresourcedefinition.apiextensions.k8s.io/redisenterprisedatabases.app.redislabs.com created

Step 7. Verifying the Deployment:#

Run the following command to verify redis-enterprise-operator deployment is running.

kubectl get deployment
NAME                               READY   UP-TO-DATE   AVAILABLE   AGE
redis-enterprise-operator          1/1     1            1           9m34s

Step 8. Create a Redis Enterprise Cluster#

Create a Redis Enterprise Cluster (REC) using the default configuration, which is suitable for development type deployments and works in typical scenarios:

$ kubectl apply -f crds/app_v1_redisenterprisecluster_cr.yaml

redisenterprisecluster.app.redislabs.com/redis-enterprise created

Step 9. Verifying the Redis Enterprise Cluster#

rec is a shortcut for RedisEnterpriseCluster. The cluster takes around 5-10 minutes to come up. Run the command below to check that the RedisEnterpriseCluster is up:

$ kubectl get rec
NAME               AGE
redis-enterprise   14s
[node1 redis-enterprise-k8s-docs]$

Step 10. Listing Kubernetes Resources#

$ kubectl get po,svc,deploy
NAME                                                    READY   STATUS    RESTARTS   AGE
pod/redis-enterprise-0                                  2/2     Running   0          6m42s
pod/redis-enterprise-1                                  2/2     Running   0          4m34s
pod/redis-enterprise-2                                  2/2     Running   0          2m18s
pod/redis-enterprise-operator-58f8566fd7-5kcvz          1/1     Running   0          69m
pod/redis-enterprise-services-rigger-5849b86c65-lwql9   1/1     Running   0          6m42s
NAME                          TYPE           CLUSTER-IP     EXTERNAL-IP     PORT(S)                      AGE
service/kubernetes            ClusterIP      10.3.240.1     <none>          443/TCP                      71m
service/redis-enterprise      ClusterIP      None           <none>          9443/TCP,8001/TCP,8070/TCP   6m42s
service/redis-enterprise-ui   LoadBalancer   10.3.246.252   35.196.117.24   8443:31473/TCP               6m42s
NAME                                               READY   UP-TO-DATE   AVAILABLE   AGE
deployment.apps/redis-enterprise-operator          1/1     1            1           69m
deployment.apps/redis-enterprise-services-rigger   1/1     1            1           6m44s

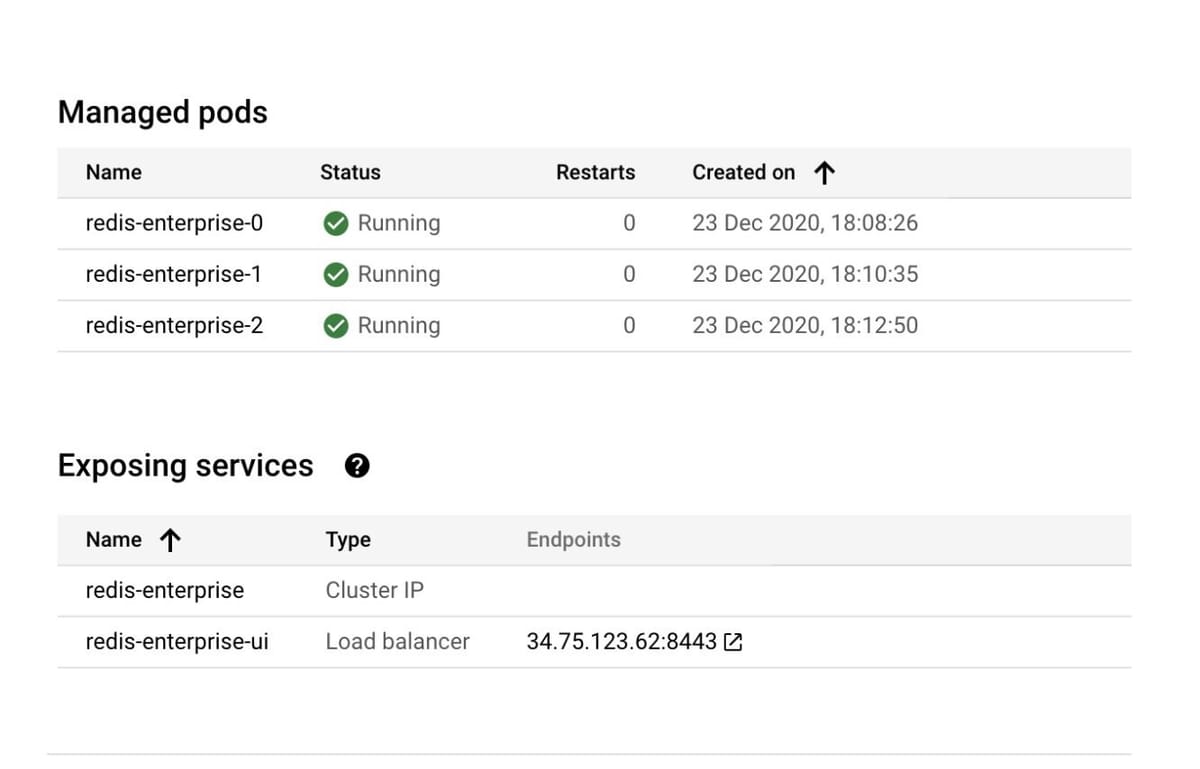
You can verify the Pods and list of services using the Google Cloud Dashboard UI:

Step 11. Listing the Secrets#

kubectl get secrets redis-enterprise -o yaml | grep password | awk '{print $2}'
bXVLeHRpblY=

Step 12. Listing the Password#

echo bXVLeHRpblY= | base64 -d

Step 13. Creating a Database#

Open https://localhost:8443 in the browser to see the Redis Enterprise Software web console. Click on "Setup", add your preferred DNS and admin credentials and proceed further to create your first Redis database using Redis Enterprise.

Next Steps#