Tutorial
Create a database using Azure Cache for Redis
February 26, 20263 minute read
TL;DR:Set up Azure Cache for Redis Enterprise by launching Redis Enterprise from the Azure Marketplace, configuring your subscription and cache settings in the Azure portal, and connecting withredis-cli. The Enterprise tier gives you access to advanced features like active geo-replication, Redis modules (RediSearch, RedisJSON, RedisBloom, RedisTimeSeries), and enterprise-grade SLAs.
Azure Cache for Redis is a native fully-managed service on Microsoft Azure. Azure Cache for Redis offers both the Redis open-source (OSS Redis) and a commercial product from Redis (Redis Cloud) as a managed service. It provides secure and dedicated Redis server instances and full Redis API compatibility. The service is operated by Microsoft, hosted on Azure, and accessible to any application within or outside of Azure.
#What will you learn?
- How to subscribe to Azure Cache for Redis Enterprise through the Azure Marketplace
- How to configure a new Redis Enterprise cache instance in the Azure portal
- How to connect to your Azure Redis Enterprise database using
redis-cli
#Prerequisites
- An active Microsoft Azure account
- Basic familiarity with the Azure portal
redis-cliinstalled locally (included with Redis)
#How is Azure Cache for Redis Enterprise different from the basic tier?
Azure Cache for Redis Enterprise is the premium offering that provides features beyond the standard Azure Cache for Redis tiers. Enterprise tier benefits include:
- Active geo-replication for multi-region deployments
- Redis modules such as RediSearch, RedisJSON, RedisBloom, and RedisTimeSeries
- Enterprise-grade SLAs with 99.999% availability
- Higher throughput and lower latency compared to Basic and Standard tiers
- Flash storage support for cost-effective large datasets
If you're looking for the standard Azure Cache for Redis setup, see the Azure portal basic tutorial.
#How do you set up Azure Cache for Redis Enterprise?
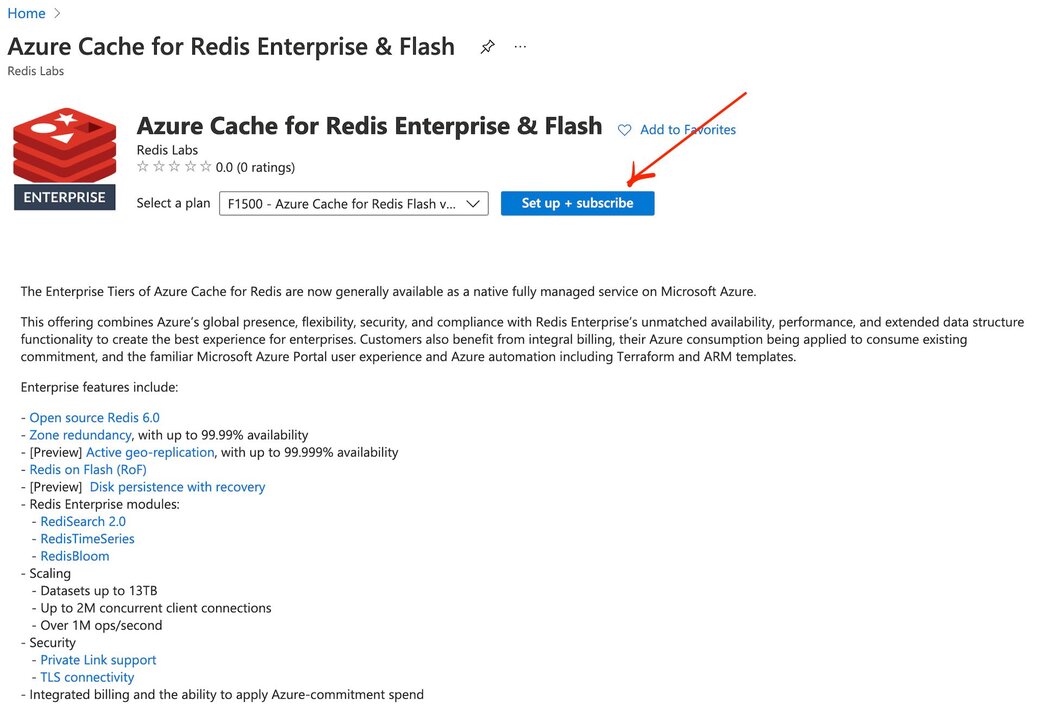
#Step 1. Launch from the Azure Marketplace
Open the Azure Cache for Redis Cloud & Flash listing in the Azure Marketplace.

#Step 2. Subscribe and configure your plan
Select your Azure subscription, resource group, and region. Choose the Enterprise tier that matches your workload requirements.
#Step 3. Configure your Redis Enterprise cache
Set your cache name, select the desired capacity, and enable any Redis modules you need (such as RediSearch or RedisJSON). Configure networking and security settings based on your requirements.

#Step 4. Finalize and deploy
Review your configuration and click Create to deploy your Azure Cache for Redis Enterprise instance. Deployment typically takes a few minutes.
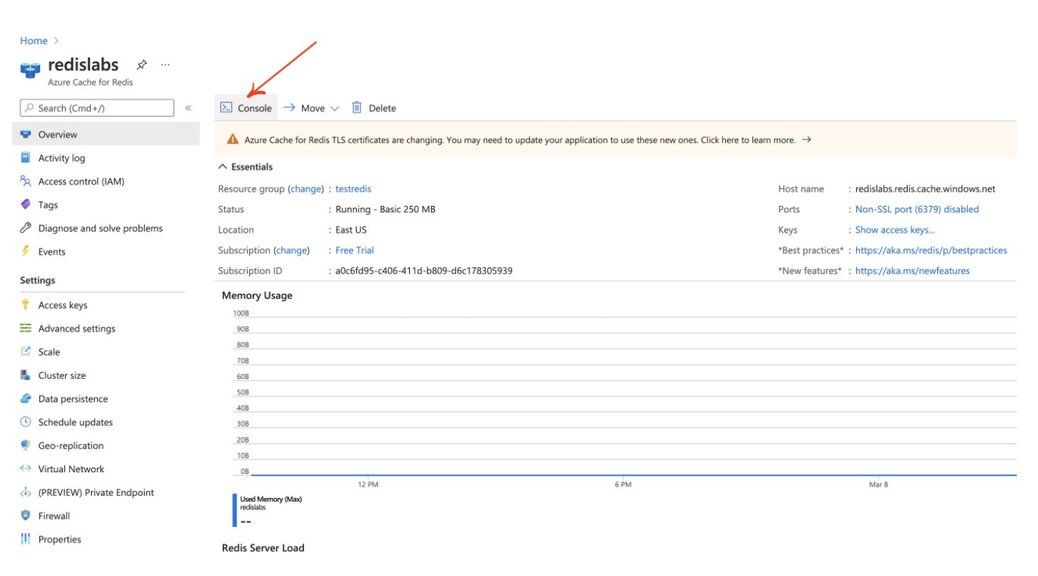
#How do you connect to your Azure Redis Enterprise database?
Once your cache is deployed, retrieve the hostname and access key from the Azure portal. Then connect using
redis-cli:Replace
redislabs.redis.cache.windows.net with your actual cache hostname from the Azure portal.#Next steps
- Follow the Azure Cache for Redis portal tutorial for a walkthrough of the standard tier setup
- Learn how to migrate from ElastiCache to Azure Managed Redis
- Learn how to migrate from Memorystore to Azure Managed Redis
- Explore using Azure Managed Redis to store LLM chat history
- Build serverless apps with Azure Functions and Redis
- Review Best Practices for Azure Cache for Redis
- Get started with Azure Cache for Redis in .NET Framework