Step 1. Create Redis Cloud
Create your free Redis Cloud account. Follow this link to create Redis Cloud subscription and database as shown below:
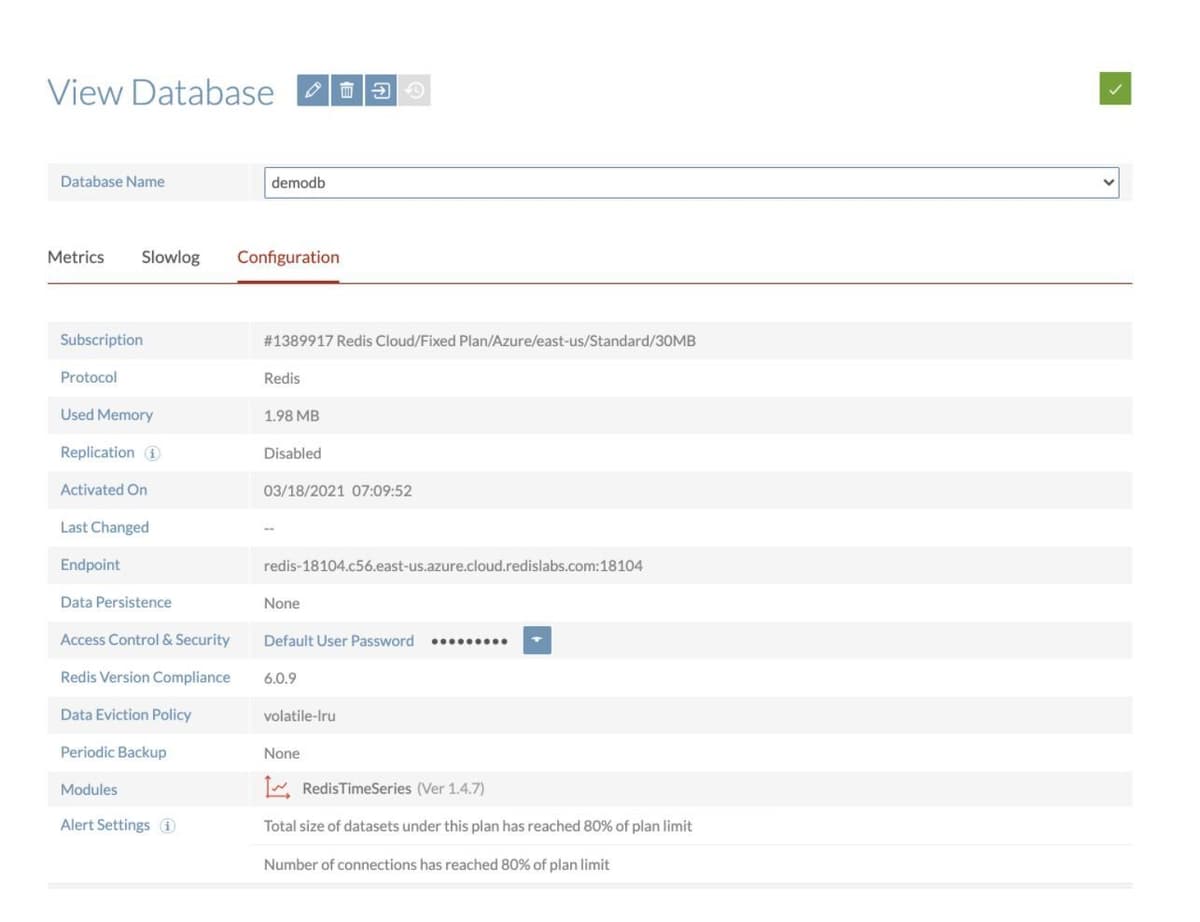
Save the database endpoint URL and password for future reference.
Step 2. Create a Heroku account
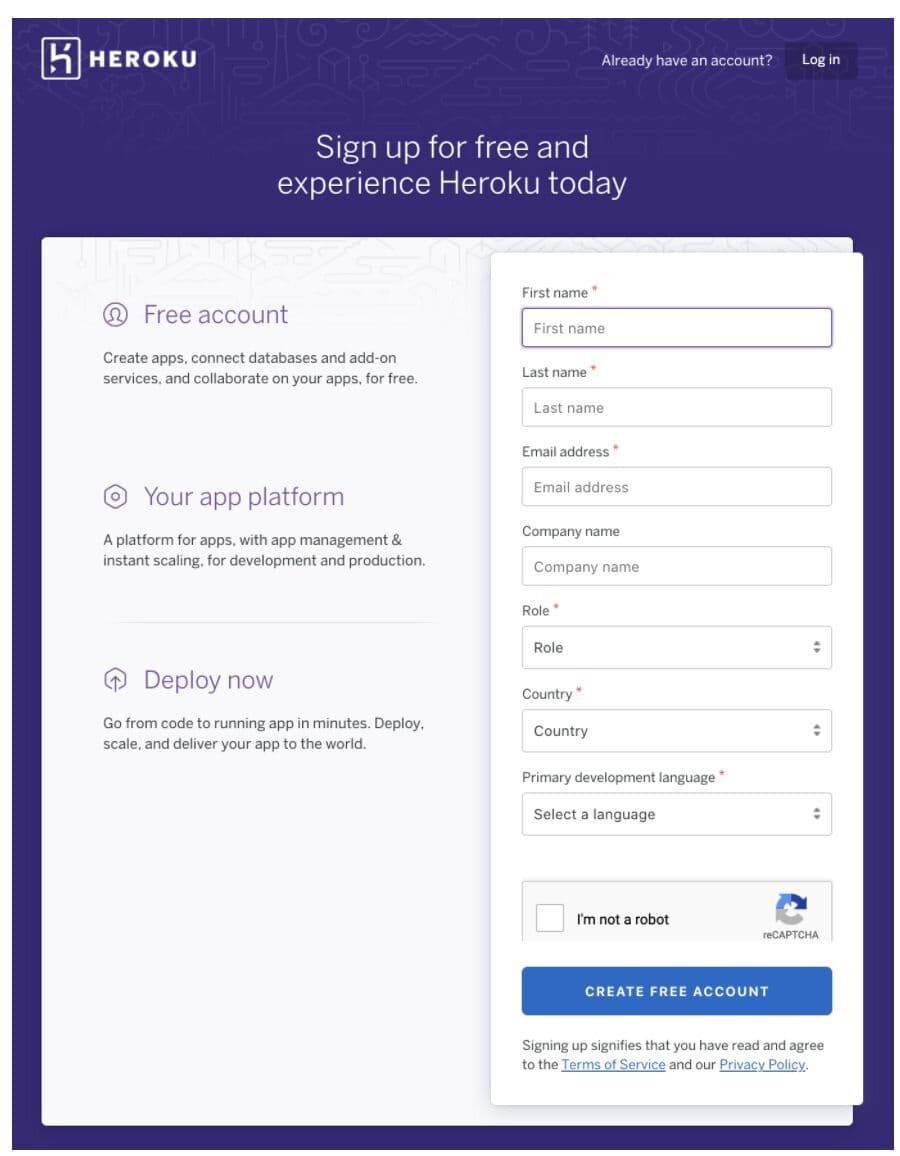
If you are using Heroku for the first time, create your new Heroku account through this link
Step 3. Install Heroku CLI on your system
Step 4. Login to Heroku
Step 5. Connect your application to Redis Cloud
For this demonstration, we will be using a Sample Rate Limiting application
Clone the repository
Step 6. Setting up environment variables
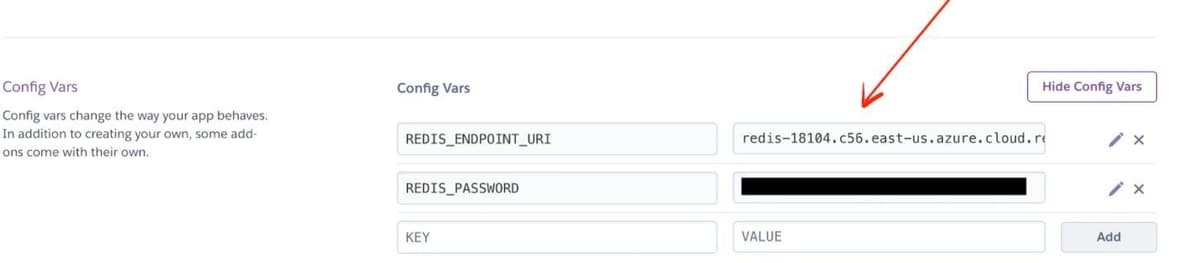
Go to Heroku dashboard, click "Settings" and set REDIS_ENDPOINT_URI and REDIS_PASSWORD under the Config Vars. Refer to Step 1 for reference.
You now have a functioning Git repository that contains a simple application as well as a package.json file, which is used by Node’s dependency manager.
Step 7. Deploy your code
Heroku generates a random name (in this case hidden-woodland-03996) for your app, or you can pass a parameter to specify your own app name. Now deploy your code:
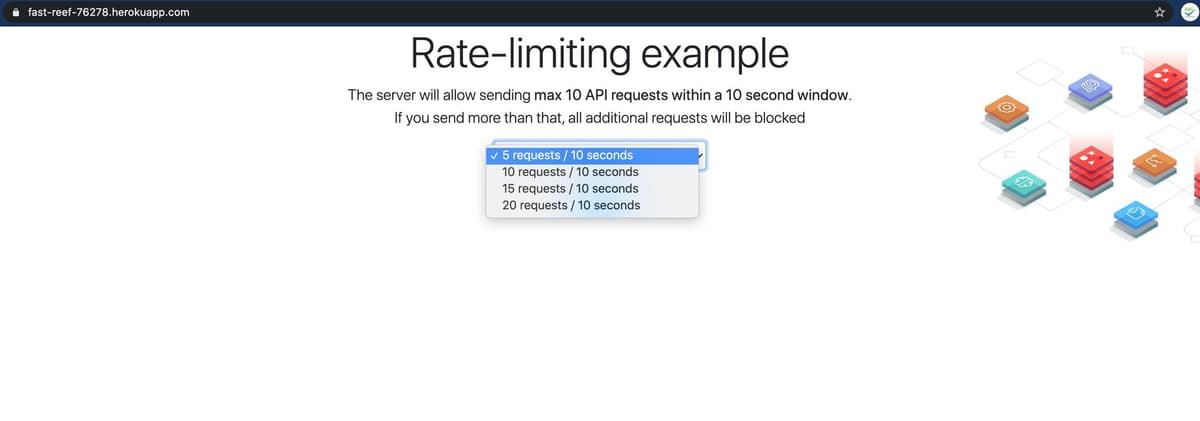
Step 8. Accessing the application
Open https://hidden-woodland-03996.herokuapp.com/ to see your application