Tutorial
CircleCI: What it is and why it should be part of your Redis CI-CD
February 26, 20265 minute read
TL;DR:You can use CircleCI with Redis by adding a Redis service container to your CircleCI pipeline configuration. Define your jobs in a.circleci/config.ymlfile, include a Redis Docker image as a secondary service, and CircleCI handles the rest — running your tests against a live Redis instance on every commit and deploying your application automatically.

#What you'll learn
- What CircleCI is and how it fits into a Redis CI/CD workflow
- How to connect a GitHub repository to CircleCI
- How to configure a
.circleci/config.ymlpipeline for a Redis application - How to deploy a Redis-powered Python app to Heroku using CircleCI
#What is CircleCI?
CircleCI is a continuous integration and continuous delivery (CI/CD) platform designed to automate the build, test, and deployment stages of software development. It integrates with version control systems like GitHub and Bitbucket to trigger pipelines on every code change, giving teams fast feedback through a real-time dashboard.
CircleCI supports a wide range of languages and cloud-hosted compute types including Docker containers, Linux VMs, macOS, Windows, and Arm executors. Pipelines are defined as code in a
config.yml file, which makes them version-controlled, reviewable, and reproducible.Key features include parallel job execution, built-in caching (including Redis caching), reusable configuration packages called orbs, SSH debugging, self-hosted runners, and flaky test detection.
#How does CircleCI work?
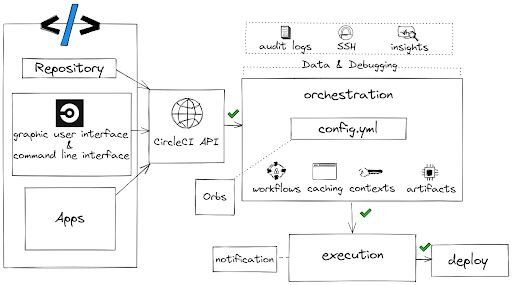
After you authorize GitHub or Bitbucket and add your repository as a project on circleci.com, every code change triggers a pipeline run. CircleCI locates your
.circleci/config.yml, executes the defined jobs — building your code, running tests, performing security scans, and going through any approval steps — then deploys the result. You receive an email notification on success or failure.#What are CircleCI's capabilities?
As a DevOps engineer or developer, you can:
- SSH into any job to debug build issues.
- Set up jobs to run in parallel to reduce pipeline duration.
- Configure a Redis cache with two simple keys to reuse data from previous jobs in your workflow.
- Configure self-hosted runners for unique platform support.
- Access Arm resources for the machine executor.
- Use reusable packages of configuration (orbs) to integrate with third parties.
- Use a pre-built Redis Docker image in a variety of languages.
- Use the API to retrieve information about jobs and workflows.
- Use the CLI to access advanced tools locally.
- Get flaky test detection with test insights.
#Deploy a Redis rate limiting application on Heroku using CircleCI
#Prerequisites
- A CircleCI account (free tier available)
- A GitHub account
- A Heroku account
- Basic familiarity with Git, YAML, and command-line tools
#Getting started
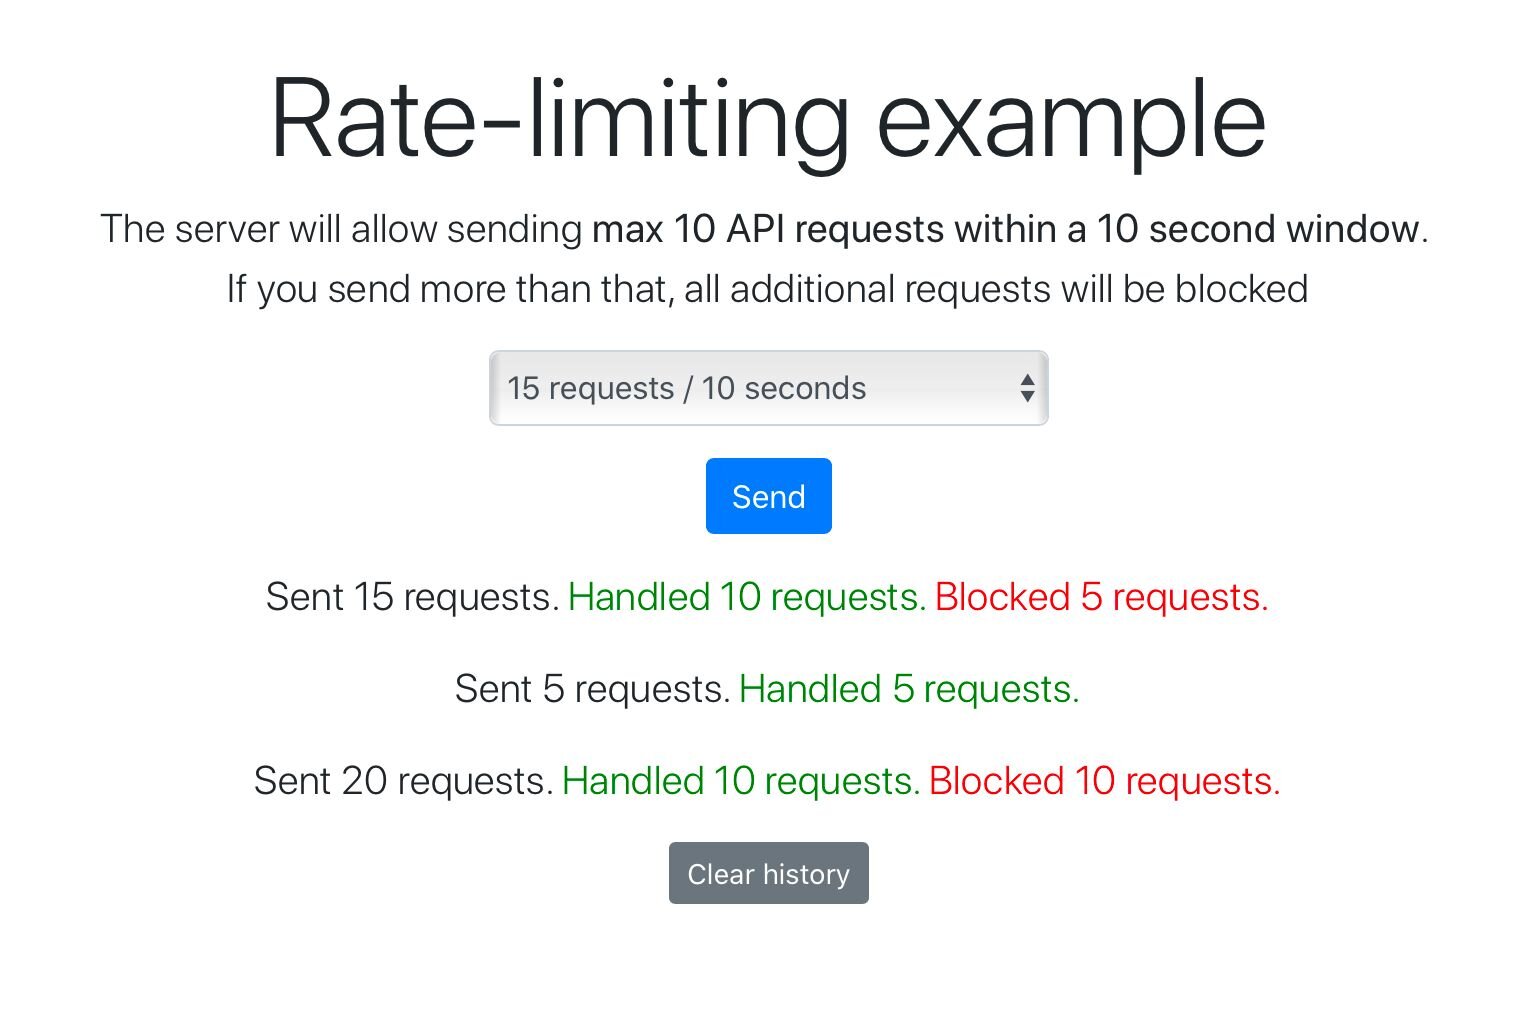
In this tutorial, you will configure CircleCI to deploy a Redis rate limiting application built with Python directly to the Heroku platform.
Rate limiting is a mechanism that controls how many requests a client can make to an API endpoint within a time window, responding with a 429 status code when the limit is exceeded. The complete source code for this project is available on GitHub.
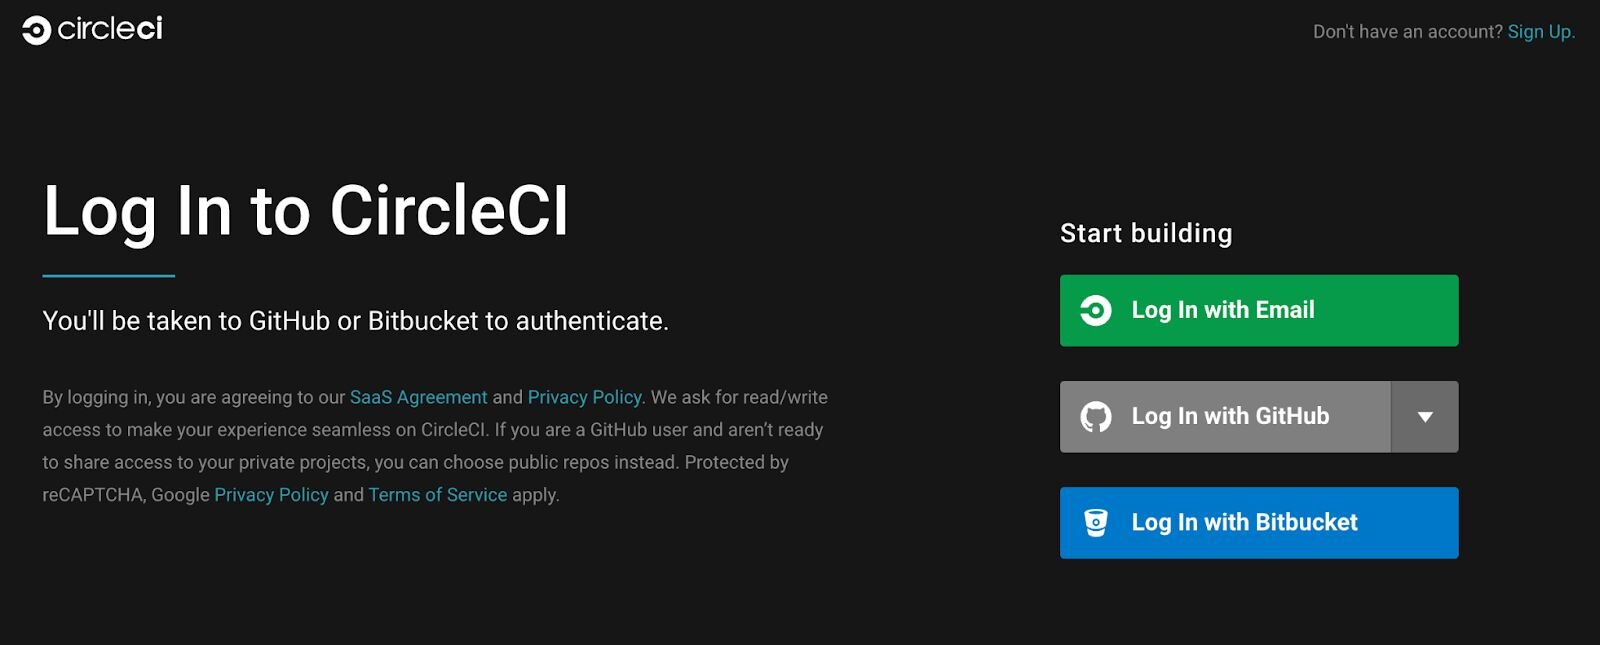
#Step 1. Log in to CircleCI with your GitHub account
Go to https://circleci.com and log in. Choose GitHub as the authentication method to connect your repositories directly.
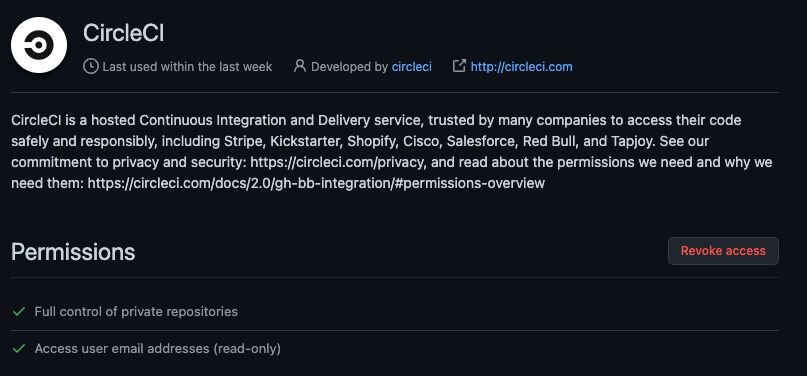
#Step 2. Authorize CircleCI on GitHub
Grant CircleCI permission to access your GitHub repositories.
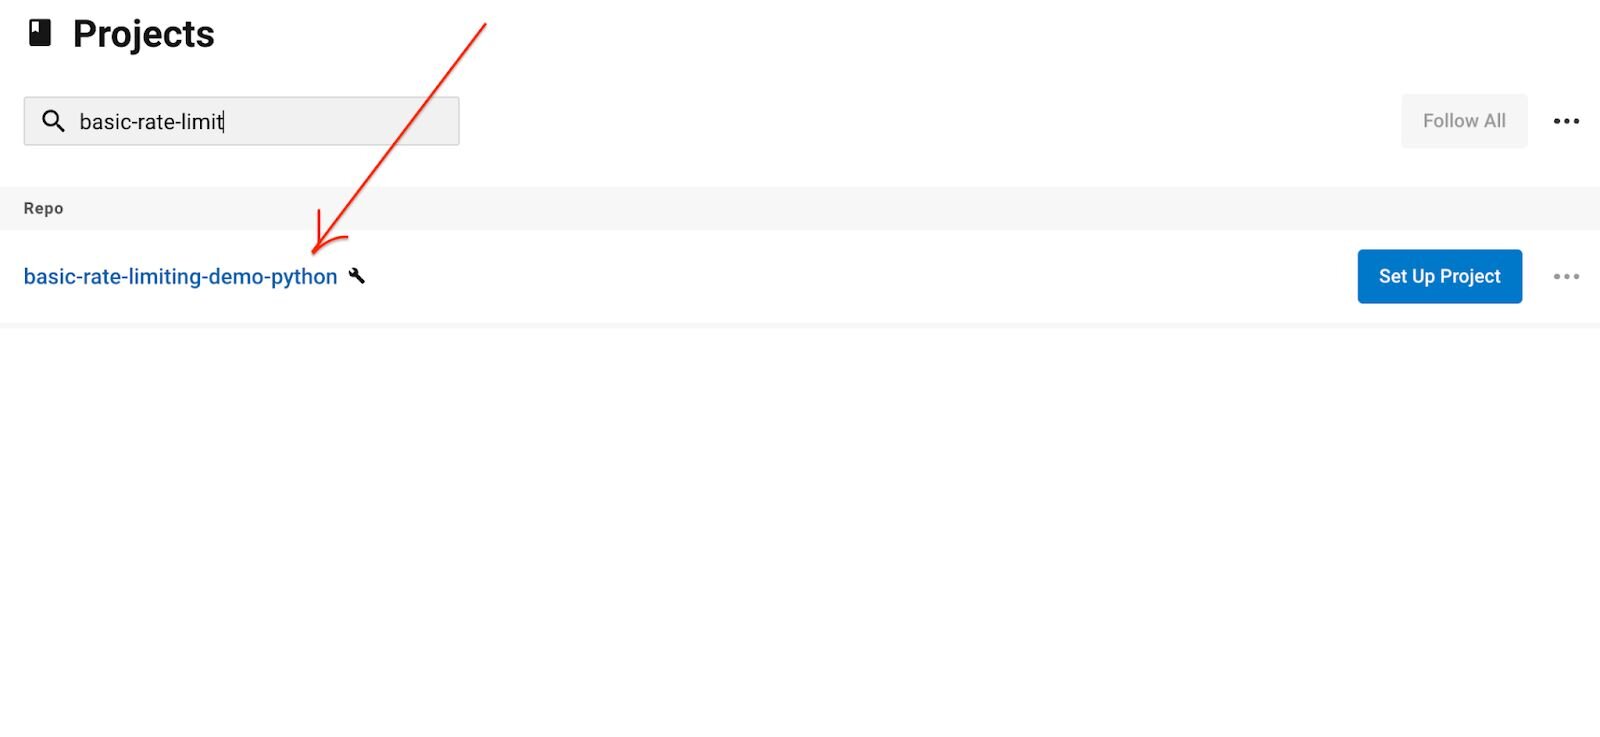
#Step 3. Select your project repository and click "Setup Project"
Choose the Redis rate limiting repository from your project list.
#Step 4. Create a CircleCI configuration file
CircleCI uses configuration as code. The entire delivery process from build to deployment is orchestrated through a single file called
config.yml, located in a .circleci directory at the root of your project.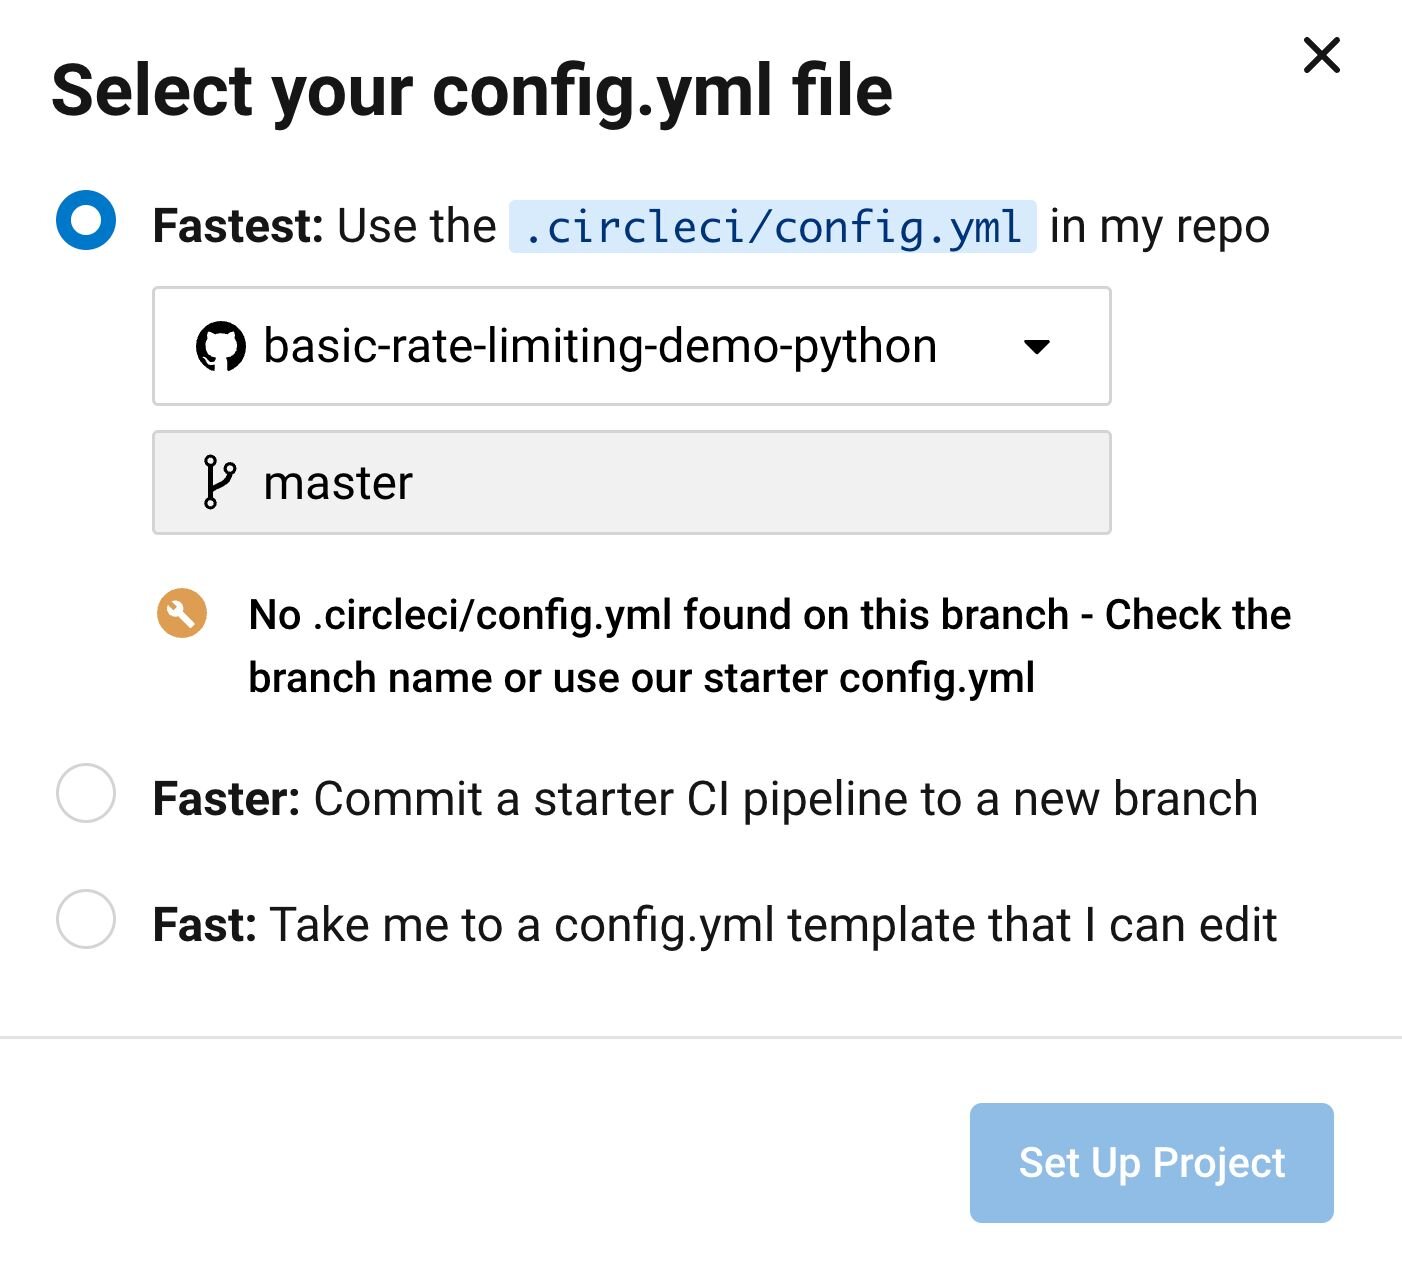
Since we haven't created a
config.yml file yet, choose the "Fast" option to start from an editable template.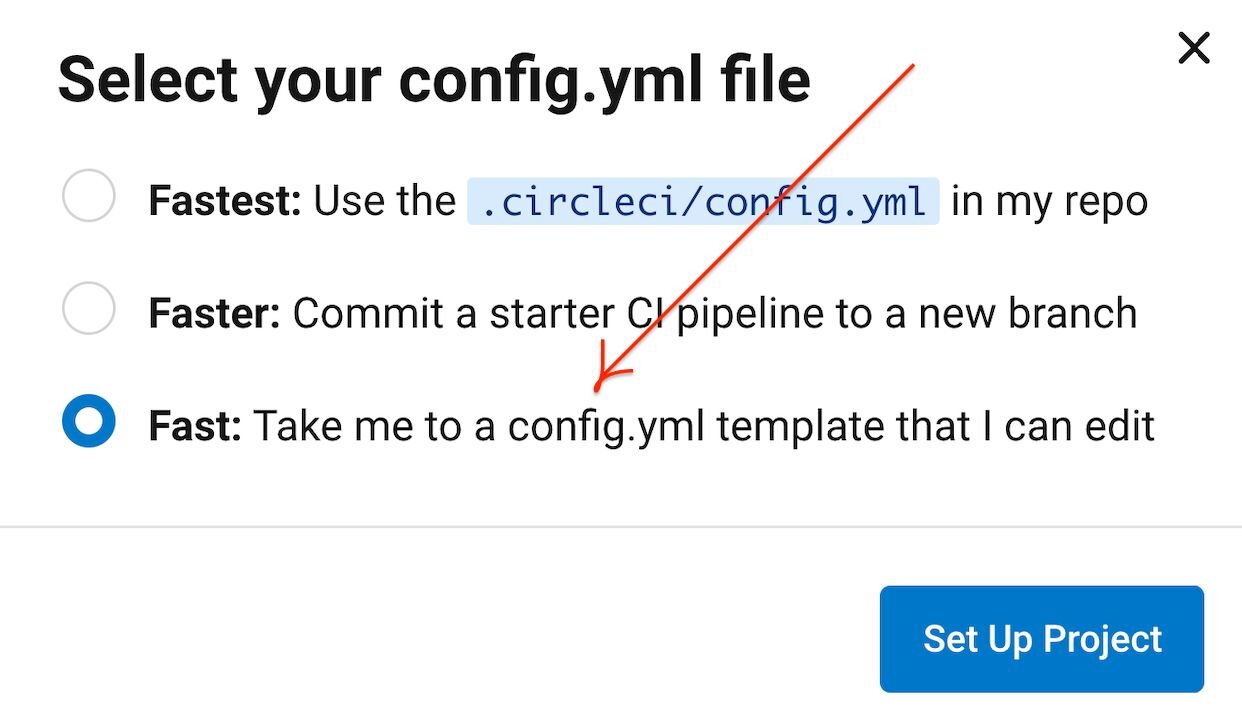
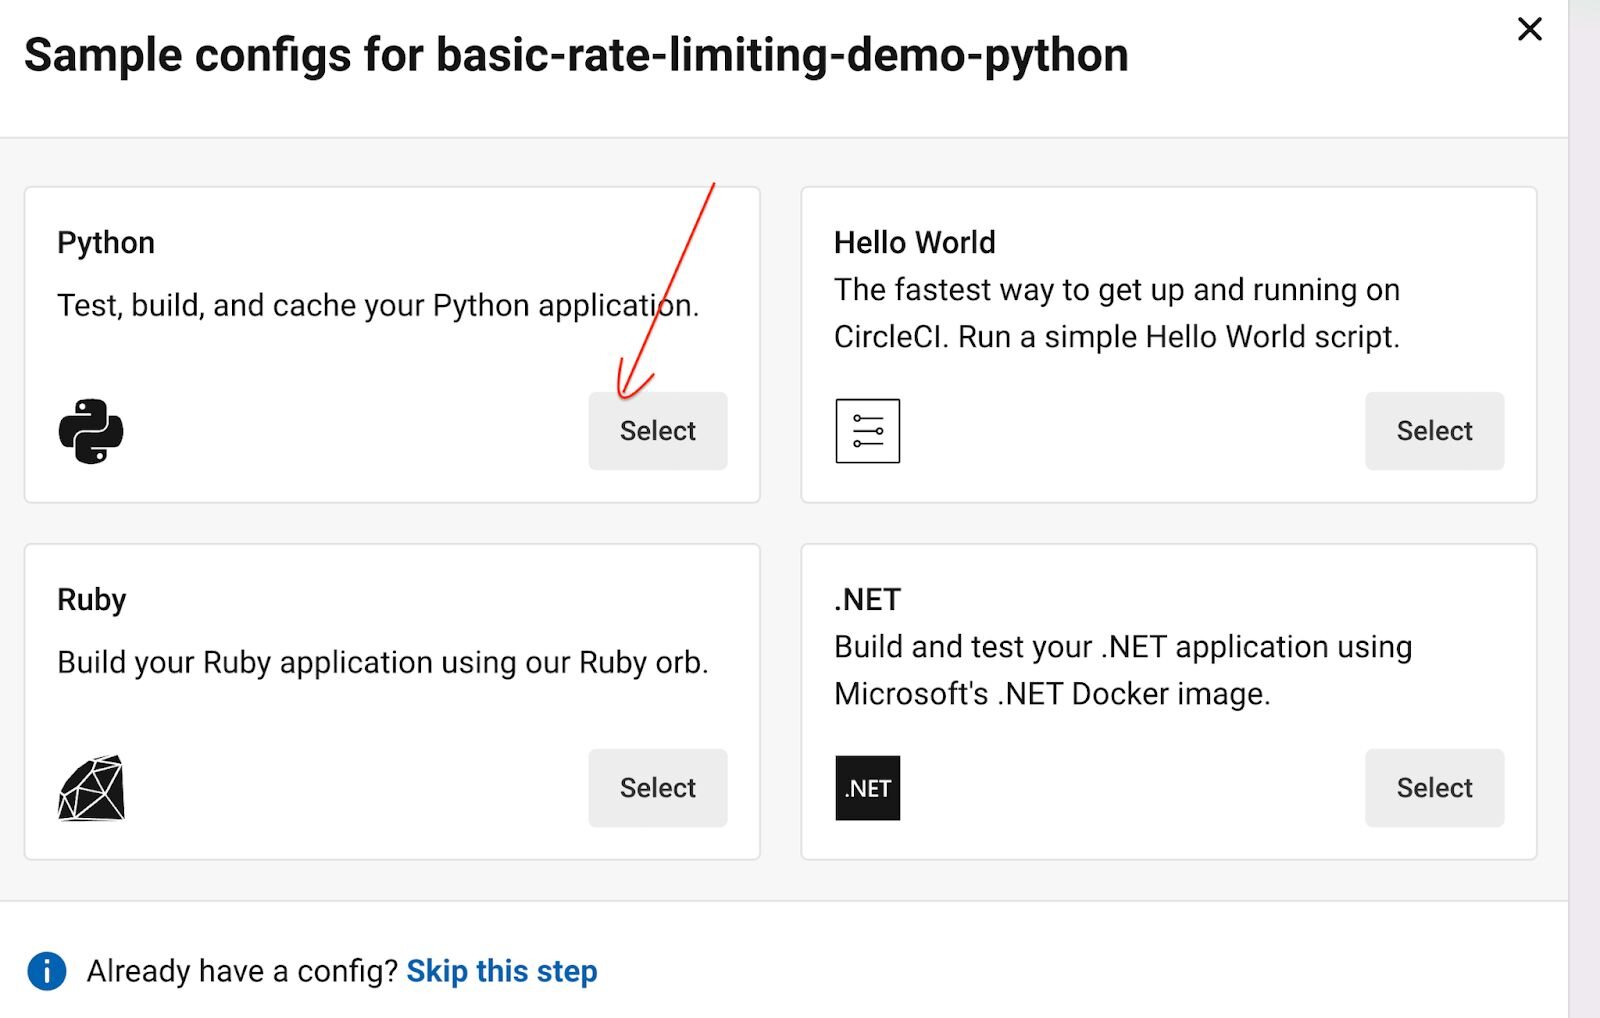
After clicking "Set Up project," you'll be prompted to select a sample config:
Add the following content to
.circleci/config.yml and save the file:This configuration pulls in the Heroku orb (
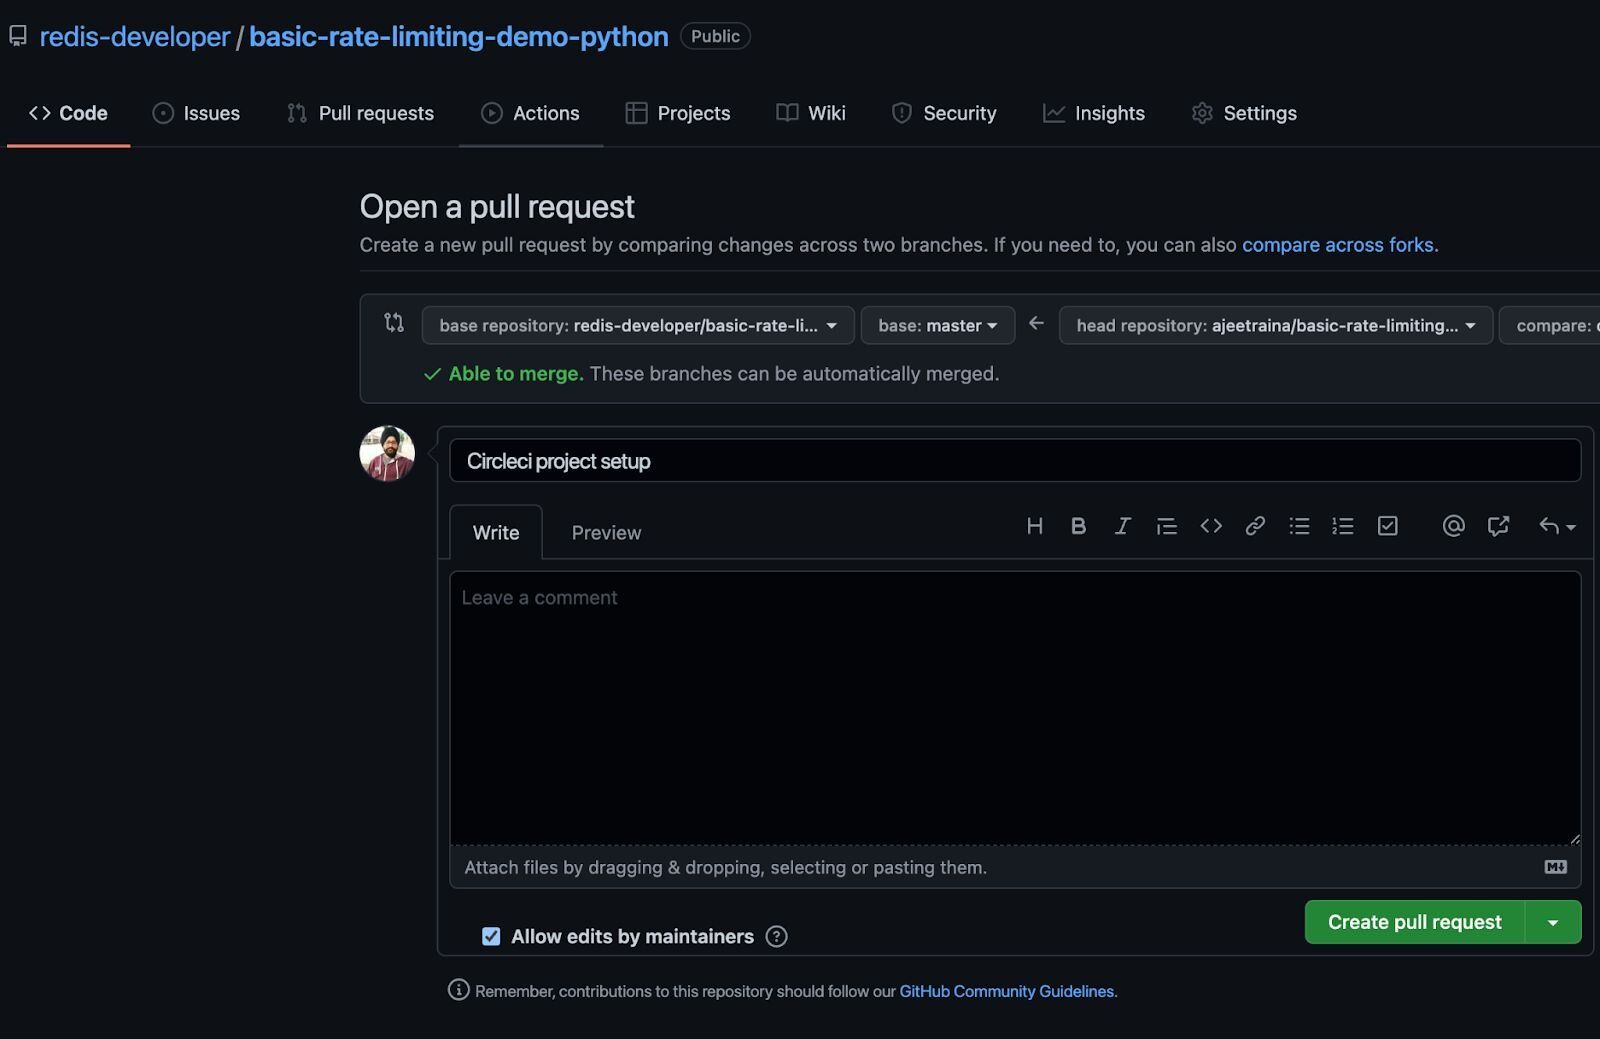
circleci/[email protected]), which provides a set of pre-built Heroku jobs and commands. The heroku/deploy-via-git job deploys your application from your GitHub repository directly to your Heroku account.#Step 5. Merge the pull request
Once you save the new configuration, CircleCI creates a pull request in your repository. Go ahead and merge it.
#Step 6. Set up your Heroku account
Follow these steps to set up a Heroku account and create a new app called
rate-limit-python. You'll need your Heroku API key for the next step.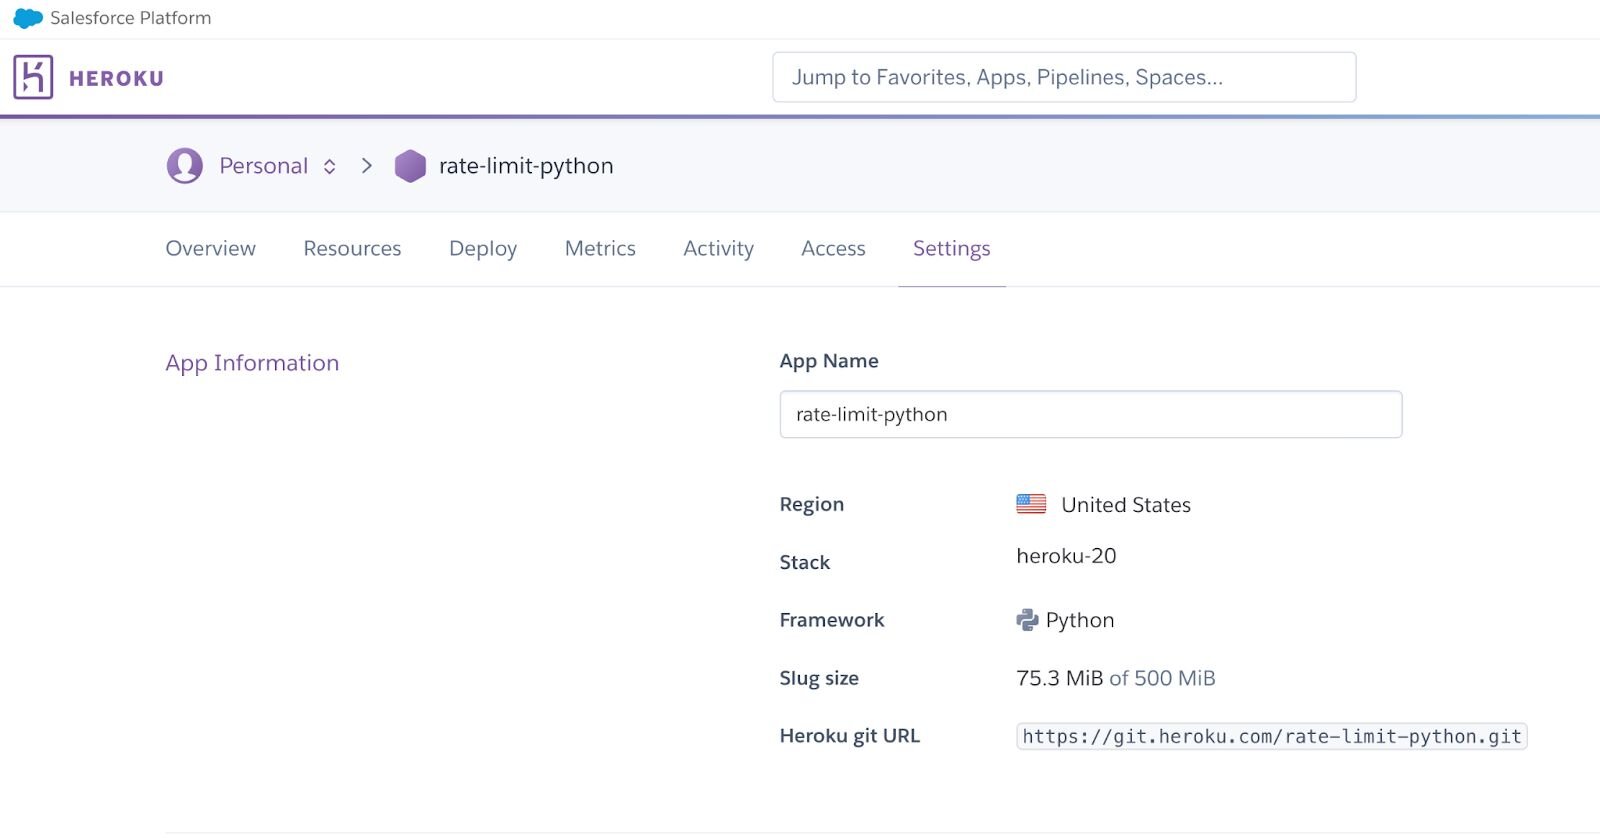
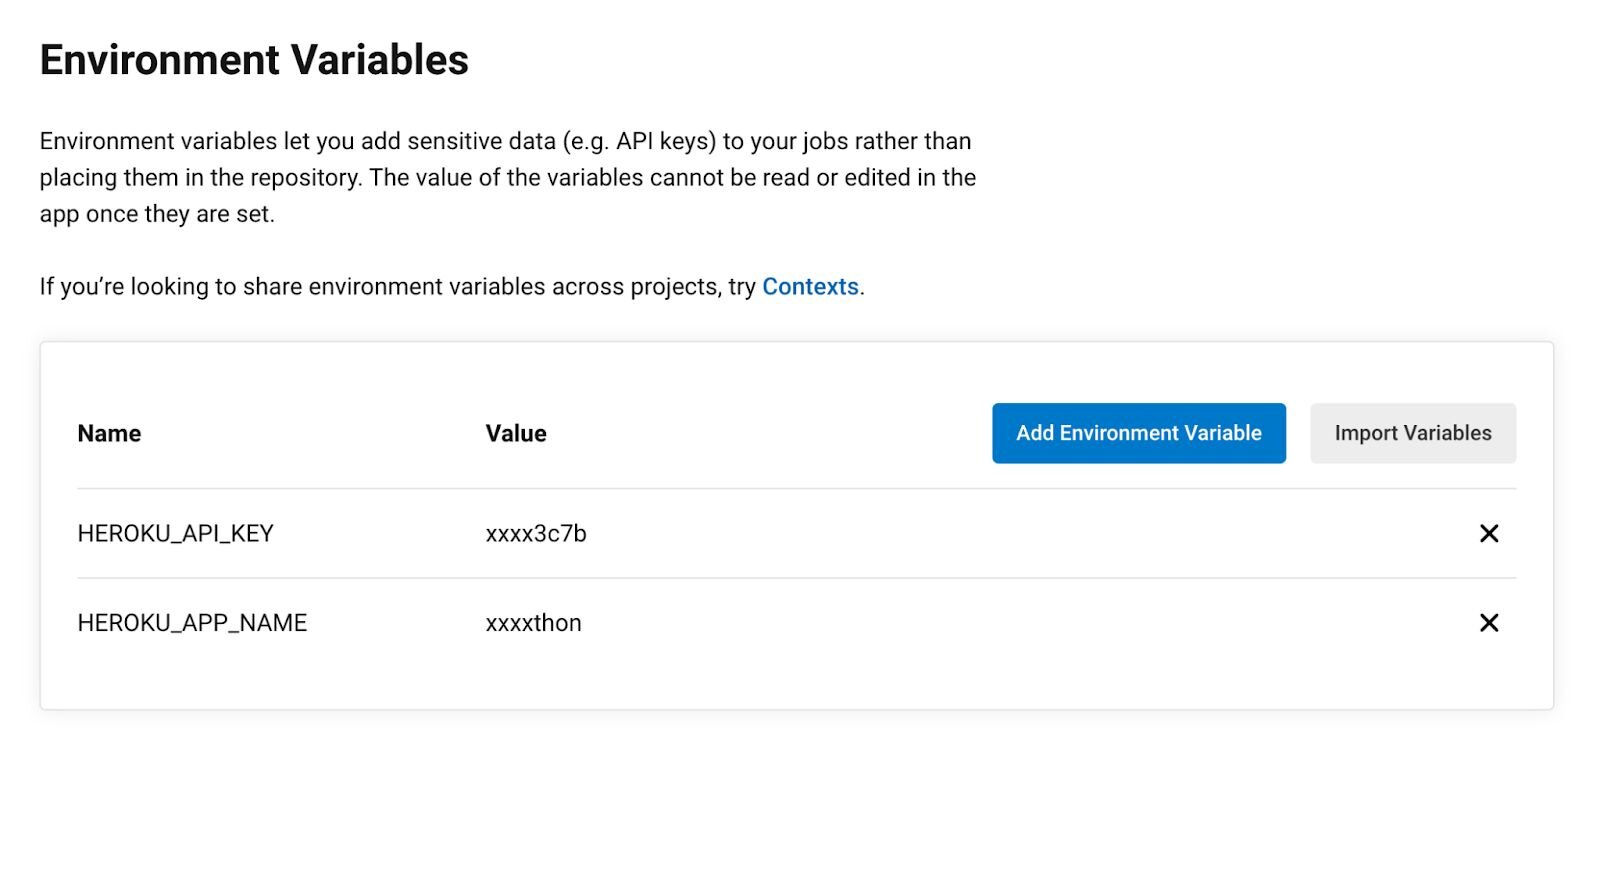
#Step 7. Configure Heroku environment variables on CircleCI
Before CircleCI can deploy to Heroku, you need to set up an authenticated connection between the two platforms. In your CircleCI project settings, navigate to Build Settings > Environment Variables and create two variables:
- HEROKU_APP_NAME — the name of your Heroku application (e.g.,
rate-limit-python) - HEROKU_API_KEY — your Heroku account API key, found under Account Settings > API Key in the Heroku dashboard
#Step 8. Trigger the build
As soon as you merge the pull request, CircleCI triggers the pipeline automatically. You can monitor the build progress in the CircleCI dashboard.
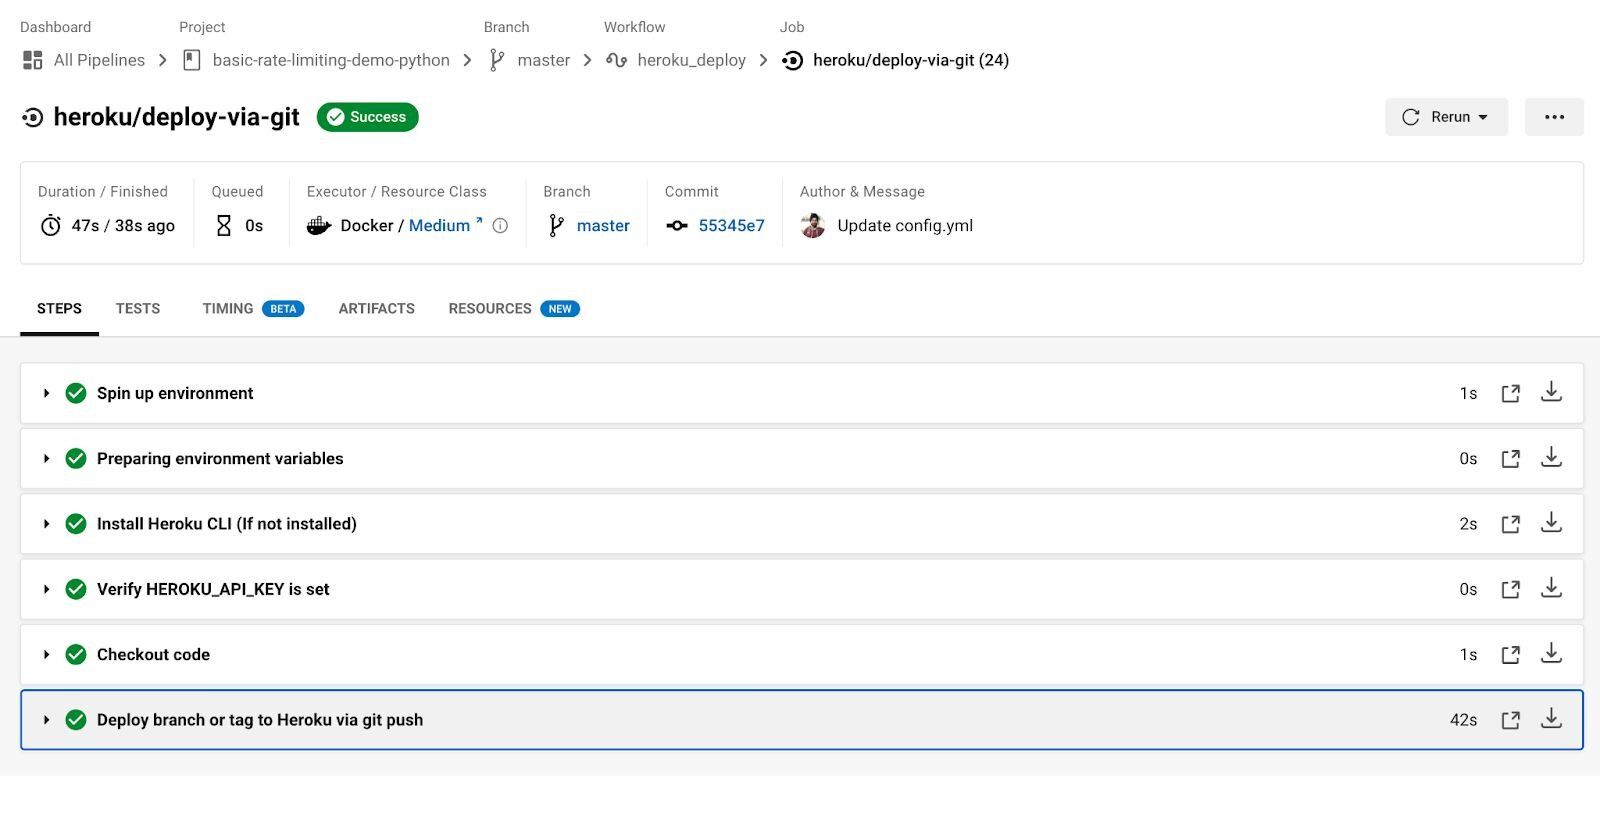
Once the build completes, your application is deployed. The Heroku build log confirms a successful deployment:
#Next steps
- Learn how to set up Argo CD for Redis CI/CD as an alternative GitOps-based deployment approach
- Explore the CircleCI orb registry for reusable Redis-related configurations
- Read the Redis Docker Hub page to find official images for your CircleCI pipelines