Blog
Start to Finish with Databases on Kubernetes
With the latest release of Redis Enterprise 6.0.6, our Kubernetes operator includes a new database controller that provides the ability to create databases via custom resources. This mechanism enables database configurations to be packaged in a familiar YAML format alongside other application workloads. This also enables continuous integration/continuous deployment (CI/CD) processes like GitOps for code-driven Infrastructure as Code (IaC) deployments.
A database is described via a custom resource containing the minimal necessary requirements and then is created within a namespace by applying that resource to the namespace. For example, a small test database can be easily created on an existing cluster, named “rec”, by a resource described in a YAML format:
While there are a variety of options available for controlling how the database is created, the user only needs to specify the minimum necessary features. Once the custom resource is created in a namespace, our database controller will discover the newly created resource and ensure its creation in the referenced cluster. If the description of the desired database changes, the operator will ensure the same changes are reflected in the cluster. In this way, the application developer manages the database in the same way they do other workloads in Kubernetes.
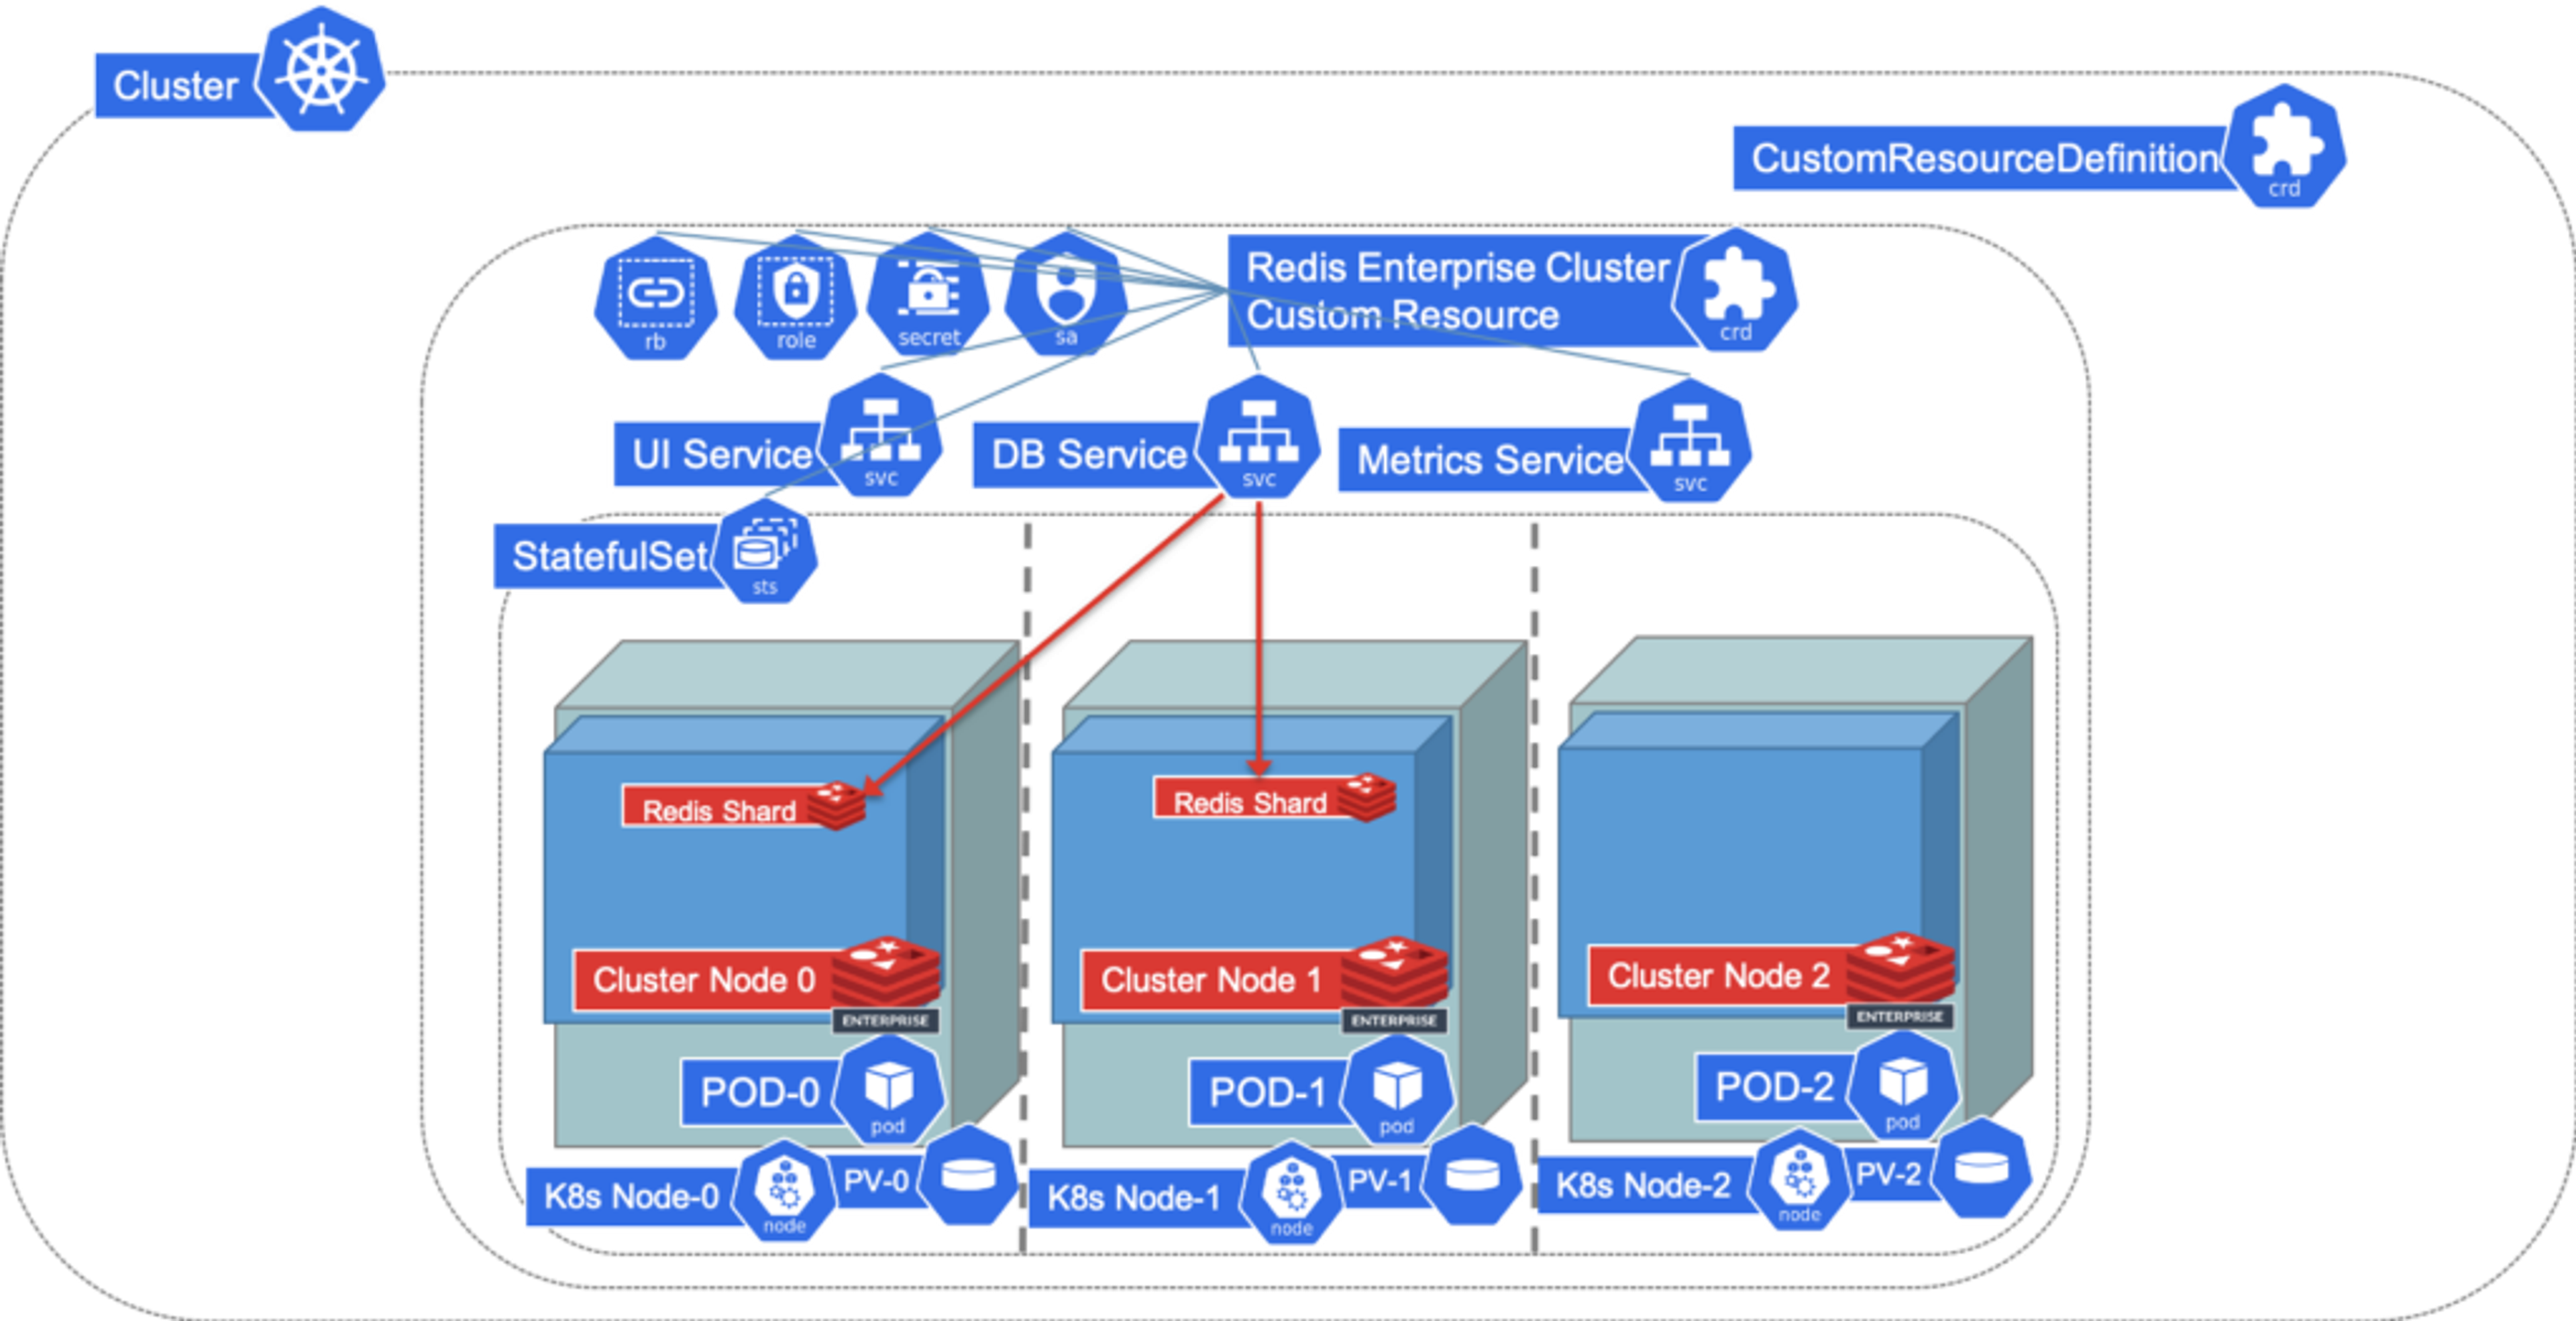
For more details about our operator and a live GitOps demo, watch the RedisConf 2020 Takeaway session on Cloud Native Automation with the Redis Enterprise Kubernetes Operator with Amiram Mizne and Roey Prat. This session, embedded below, discusses the architecture of the operator, introduces the database controller, and demonstrates a continuous deployment scenario using the Flux CD system.
An illustrative example
Let’s walk through the basics of using the database operator. We’ll assume that you have a Kubernetes cluster with the Redis Enterprise operator installed. If not, you can refer to our documentation and GitHub reference material for instructions on installing the operator into your namespace.
Creating the database First, we’ll create an example application in a namespace called bdb: kubectl create namespace bdb In this namespace, let’s set up a small test cluster and deploy the sample guestbook application. In this example, we’ll create a cluster with a minimum of 3 nodes and with all the memory, CPU, and other settings with their default values:
This will create a small cluster called “rec” on which we can create our database. The cluster will take a few minutes to start and to be ready for database creation. You can monitor the change of the status of your cluster to “Running” by: kubectl get rec/rec -o jsonpath='{.status.state}' Once the cluster is ready, you can create a database by just applying a database custom resource:
At this point, the database controller within the Redis Enterprise operator will recognize the new custom resource. It will go through the process of creating the database on the cluster and exposing it as services within your namespace. The database status will change to “active” when it is ready, and can be monitored by: kubectl get redb/smalldb -o jsonpath="{.status.status}" That’s all that there is to creating the database. Once we are done with it, we can delete the database by simply deleting the custom resource.

Using a database
While there are various ways of controlling access to the database, our example didn’t specify anything other than the size. Consequently, the database controller generated a password for the database and stored it in a Kubernetes secret that is named in a consistent way. This secret also contains the other binding information required by an application, including the database port and service name. With these three items from the secret, we have the necessary information to connect to the database.
You can find the database secret name by: kubectl get redb/smalldb -o jsonpath="{.spec.databaseSecretName}" Because we let the secret be named by the database controller, the name is consistently generated as “redb-smalldb” where the name of the database is prefixed with “redb-”
With this secret, we can deploy an application. For example, we can deploy a simple guestbook application that can access the database using the secret:
By applying the above, the application is deployed in a pod where the connection information is stored in environment variables in the container. These values are pulled from the secret in the “env” section where the “secretKeyRef” is used to specify the name/value pair. Our guestbook application is written to use these environment variables to connect to the database.
With the above deployment, our application should now be running within our namespace. While there are many ways to expose this application, for testing purposes we can simply forward the web application’s port to our local machine: kubectl port-forward `kubectl get pod -l name=guestbook -o jsonpath='{.items..metadata.name}'` 8080:80 We can then visit http://localhost:8080 in a browser and see the application running. If you add a name to the guest book, you’ll see that it is stored. Try reloading the browser to see that you can retrieve the list again from the Redis database.
Summary
We have now seen the database controller in action with a simple deployment that included the creation and use of a database. Again, I encourage you to watch the RedisConf 2020 Takeaway session on Cloud Native Automation with the Redis Enterprise Kubernetes Operator to learn more about using the operator in conjunction with GitOps and continuous deployment.
Because the database is also a resource description we can write in YAML format, we can manage the database configuration like other code and configuration files. These deployment descriptions can be parameterized with various tools, like kustomize, and used as input to CI/CD systems. The database custom resource and controller gives the application developer a cloud-native mechanism for packaging their database along with their application deployment and the Redis Enterprise operator turns that packaging into action.
Related Articles

Why Should You Care About Kubernetes?
Learn More

Automated Cluster Recovery Comes to the Redis Enterprise Kubernetes Operator
Learn More
Get started with Redis today
Speak to a Redis expert and learn more about enterprise-grade Redis today.
