Create a Pro database in an existing subscription
Shows how to create a Pro database in an existing subscription
| Redis Cloud |
|---|
This guide shows how to create a Pro database in an existing subscription.
- If you don't yet have a Pro subscription, see Create a Pro database with a new subscription.
- If you'd rather create an Essentials database, see Create an Essentials database.
To create a database in an already existing Pro subscription:
-
Sign in to the Redis Cloud console.
-
Select the New database button.

This displays the Create database screen.
-
Select the type of subscription you need. For this guide, select Existing subscription, and then select your existing Pro subscription from the list.
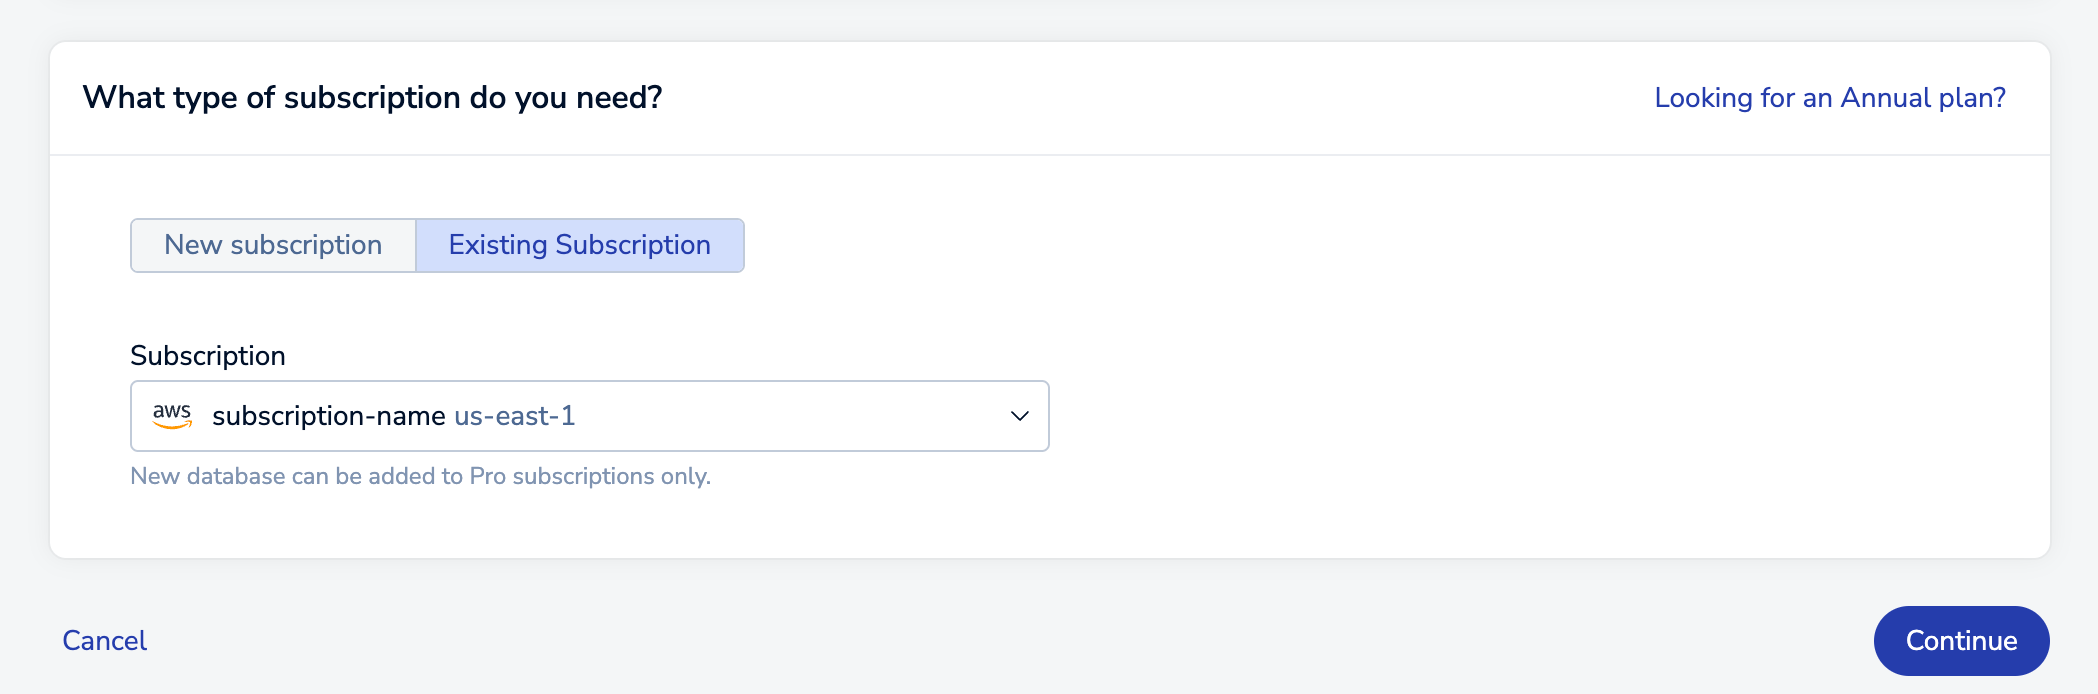
After you select your existing subscription from the list, select Continue to go to the New database page.
You can also select your subscription from the subscription list and select Create database in this subscription.

The New database page is divided into sections, each dedicated to a specific category of settings. The following sections provide more details.
When you've configured your new database, click the Activate database button to create and activate it.

General section
The General section defines basic properties about your database.
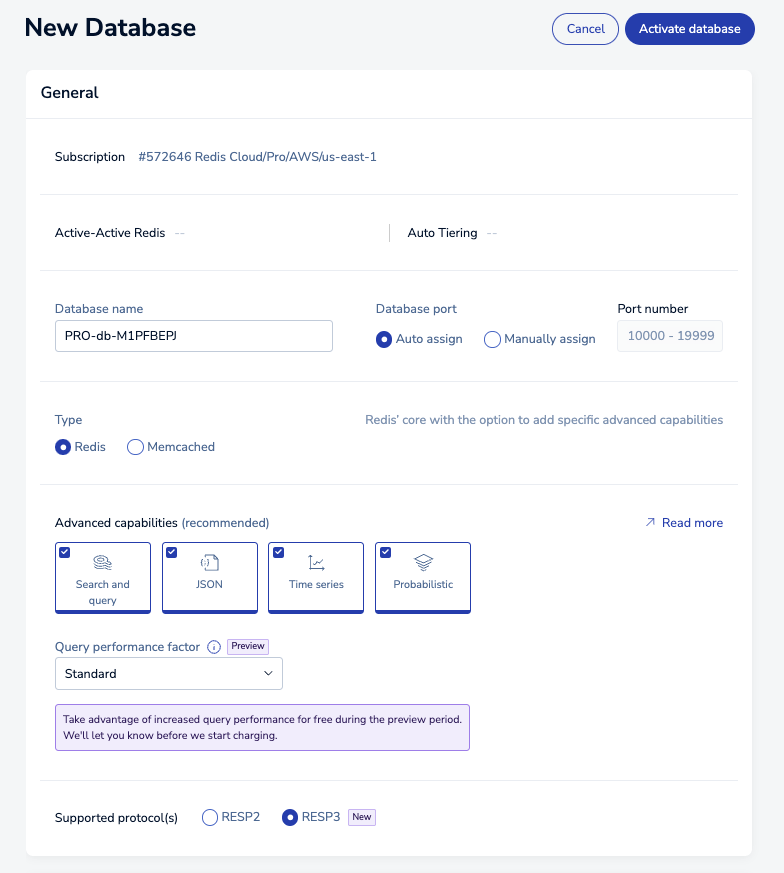
The available settings vary according to your subscription plan:
| Setting name | Description |
|---|---|
| Subscription | Read-only description of your Pro subscription, including cloud provider and region |
| Database name | A name for your database (required) |
| Database port | Automatically or manually assigns a database port (range: 10000-19999). You cannot assign a port that is reserved or already in use. |
| Database version | The Redis version of your database. We recommend you choose the latest available version. |
| Type | Controls advanced database capabilities and protocol. Supported values include Redis and Memcached |
| Advanced capabilities | Advanced features and data types used by the database. Starting with Redis 8.0, all advanced capabilities are included in Redis by default. |
| Query performance factor | (Search and query databases on Redis 7.2 or later only) Adds additional compute power to process your query and vector search workloads and boost your queries per second. See Search and query sizing for more information. |
| Supported Protocol(s) | Choose between RESP2 and RESP3 (Redis 7.2 only). See Redis serialization protocol for details |
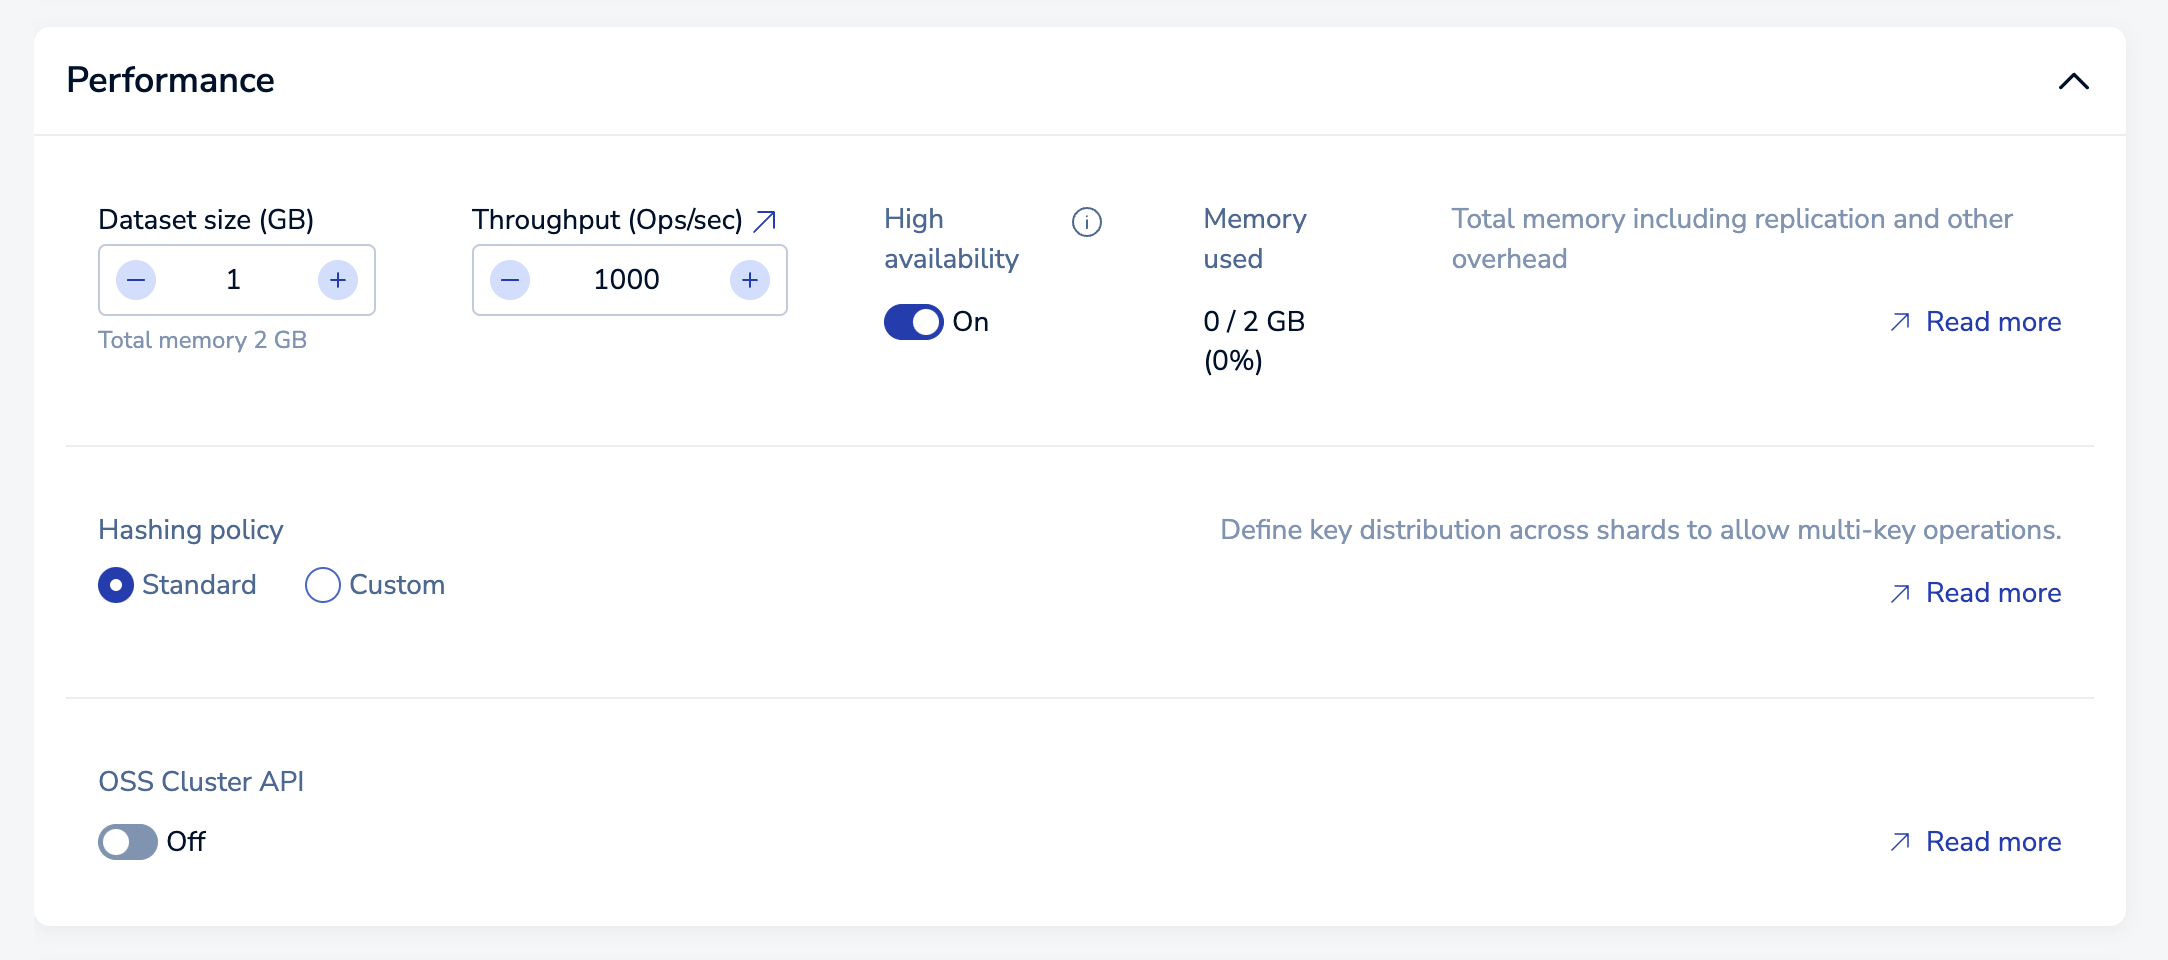
Performance section
The Performance section lets you manage the maximum size, throughput, and hashing policy for a database.
| Setting name | Description |
|---|---|
| Dataset size | Maximum size (in GB) for your dataset. See Dataset size for sizing considerations. Databases with Search and query have specific size requirements, see Search and query sizing for more information. |
| Throughput | Defines throughput in terms of maximum operations per second for the database. See Throughput for more info. Databases with Search and query have specific throughput requirements, see Search and query sizing for more information. |
| High availability | Indicates whether a replica copy of the database is maintained in case the primary database becomes unavailable. See High availability for more info |
| Query performance factor | (Search and query databases on Redis 7.2 or later) Adds additional compute power to process your query and vector search workloads and boost your queries per second. See Search and query sizing for more information. |
| Hashing policy | Defines the hashing policy. |
| OSS Cluster API | Activates the OSS Cluster API for a database. After you select OSS Cluster API, you can select Use external endpoint if you want to use the external endpoint for the database. Selecting Use external endpoint will block the private endpoint for this database. |
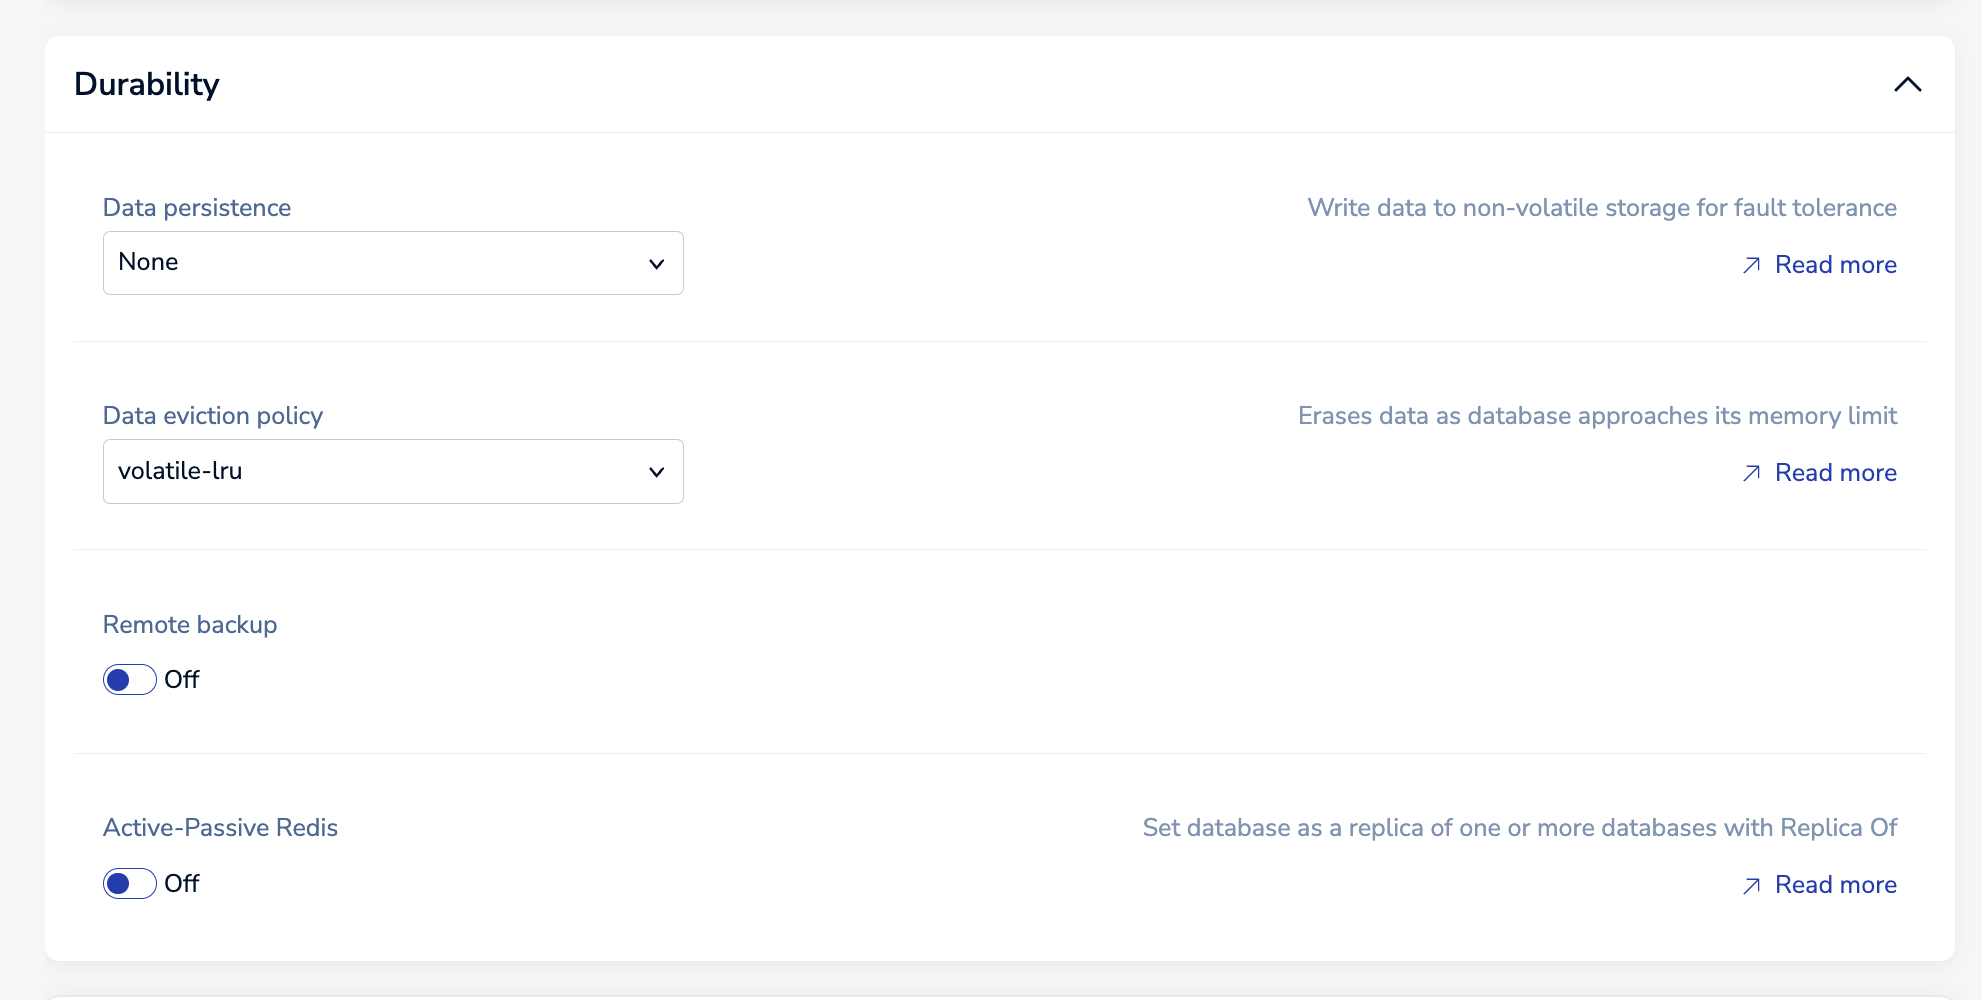
Durability section
The Durability section helps you keep your database (and your data) available when problems occur.
| Setting name | Description |
|---|---|
| Data persistence | Defines the data persistence policy, if any. See Data persistence. |
| Data eviction policy | Configures which policy is applied when your database reaches its memory limit. |
| Remote backup | When enabled, identifies a location and interval for data backups. |
| Active-Passive Redis | When enabled, identifies a path to the linked database. See Migrate data for more information. |
Tags section
The Tags section lets you add tags to the database.
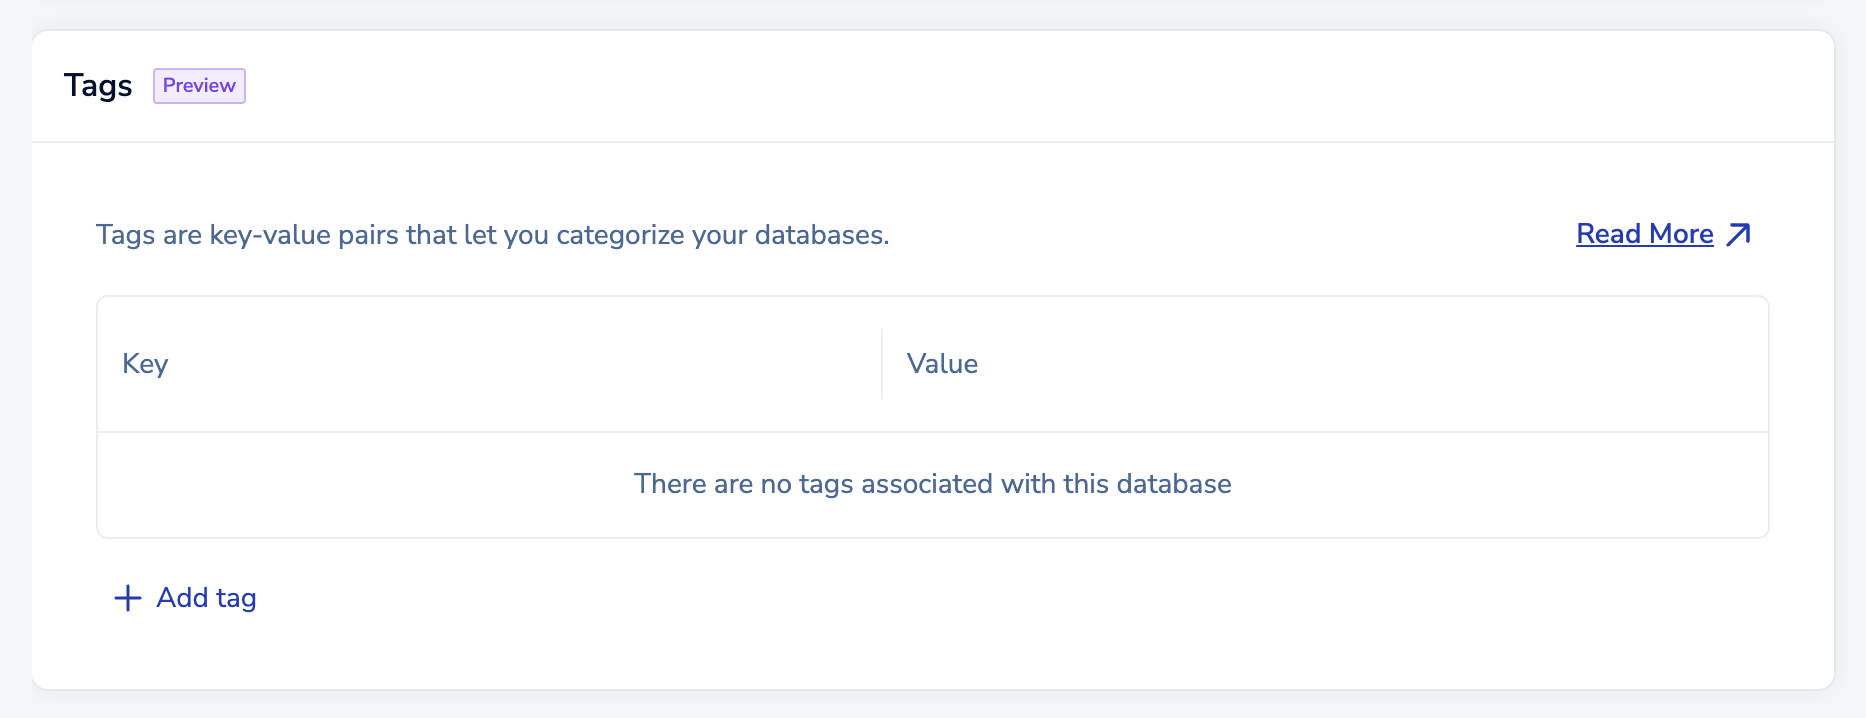
Select Add tag to add a tag.

You can select the tag's Key and Value from the suggestions, or you can enter your own.

A valid tag must follow these guidelines:
- Tag keys must be between 1 and 64 characters long, and values must be at least 1 character long.
- Tags can only have lowercase letters, numbers, spaces, and these special characters:
-,_,.,+,@, and:.
After you add your first tag, you can:
-
Select the Key or Value field of an existing tag and enter new text to edit it.
-
Select Delete next to a tag to delete it.

-
Select Add additional tag to add another tag.

Security section
The Security section helps you control access to your database.
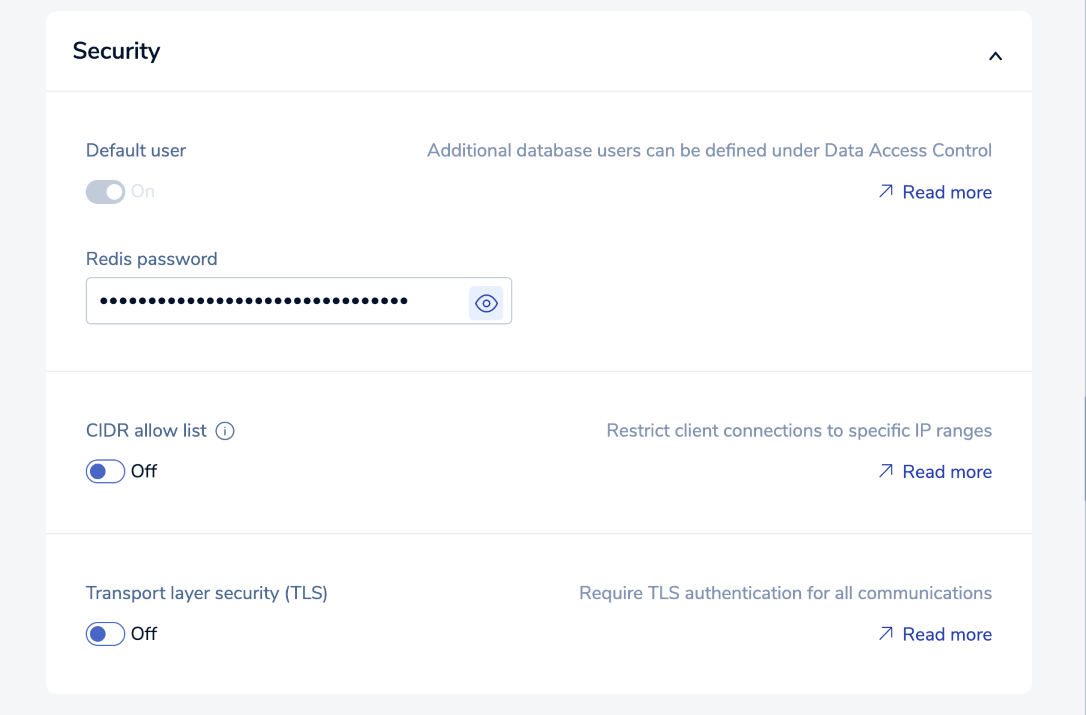
| Setting name | Description |
|---|---|
| Default user | When enabled, permits access using the default username and a simple password (see Default User). Turn on Role-based access control to turn off this setting. |
| Default user password | Password assigned to the database when created. |
| CIDR allow list | Allow list of IP addresses/security groups permitted to access the database |
| Transport layer security (TLS) | Enables transport layer security (TLS) encryption for database access. |
Alerts section
The Alerts section defines notification emails sent to your account and the conditions that trigger them.
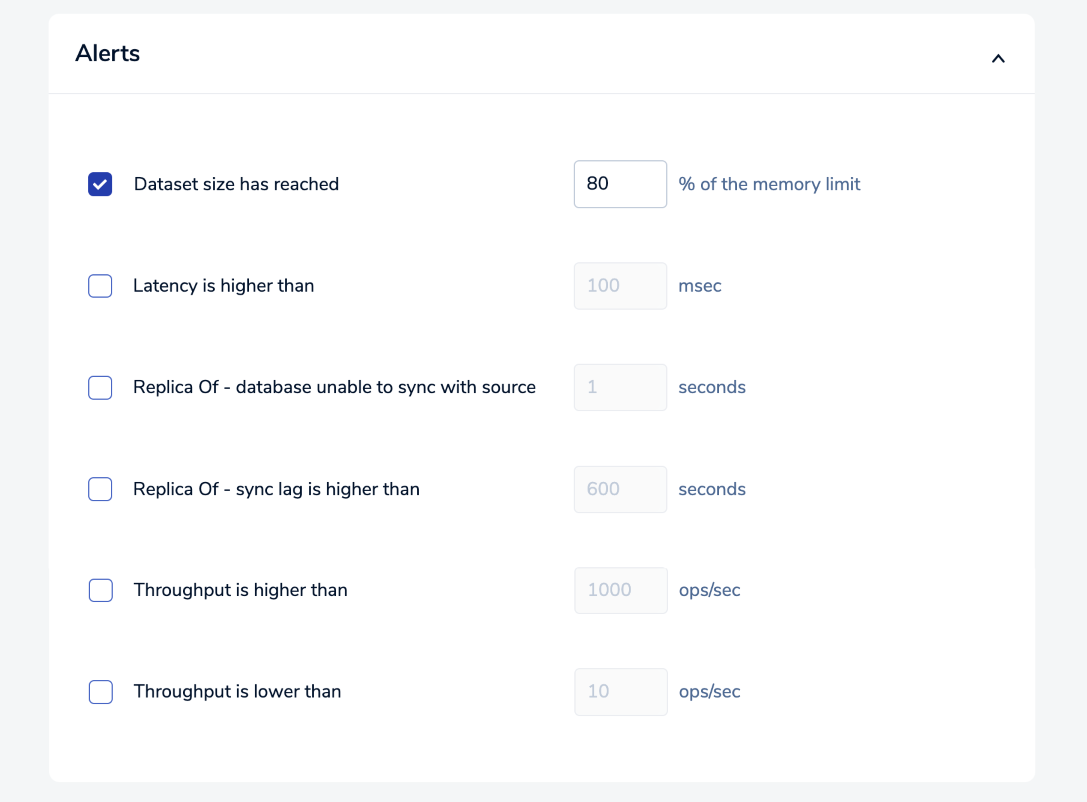
The available alerts vary according to the plan type. See Configure alerts for more information.
Billing unit types
The Redis Billing Unit types associated with your Pro subscription depend on your database memory size and throughput requirements.
| Billing unit type | Capacity (Memory/Throughput) |
|---|---|
| Pico | 100MB / 100 ops/sec |
| Nano | 500MB / 500 ops/sec |
| Micro | 1GB / 1K ops/sec |
| High-throughput | 2.5GB / 25K ops/sec |
| Small | 12.5GB / 12.5K ops/sec |
| Large | 25GB / 25K ops/sec |
| Very large1 | 50GB / 5K ops/sec |
| XLarge2 | 50GB / 10K ops/sec |
| Flex-103 | 50GB / 5K ops/sec |
| Flex-203 | 50GB / 10K ops/sec |
| Flex-303 | 50GB / 15K ops/sec |
| Flex-403 | 50GB / 20K ops/sec |
| Flex-503 | 50GB / 25K ops/sec |
-
Used for hosted databases with Auto Tiering between Redis 7.2 and Redis 8.2.
-
Used for Redis Flex databases for Redis 8.2 or later. Available Flex billing units depend on the RAM percentage you set for your database.
Prices vary according to the cloud provider and region. Minimum prices apply.