Create an Active-Active geo-replicated database
How to create an Active-Active database and things to consider when setting it up.
| Redis Software |
|---|
Active-Active geo-replicated databases (formerly known as CRDBs) give applications write access to replicas of the dataset in different geographical locations.
The participating Redis Software clusters that host the instances can be distributed in different geographic locations. Every instance of an Active-Active database can receive write operations, and all operations are synchronized to all instances without conflict.
Steps to create an Active-Active database
- Create a service account - On each participating cluster, create a dedicated user account with the Admin role.
- Confirm connectivity - Confirm network connectivity between the participating clusters.
- Create Active-Active database - Connect to one of your clusters and create a new Active-Active database.
- Add participating clusters - Add the participating clusters to the Active-Active database with the user credentials for the service account.
- Verify creation - Log in to each of the participating clusters and verify your Active-Active database was created on them.
- Confirm Active-Active database synchronization - Test writing to one cluster and reading from a different cluster.
Prerequisites
- Two or more machines with the same version of Redis Software installed
- Network connectivity and cluster FQDN name resolution between all participating clusters
- Network time service listener (ntpd) configured and running on each node in all clusters
Create an Active-Active database
-
Create service accounts on each participating cluster:
-
To verify network connectivity between participating clusters, run the following
telnetcommand from each participating cluster to all other participating clusters:telnet <target FQDN> 9443 -
In a browser, open the Cluster Manager UI of the cluster where you want to create the Active-Active database.
The default address is:
https://<RS_address>:8443 -
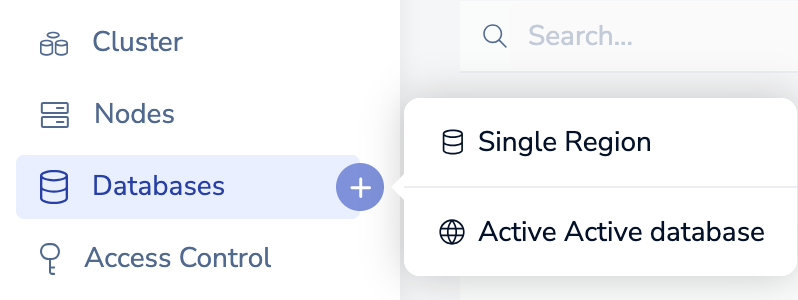
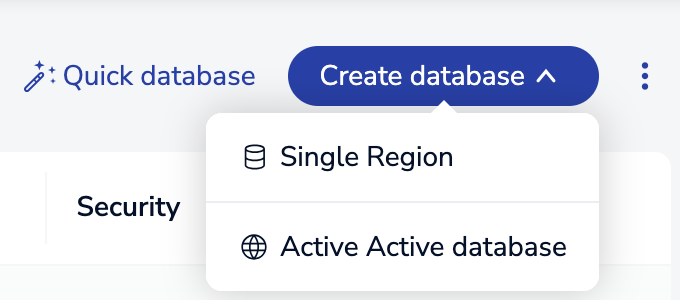
Open the Create database menu with one of the following methods:
-
Select Active-Active database.
-
Enter the cluster's local admin credentials, then click Save:

-
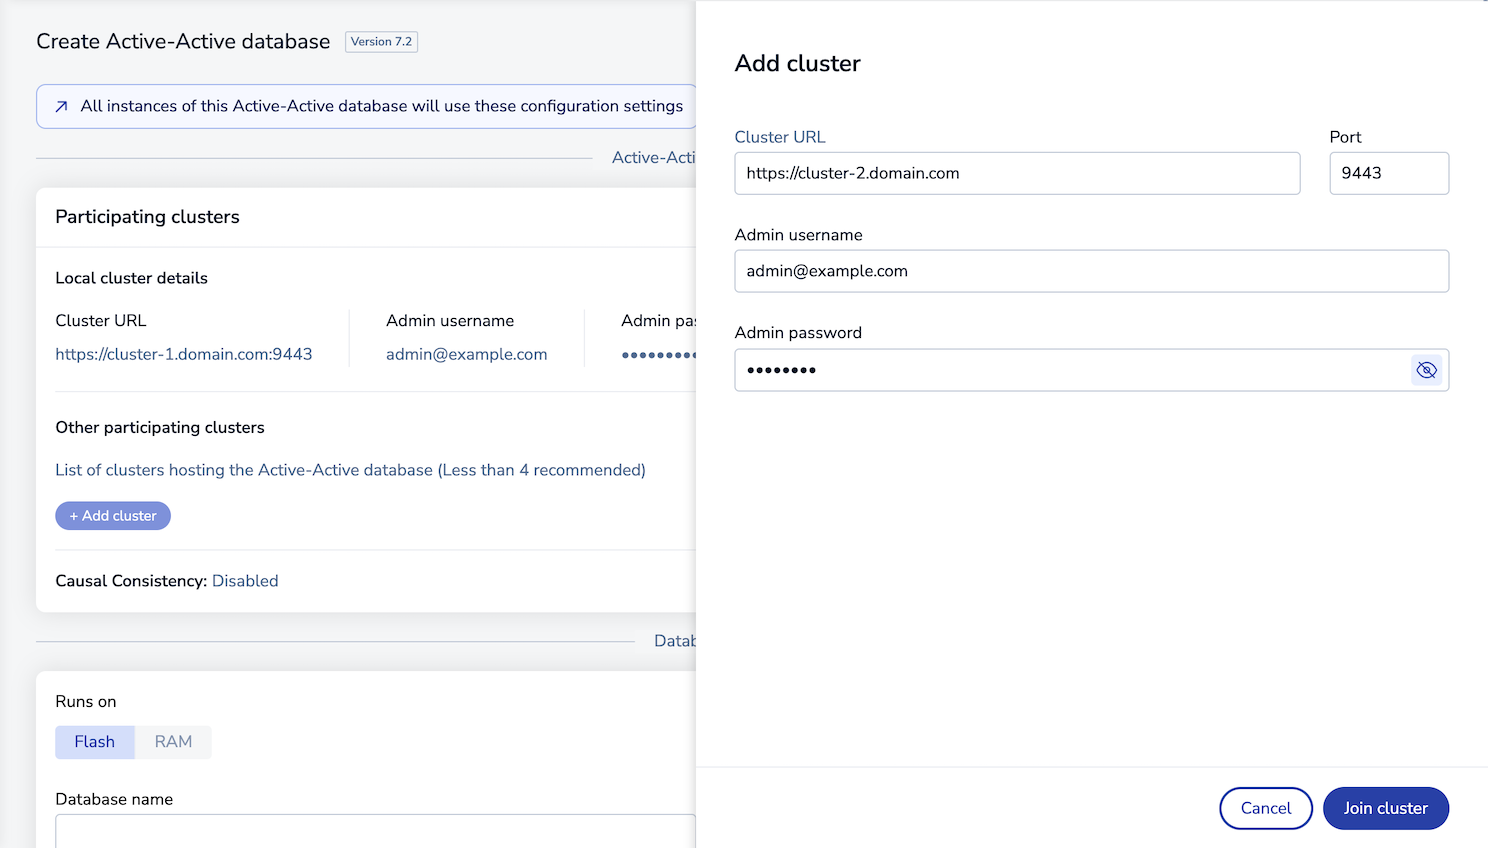
Add participating clusters that will host instances of the Active-Active database:
-
In the Participating clusters section, go to Other participating clusters and click + Add cluster.
-
In the Add cluster configuration panel, enter the new cluster's URL, port number, and the admin username and password for the new participating cluster:
 Note:If an Active-Active database runs on flash memory, you cannot add participating clusters that run on RAM only.
 -
Click Join cluster to add the cluster to the list of participating clusters.
-
-
Enter a Database name.
-
If your cluster supports Redis Flex or Auto Tiering, in Runs on you can select Flash so that your database uses Flash memory. We recommend that you use AOF every 1 sec for the best performance during the initial Active-Active database sync of a new replica.
-
To configure additional database settings, expand each relevant section to make changes.
See Configuration settings for more information about each setting.
-
Click Create.
Configuration settings
-
Database version - The Redis version used by your database.
-
Database name - The database name requirements are:
-
Maximum of 63 characters
-
Only letters, numbers, or hyphens (-) are valid characters
-
Must start and end with a letter or digit
-
Case-sensitive
-
-
Port - You can define the port number that clients use to connect to the database. Otherwise, a port is randomly selected.
Note:You cannot change the port number after the database is created. -
Memory limit - Database memory limits include all database replicas and shards, including replica shards in database replication and database shards in database clustering.
If the total size of the database in the cluster reaches the memory limit, the data eviction policy for the database is enforced.
Note:If you create a database with Auto Tiering enabled, you also need to set the RAM-to-Flash ratio for this database. Minimum RAM is 10%. Maximum RAM is 50%. -
Memory eviction - The default eviction policy for Active-Active databases is
noeviction. Redis Software versions 6.0.20 and later support all eviction policies for Active-Active databases, unless Redis Flex or Auto Tiering is enabled. -
Capabilities (previously Modules) - When you create a new in-memory database, you can enable additional capabilities in the database. You cannot enable them after database creation.
Active-Active databases created with or upgraded to Redis version 8 or later automatically enable search and query and JSON, which allows you to index, query, and perform full-text searches of nested JSON documents.
For Auto Tiering databases, you can enable capabilities that support Auto Tiering. See Redis Software and Redis Stack feature compatibility for compatibility details.
To add capabilities to the database:
-
In the Capabilities section, select one or more capabilities.
-
To customize capabilities, select Parameters and enter the optional custom configuration.
-
Select Done.
-
TLS
If you enable TLS when you create the Active-Active database, the nodes use the TLS mode Require TLS for CRDB communication only to require TLS authentication and encryption for communications between participating clusters.
After you create the Active-Active database, you can set the TLS mode to Require TLS for all communications so client communication from applications are also authenticated and encryption.
High availability
-
Replication - We recommend that all Active-Active database use replication for best intercluster synchronization performance.
When replication is enabled, every Active-Active database master shard is replicated to a corresponding replica shard. The replica shards are then used to synchronize data between the instances, and the master shards are dedicated to handling client requests.
-
Replica high availability - We also recommend that you enable replica high availability to ensure replica shards are highly-available for this synchronization.
Clustering
-
In the Clustering section, you can either:
-
Enable sharding and select the number of shards you want to have in the database. When database clustering is enabled, databases have limitations for multi-key operations.
You can increase the number of shards in the database at any time.
-
Clear the Enable sharding option to use only one shard, which allows you to use multi-key operations without the limitations.
Note:You cannot enable or turn off database clustering after the Active-Active database is created. -
-
OSS Cluster API - The OSS Cluster API configuration allows access to multiple endpoints for increased throughput. The OSS Cluster API setting applies to all instances of the Active-Active database across participating clusters.
This configuration requires clients to connect to the primary node to retrieve the cluster topology before they can connect directly to proxies on each node.
When you enable the OSS Cluster API, shard placement changes to Sparse, and the database proxy policy changes to All primary shards automatically.
Durability
To protect against loss of data stored in RAM, you can enable Persistence to store a copy of the data on disk.
Active-Active databases support append-only file (AOF) persistence only. Snapshot persistence is not supported for Active-Active databases.
Access control
-
Unauthenticated access - You can access the database as the default user without providing credentials.
-
Password-only authentication - When you configure a password for your database's default user, all connections to the database must authenticate with the [AUTH command](/docs/latest/commands/auth/.
If you also configure an access control list, connections can specify other users for authentication, and requests are allowed according to the Redis ACLs specified for that user.
Creating a database without ACLs enables a default user with full access to the database. You can secure default user access by requiring a password.
-
Access Control List - You can specify the user roles that have access to the database and the Redis ACLs that apply to those connections.
You can only configure access control after the Active-Active database is created. In each participating cluster, add ACLs after database creation.
To define an access control list for a database:
Causal consistency
Causal consistency in an Active-Active database guarantees that the order of operations on a specific key is maintained across all instances of an Active-Active database.
To enable causal consistency for an existing Active-Active database, use the REST API.
Test Active-Active database connections
With the Redis database created, you are ready to connect to your database. See Connect to Active-Active databases for tutorials and examples of multiple connection methods.


