Define data pipeline
Define the source connection and data pipeline.
| Redis Cloud |
|---|
After you have prepared your source database and connection information, you can set up your new pipeline. To do this:
- Define the source connection by entering all required source database information.
- Define the data pipeline by selecting the data that you want to sync from your source database to the target database.
Define source connection
-
In the Redis Cloud console, go to your target database and select the Data Pipeline tab.
-
Select Define source database.
-
Enter a Pipeline name.

-
A Deployment CIDR is automatically generated for you. If, for any reason, a CIDR is not generated, enter a valid CIDR that does not conflict with your applications or other databases.
-
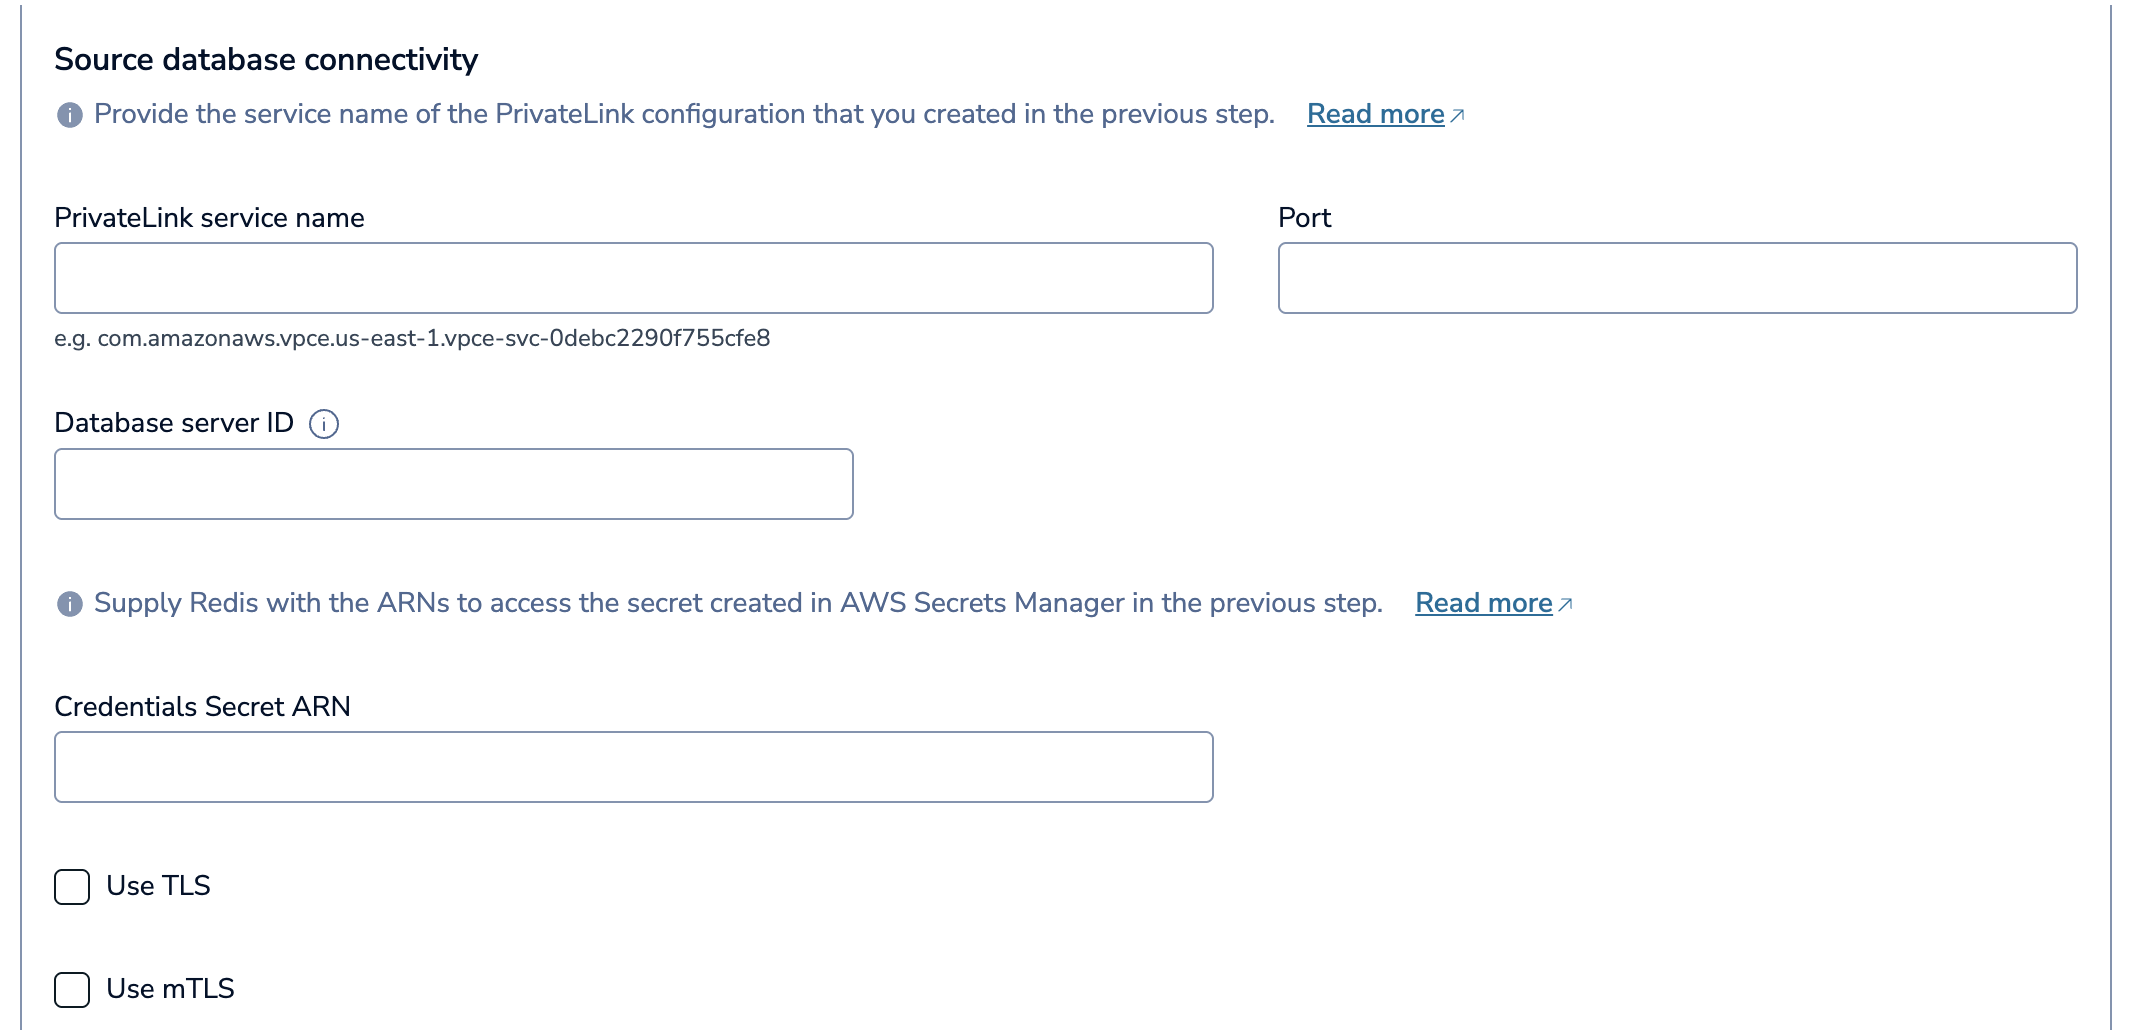
In the Source database connectivity section, enter the PrivateLink service name of the PrivateLink connected to your source database.
-
Enter your database details. This depends on your database type, and includes:
- Port: The database's port
- Database: Your database's name, or the root database (PostgreSQL, Oracle only), or a comma-separated list of one or more databases you want to connect to (SQL Server only)
- Database Server ID: Unique ID for the replication client. Enter a number that is not used by any existing replication clients (mySQL and mariaDB only)
- PDB: Name of the Oracle pluggable database (Oracle only)
-
Enter the ARN of your database credentials secret in the Source database secrets ARN field.
-
If your database requires TLS, select Use TLS. Enter the ARN of your CA certificate secret in the CA Cert Secret ARN field.

-
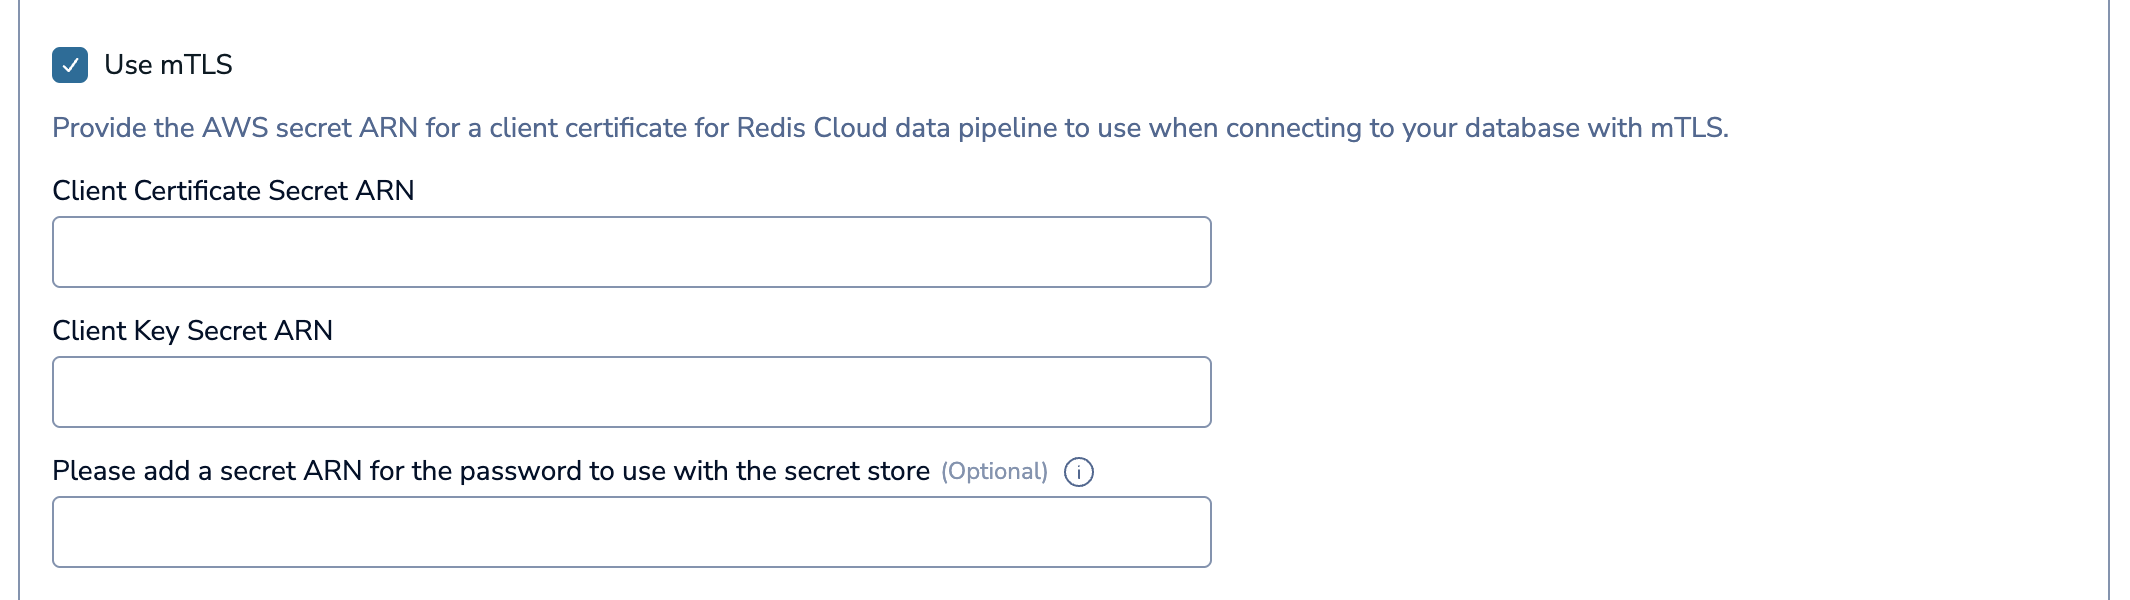
If your database requires mTLS, select Use mTLS. Enter the ARN of your Client certificate secret in the Client Certificate Secret ARN field and the ARN of your Client key secret in the Client Key Secret ARN field.
-
If your database requires mTLS with a client key passphrase, enter the ARN of your Client key passphrase secret in the Please add a secret ARN for the password to use with the secret store field.
-
Select Advanced properties to configure additional optional properties for your pipeline.
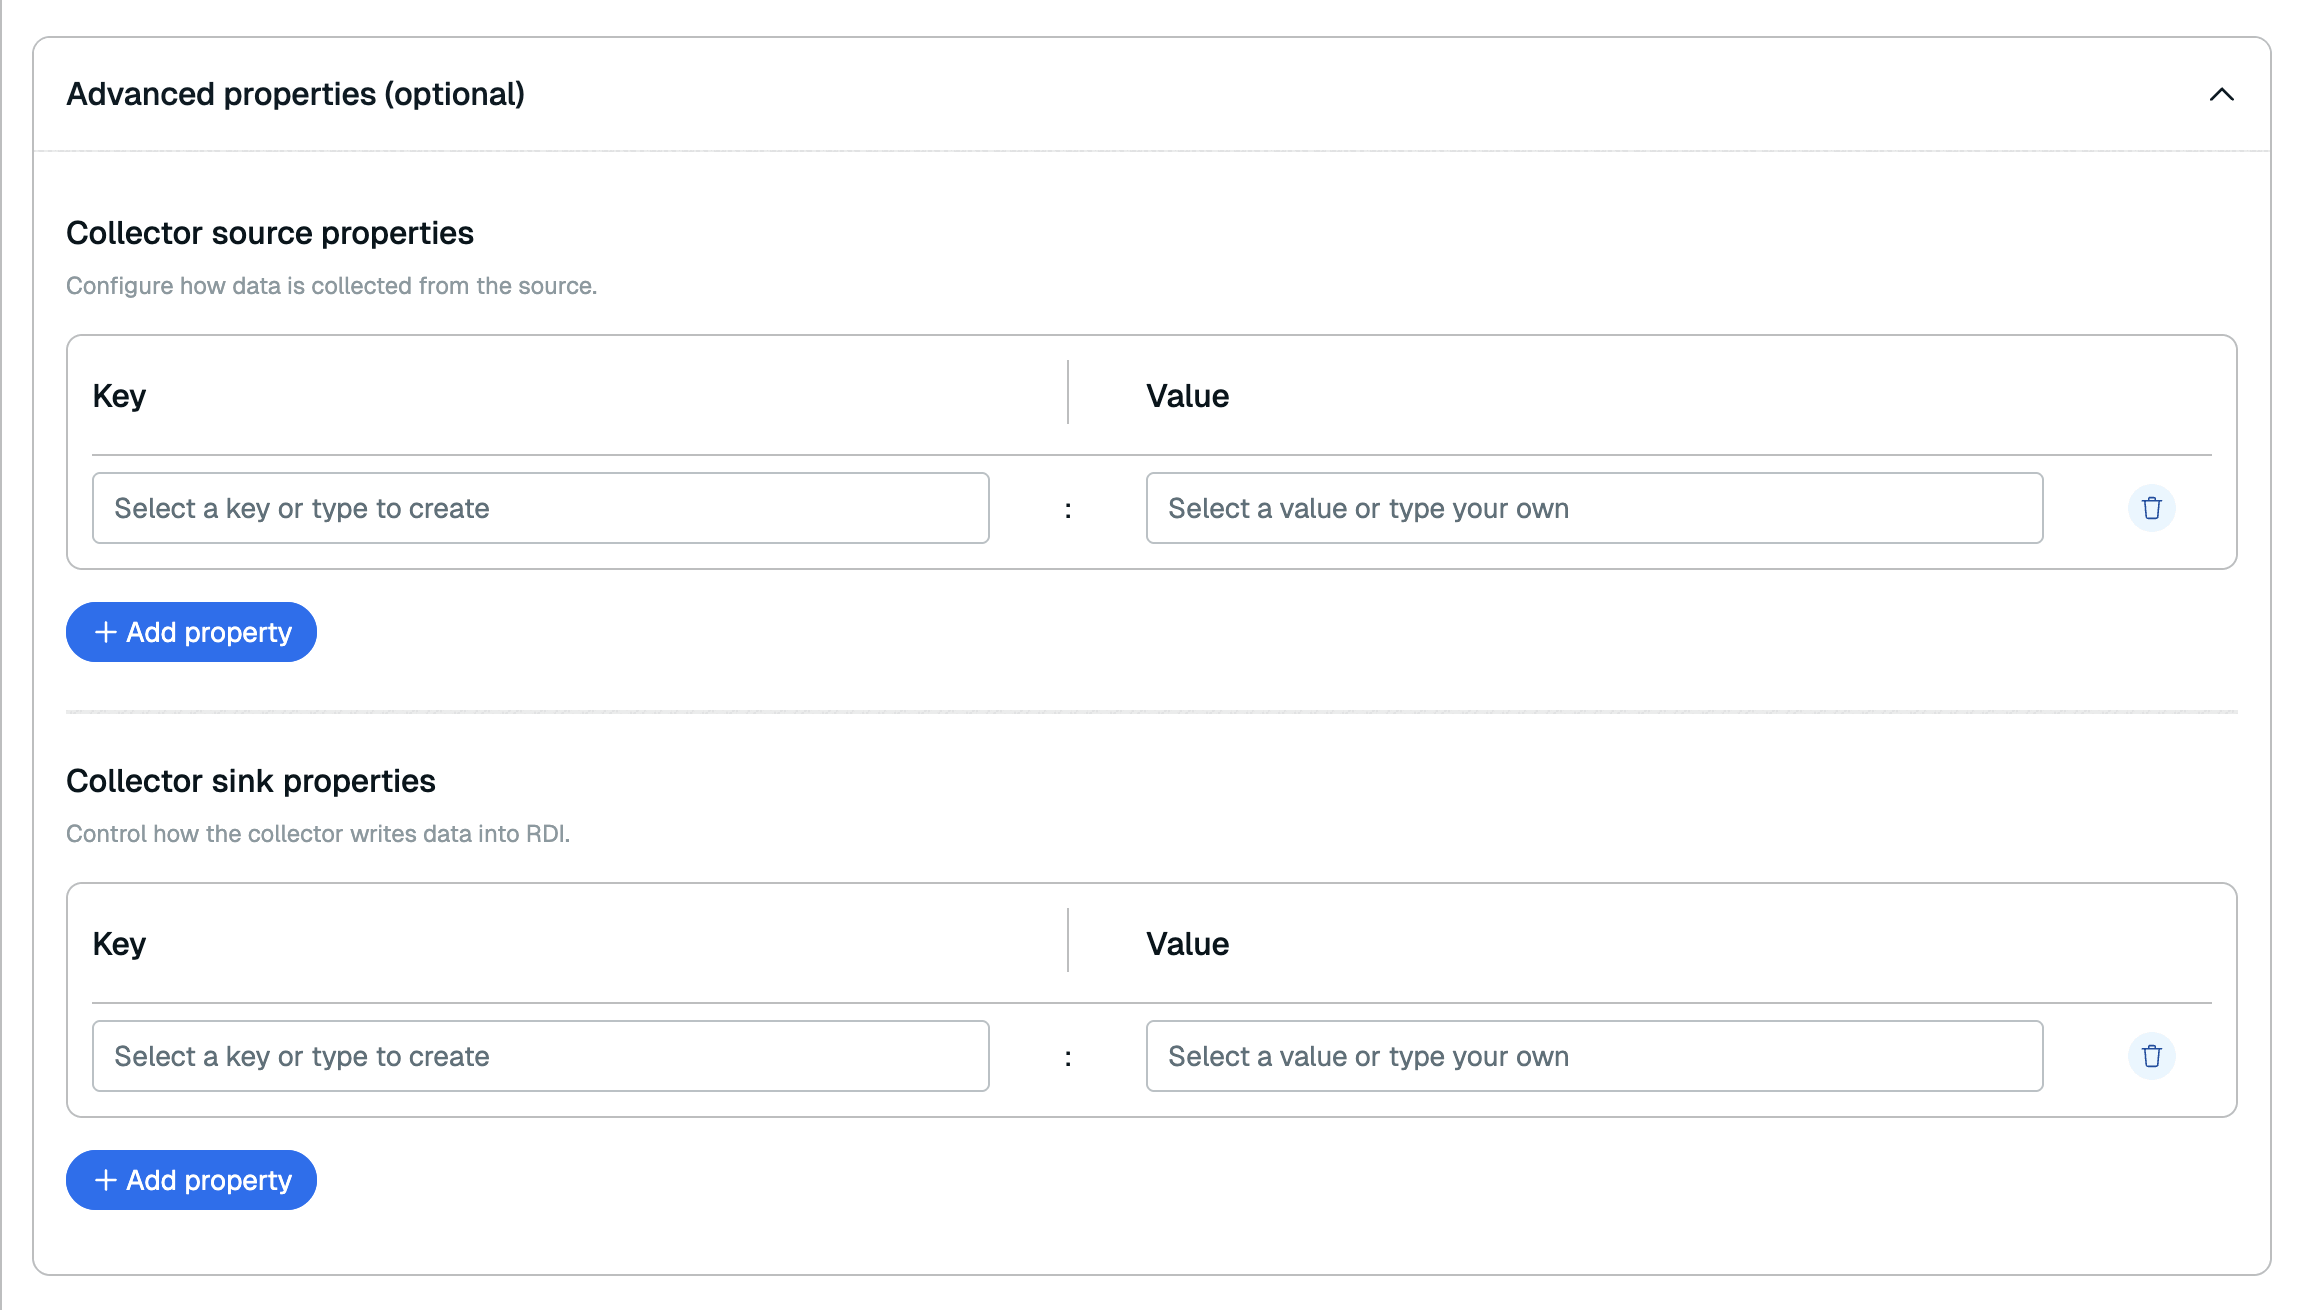 You can add any Debezium source property for your source database type in the Collector source properties section and any Redis server Debezium sink property in the Collector sink properties section.
 -
Select Start pipeline setup.

-
Redis Cloud will attempt to connect to PrivateLink. If your PrivateLink does not allow automatic acceptance of incoming connections, accept the incoming connection on AWS PrivateLink to proceed. See Accept or Reject PrivateLink connection requests.
If Redis Cloud can't find your PrivateLink connection, make sure that the PrivateLink service name is correct and that Redis Cloud is listed as an Allowed Principal for your VPC. See Set up connectivity for more info.
At this point, Redis Cloud will provision the pipeline infrastructure that will allow you to define your data pipeline.
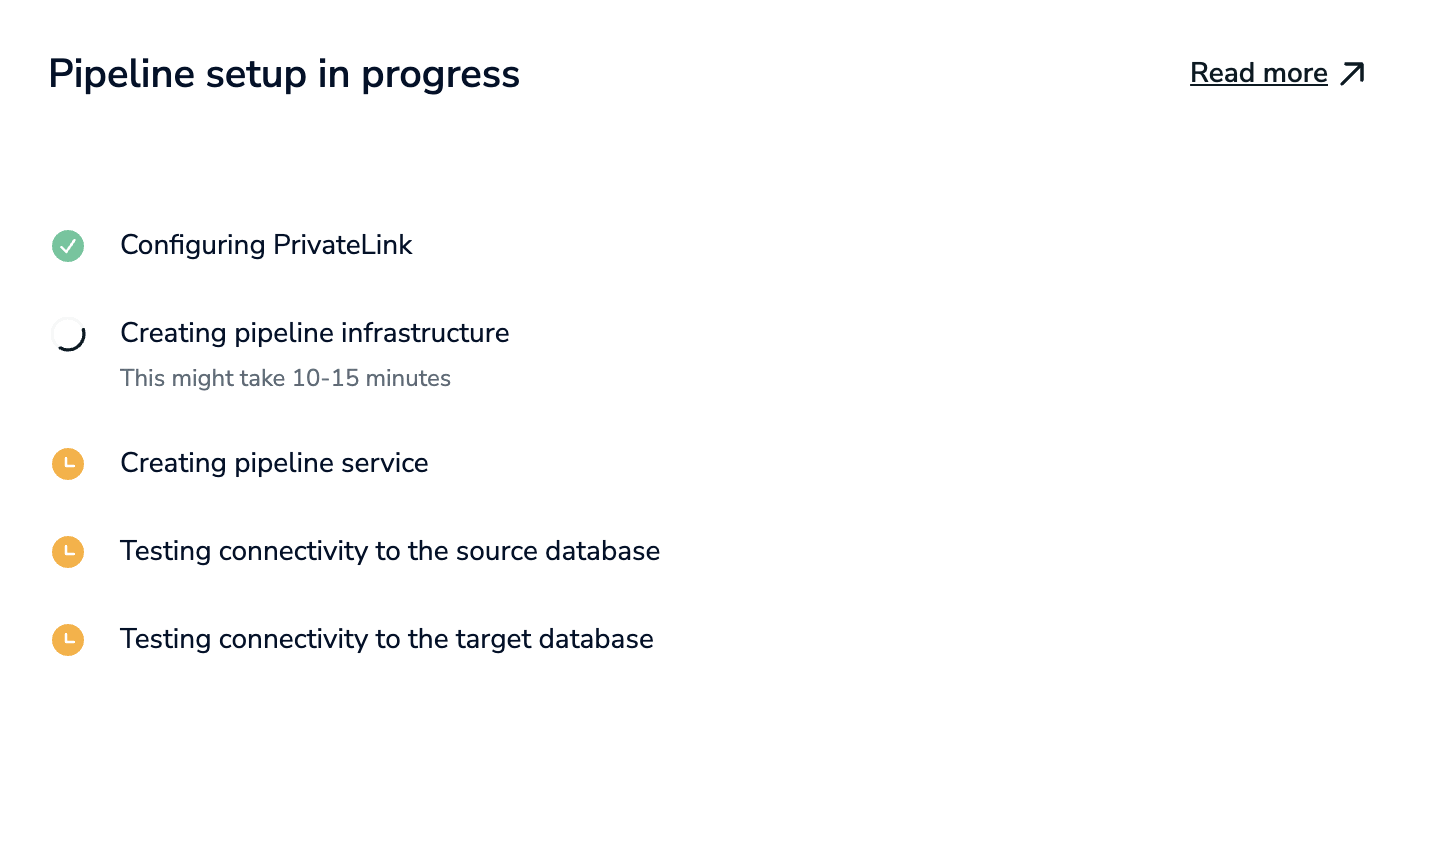
Pipelines are provisioned in the background. You aren't allowed to make changes to your data pipeline or to your database during provisioning. This process will take about an hour, so you can close the window and come back later.
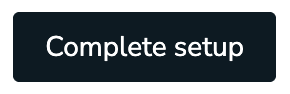
When your pipeline is provisioned, select Complete setup. You will then define your data pipeline.
Define data pipeline
After your pipeline is provisioned, you will be able to define your pipeline. You will select the database schemas, tables, and columns that you want to import and synchronize with your primary database.
Configure a new pipeline
-
In the Redis Cloud console, go to your target database and select the Data Pipeline tab. If your pipeline is already provisioned, select Complete setup to go to the Data modeling section.
-
Select the Schema and Tables you want to migrate to the target database from the list.
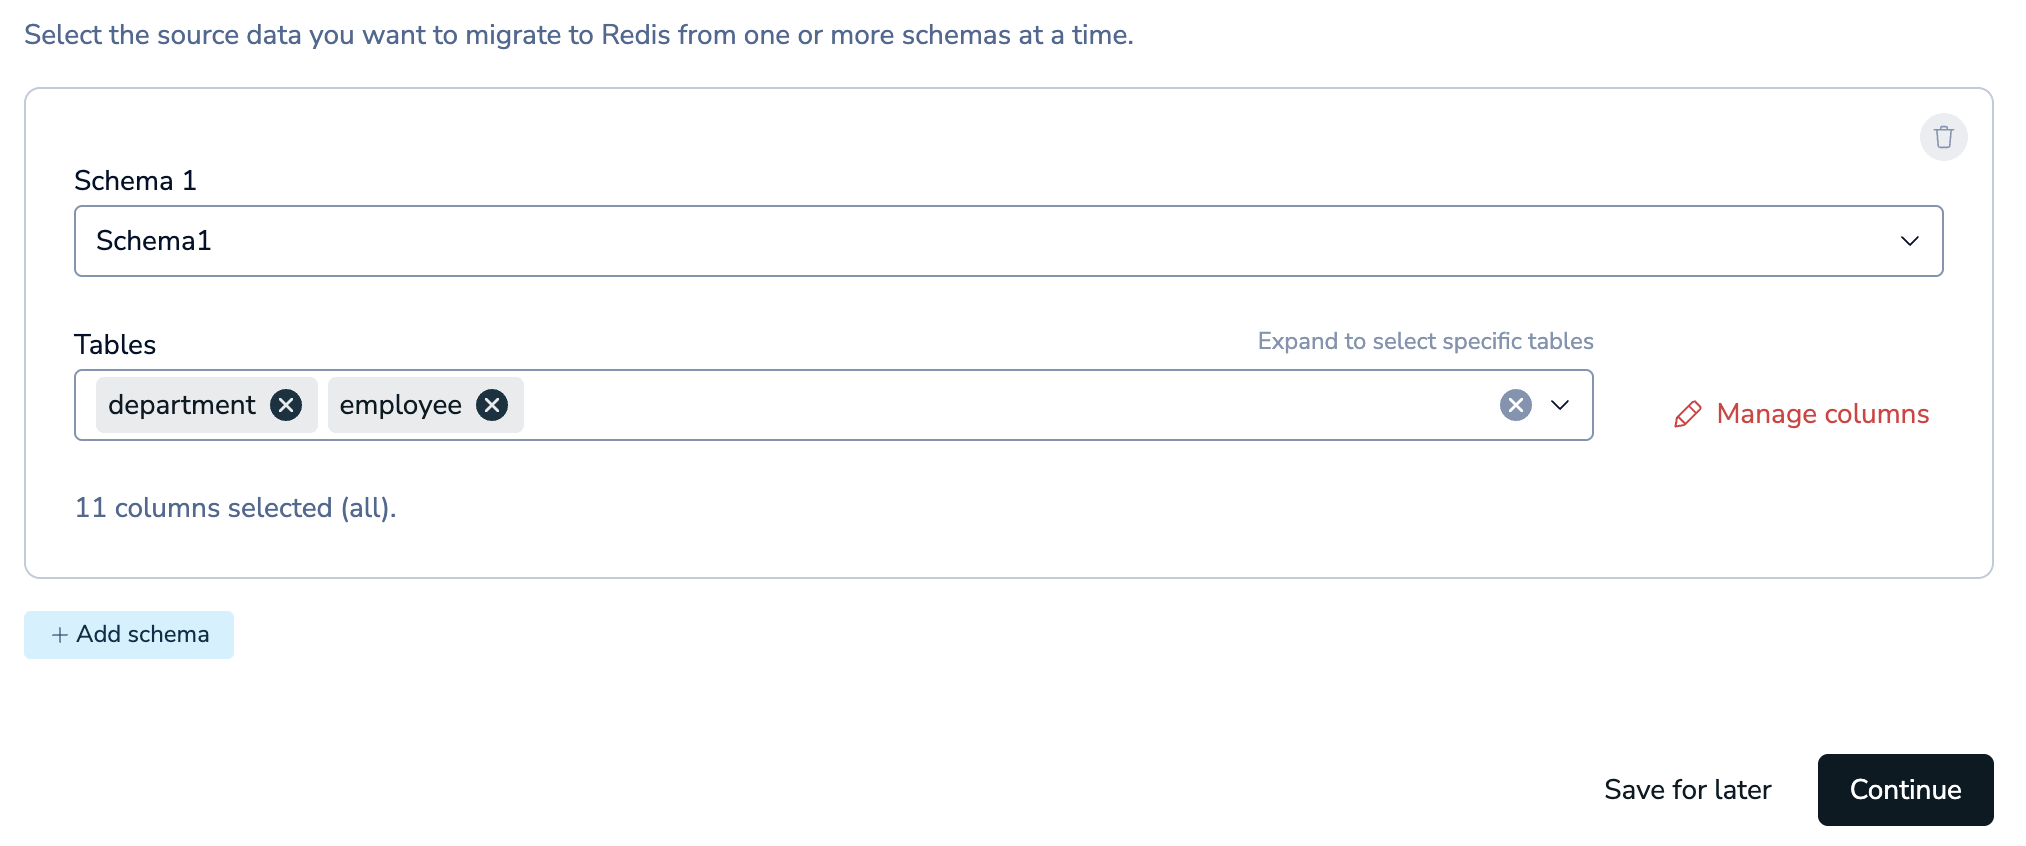
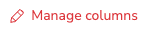
Select Manage Columns to choose which columns you want to import.
You can select any number of columns from a table.
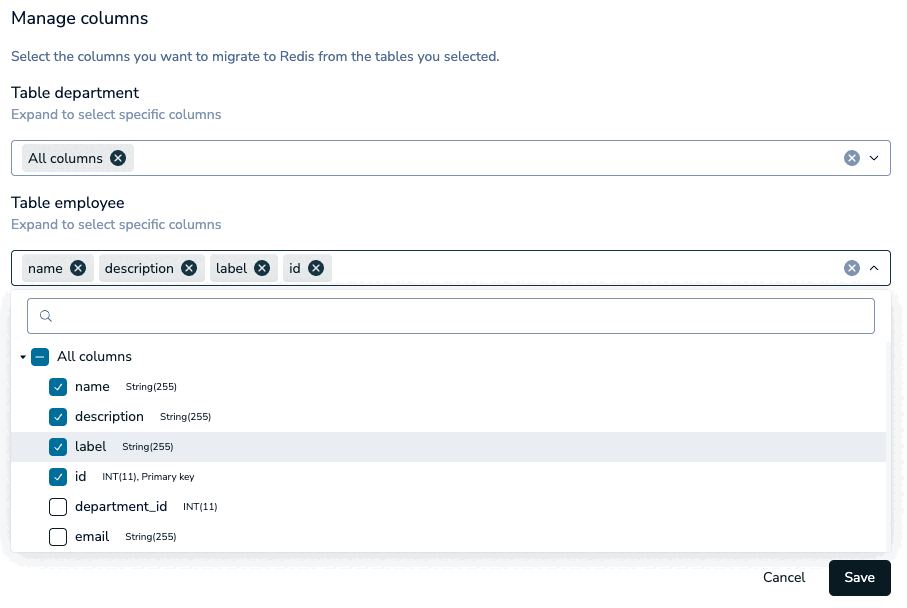
If any tables are missing a unique constraint, a warning will appear in the Data modeling section. Select Manage columns to select the columns that define a unique constraint for those tables.
Select Save to save your column changes and go back to schema selection.

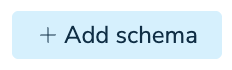
Select Add schema to add more database schemas.
Select Delete to delete a schema. You must have at least one schema to continue.

After you've selected the schemas and tables you want to sync, select Continue.

-
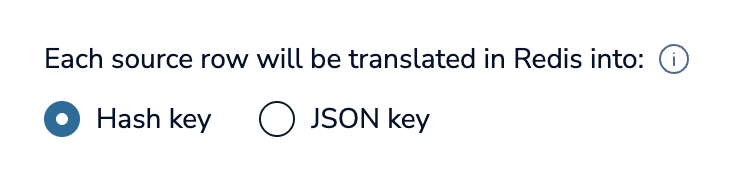
Select the Redis data type to write keys to the target. You can choose Hash key or JSON key if the target database supports JSON.
You can also supply one or more transformation job files that specify how you want to transform the captured data before writing it to the target. Select Upload jobs to upload your job files.

When you upload job files, Redis Cloud will validate the job files to check for errors.
Select Continue.
-
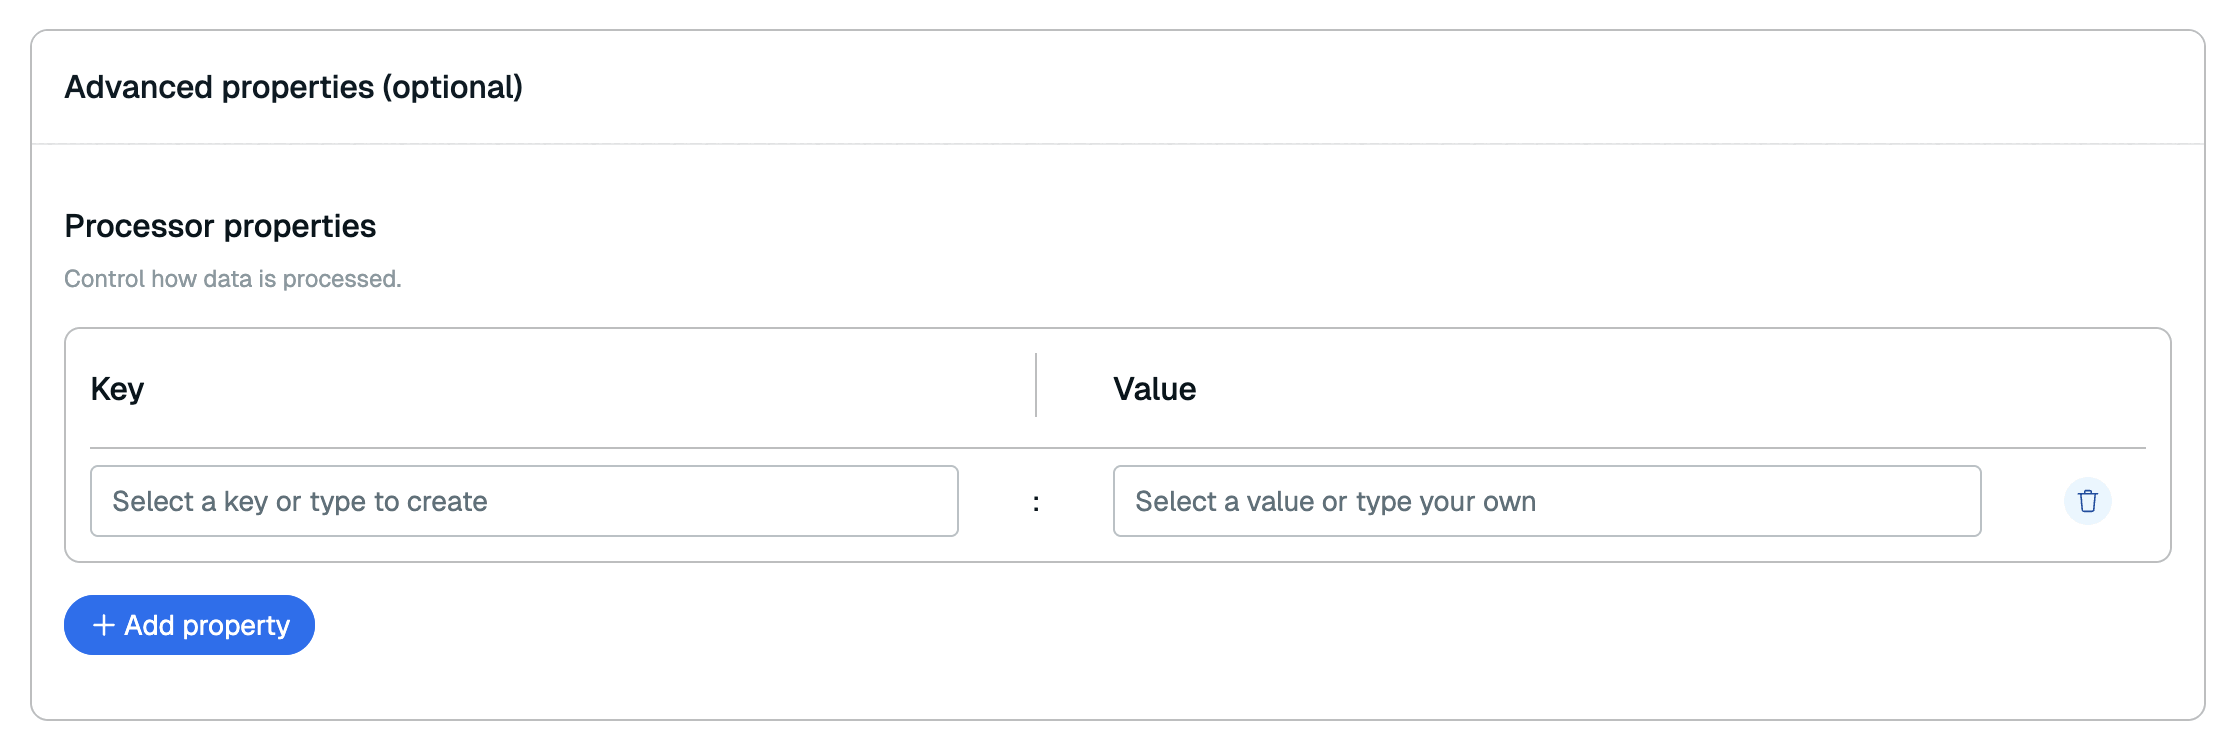
In the Advanced properties section, you can add any processor properties to control how the data is processed. See the RDI configuration file reference for all available processor properties.
Select Continue.
-
Review the tables you selected in the Review and deploy section. If everything looks correct, select Confirm & Deploy to start ingesting data from your source database.
At this point, the data pipeline will ingest data from the source database to your target Redis database. This process will take time, especially if you have a lot of records in your source database.
After this initial sync is complete, the data pipeline enters the change streaming phase, where changes are captured as they happen. Changes in the source database are added to the target within a few seconds of capture.
You can view the status of your data pipeline in the Data pipeline tab of your database. See View and edit data pipeline to learn more.