Create a Pro database with a new subscription
Shows how to create a Pro database with a new subscription
| Redis Cloud |
|---|
Redis Cloud Pro supports more databases, larger databases, greater throughput, and unlimited connections compared to Redis Cloud Essentials. Redis Cloud Pro databases are perfect for teams building mission-critical systems in the cloud.
Before creating a Redis Cloud database, you need to create an account.
To create a database in your Redis Cloud account:
-
Sign in to the Redis Cloud console.
-
Select the New database button.

This displays the Create database screen.
-
Select the type of subscription you need. For this guide, select Pro.
 Note:
Note:This guide shows how to create a Pro database with a new subscription.
- If you already have a Pro subscription and want to add a database to it, see Create a Pro database in an existing subscription.
- If you'd rather create an Essentials database, see Create an Essentials database.
After you select Pro, the Database settings section will appear.

You can choose to create your database in one of two ways:
- Easy create selects the optimal settings for you to get started faster.
- Custom settings lets you select all of the configuration options for your new database.
Create database with Easy create
If you choose to create your database with Easy create:
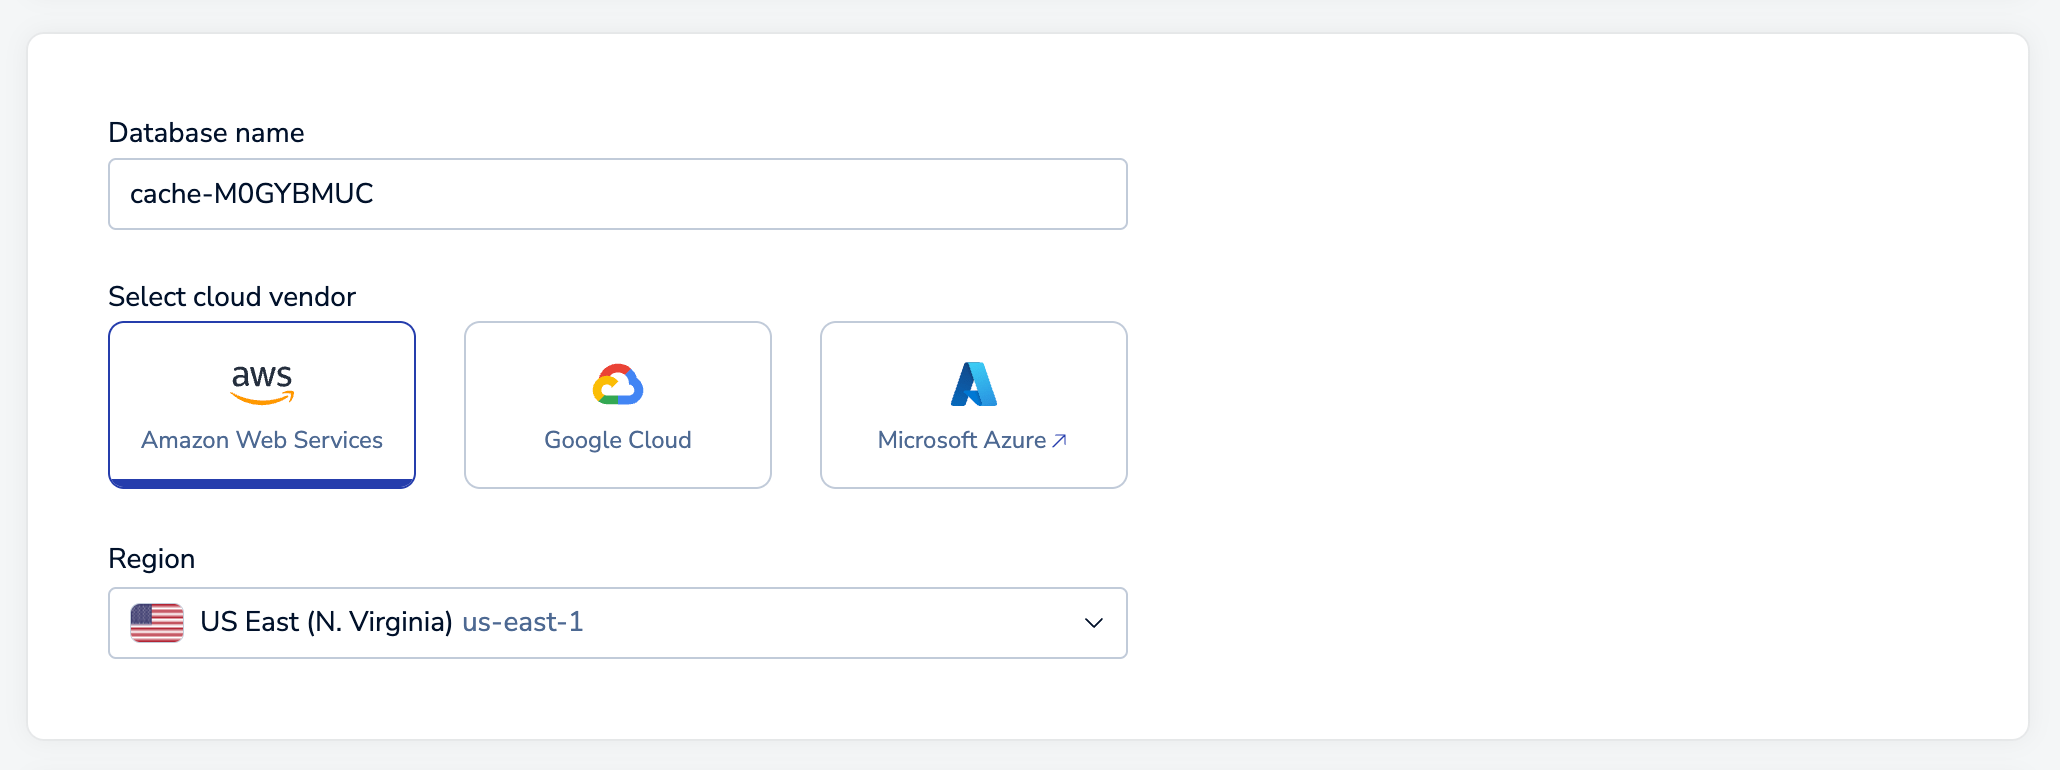
-
Choose a Cloud Provider and a Region.
-
Enter the following settings for your database:

Database setting Description Name The name for your database. Redis will generate a database name for you, but you can change it at any time. Dataset size (GB) The amount of data for your dataset. See Dataset size for sizing considerations.
Databases with Search and query have specific sizing requirements, see Search and query sizing for more information.Throughput Identifies maximum throughput for the database, which is specified in terms of operations per second (Ops/sec). See Throughput for more information.
Databases with Search and query have specific throughput requirements, see Search and query sizing for more information.High Availability Indicates whether a replica copy of the database is maintained in case the primary database becomes unavailable. (Warning: doubles memory consumption). See High Availability. -
Select View all settings to review the database settings that we selected for you.
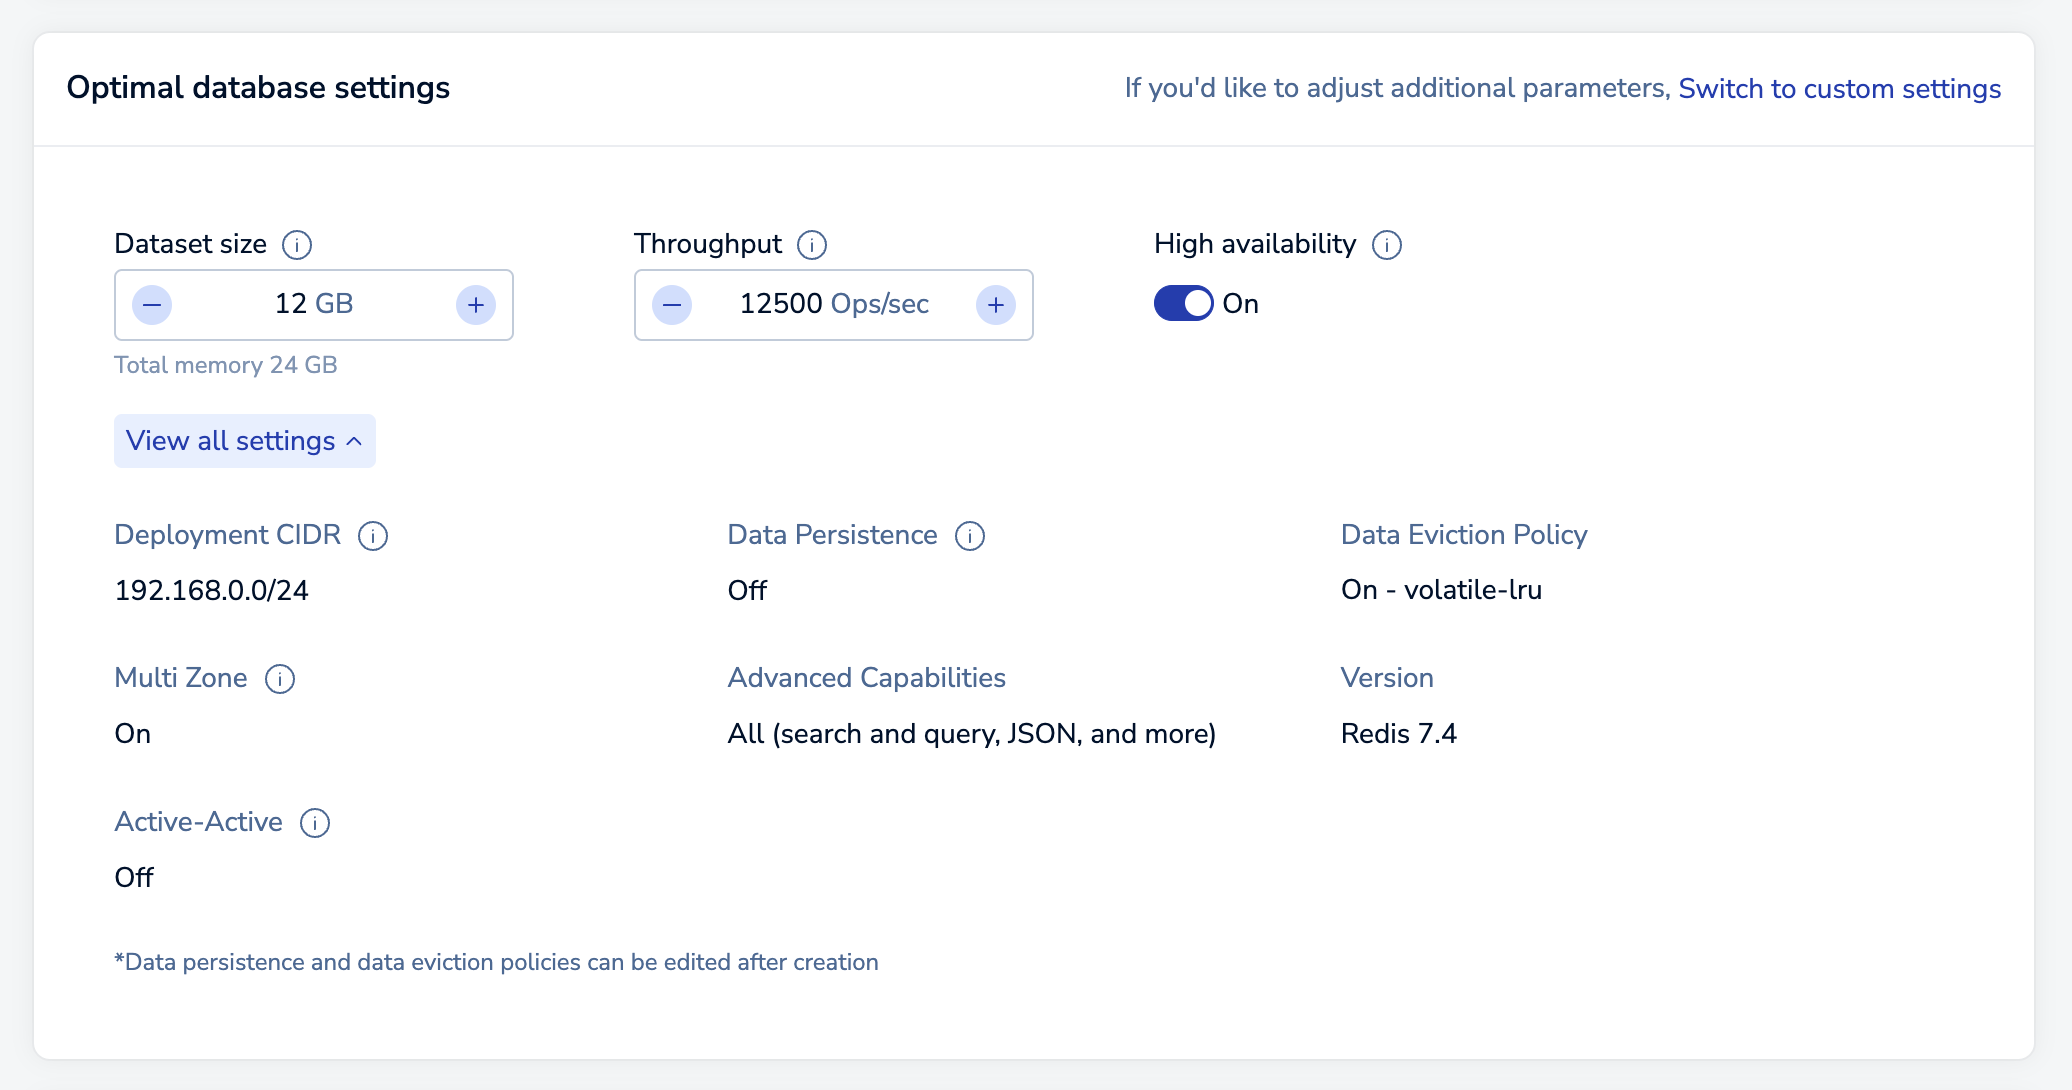
If you want to change these settings, select Switch to custom settings.
-
Enter your payment details.
If you haven't previously entered a payment method, use the Add Credit Card button to add one.

If you have not already added a business address to your account, you must enter one. Redis uses your business address for communication, invoicing, and tax purposes.
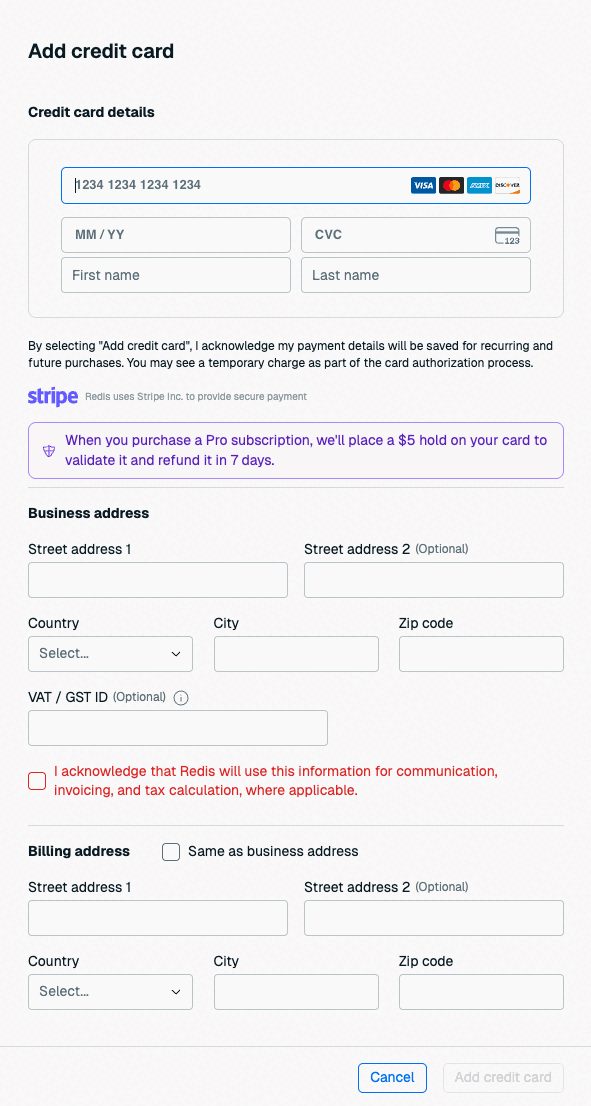
If you already have a business address, you don't need to enter one here. See Account settings to learn how to update your business address.

If the card's billing address is the same as your account's business address, select Same as business address to fill the billing address with your business address details.
Select Confirm & pay to create your database.

Note that databases are created in the background. While they are provisioning, you aren't allowed to make changes. This process generally takes 10-15 minutes.
Use the Database list to check the status of your databases.
Create database with Custom settings

If you choose to create your database with custom settings, you need to:
-
Set up the deployment options, including cloud vendor details, high availability settings, and advanced options.
-
Define the database size requirements.
-
Review your choices, provide payment details, and then create your databases.
The following sections provide more information.
Set up deployment details
The Setup tab specifies general settings for your Redis deployment.

There are two sections on this tab:
- General settings include the cloud provider details and specific configuration options.
- Advanced options define settings for high availability and security. Configurable settings vary according to cloud provider.
General settings
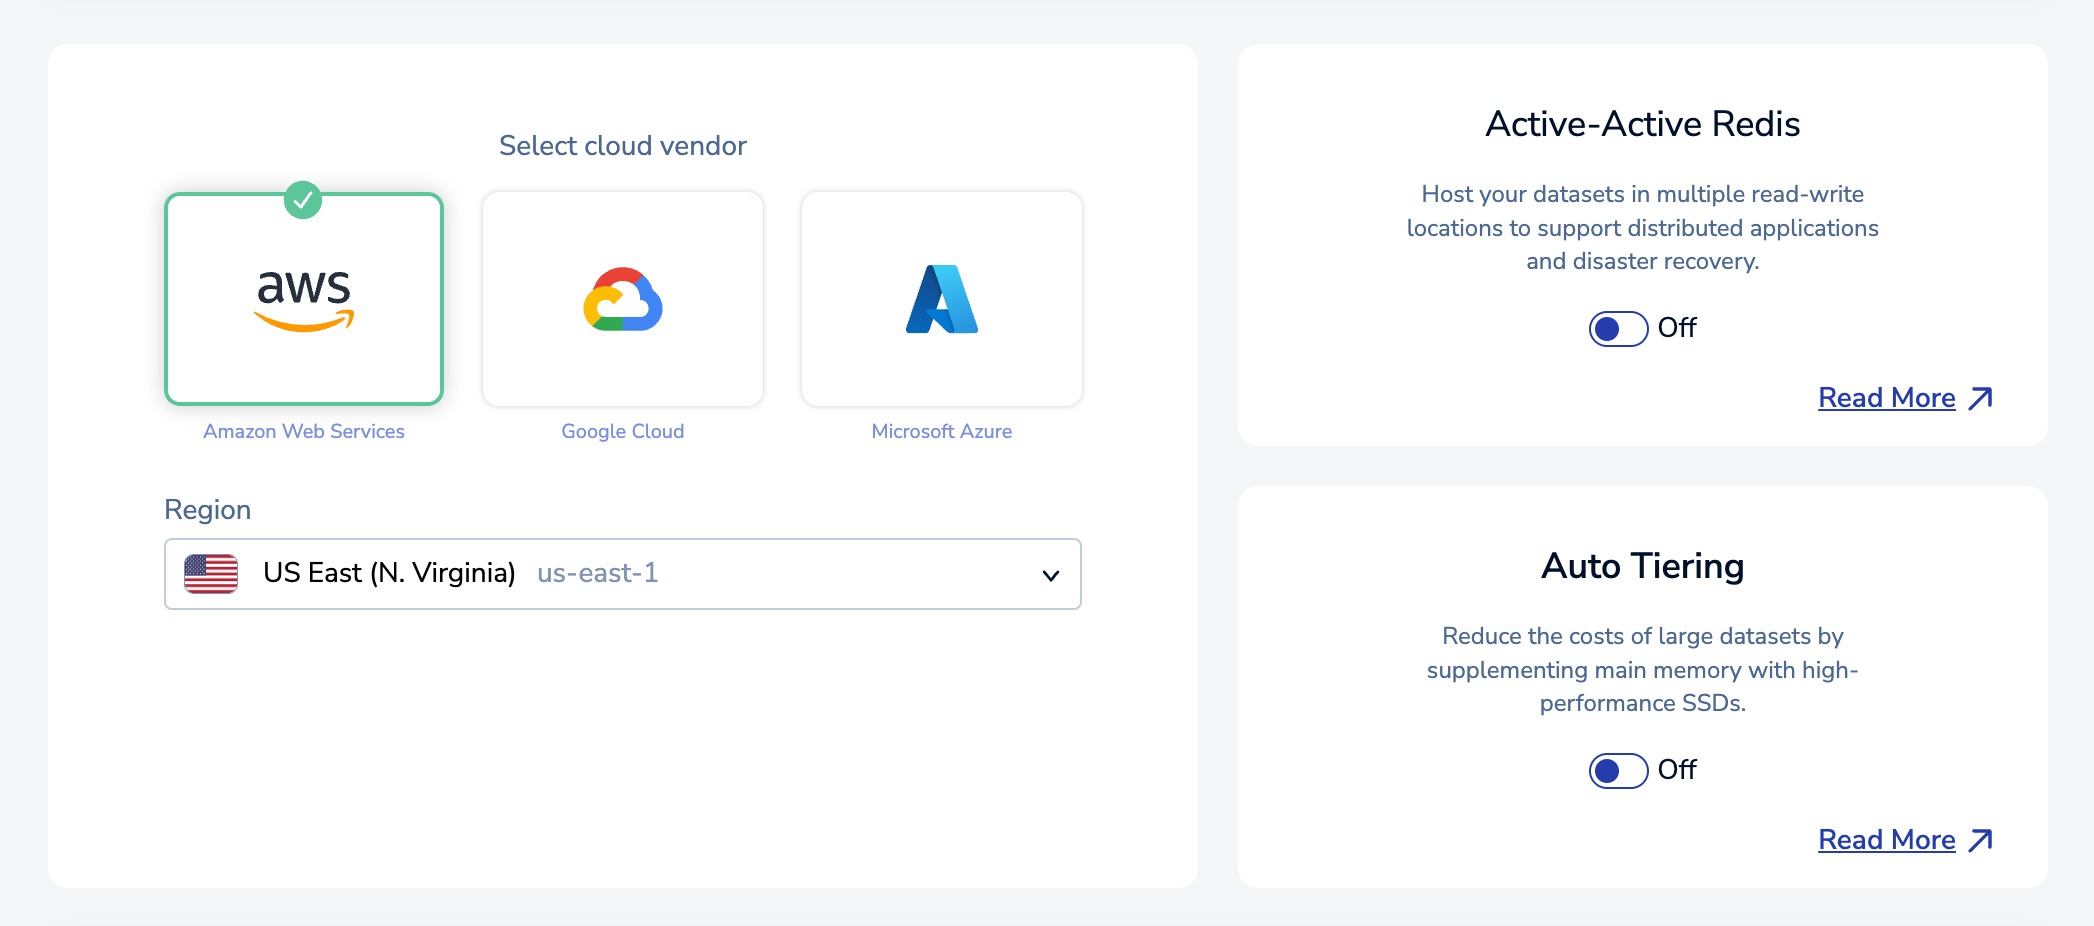
In the General settings of the Setup tab, you need to:
-
Select the public Cloud vendor to deploy your databases.
-
Select the Region where you want to deploy your database.
Note:This guide is for single region database deployment. If you want to create a multi-region Active-Active database, see Create an Active-Active database for specific steps and configuration options exclusive to Active-Active.
Advanced options
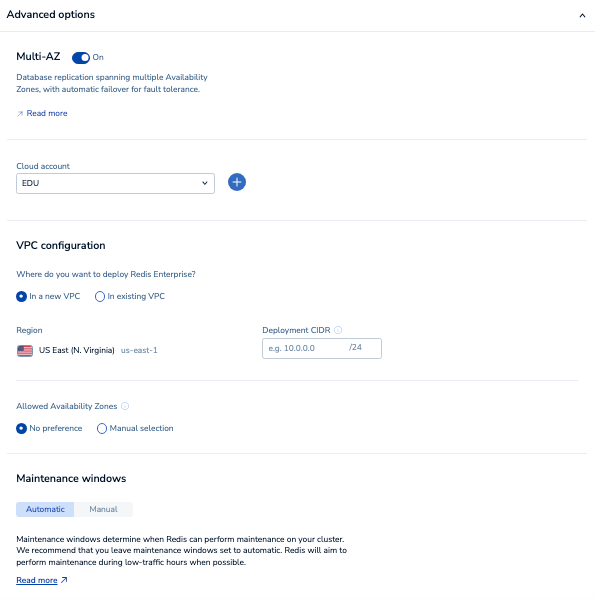
The following settings are defined in the Advanced options of the Setup tab:
| Advanced option | Description |
|---|---|
| Redis Flex | Determines if your databases are stored only in memory (RAM) or are split between memory and Flash storage (RAM+Flash). See Redis Flex for more information. |
| BYOC account | To deploy these databases to an existing cloud account, select it here. Use the Add button to add a new cloud account. (Available only if Redis Cloud Bring your own Cloud is enabled) |
| Multi-AZ | Determines if replication spans multiple Availability Zones, which provides automatic failover when problems occur. See High Availability. |
| VPC configuration | Select In a new VPC to deploy to a new virtual private cloud (VPC). To deploy these databases to an existing virtual private cloud, select In existing VPC and then set VPC ID to the appropriate ID value. (Available only if Redis Cloud Bring your own Cloud is enabled and you have selected an existing BYOC account) |
| Allowed Availability Zones | The availability zones for your selected region. If you choose Manual selection, you must select at least one zone ID from the Zone IDs list. For more information, see Availability zones. |
| Deployment CIDR | The CIDR range of IP addresses for your deployment. Redis creates a new subnet for the Deployment CIDR in your virtual private cloud (VPC). It cannot overlap with the CIDR ranges of other subnets used by your account. For deployments in an existing VPC, the Deployment CIDR must be within your VPC's primary CIDR range (secondary CIDRs are not supported). |
| Public endpoint access | Select whether or not to block public endpoints for all databases in the subscription. |
| Maintenance windows | Determines when Redis can perform maintenance on your databases. Select Manual if you want to set manual maintenance windows. |
When finished, choose Continue to determine your size requirements.

Sizing tab
The Sizing tab helps you specify the database, memory, and throughput requirements for your subscription.
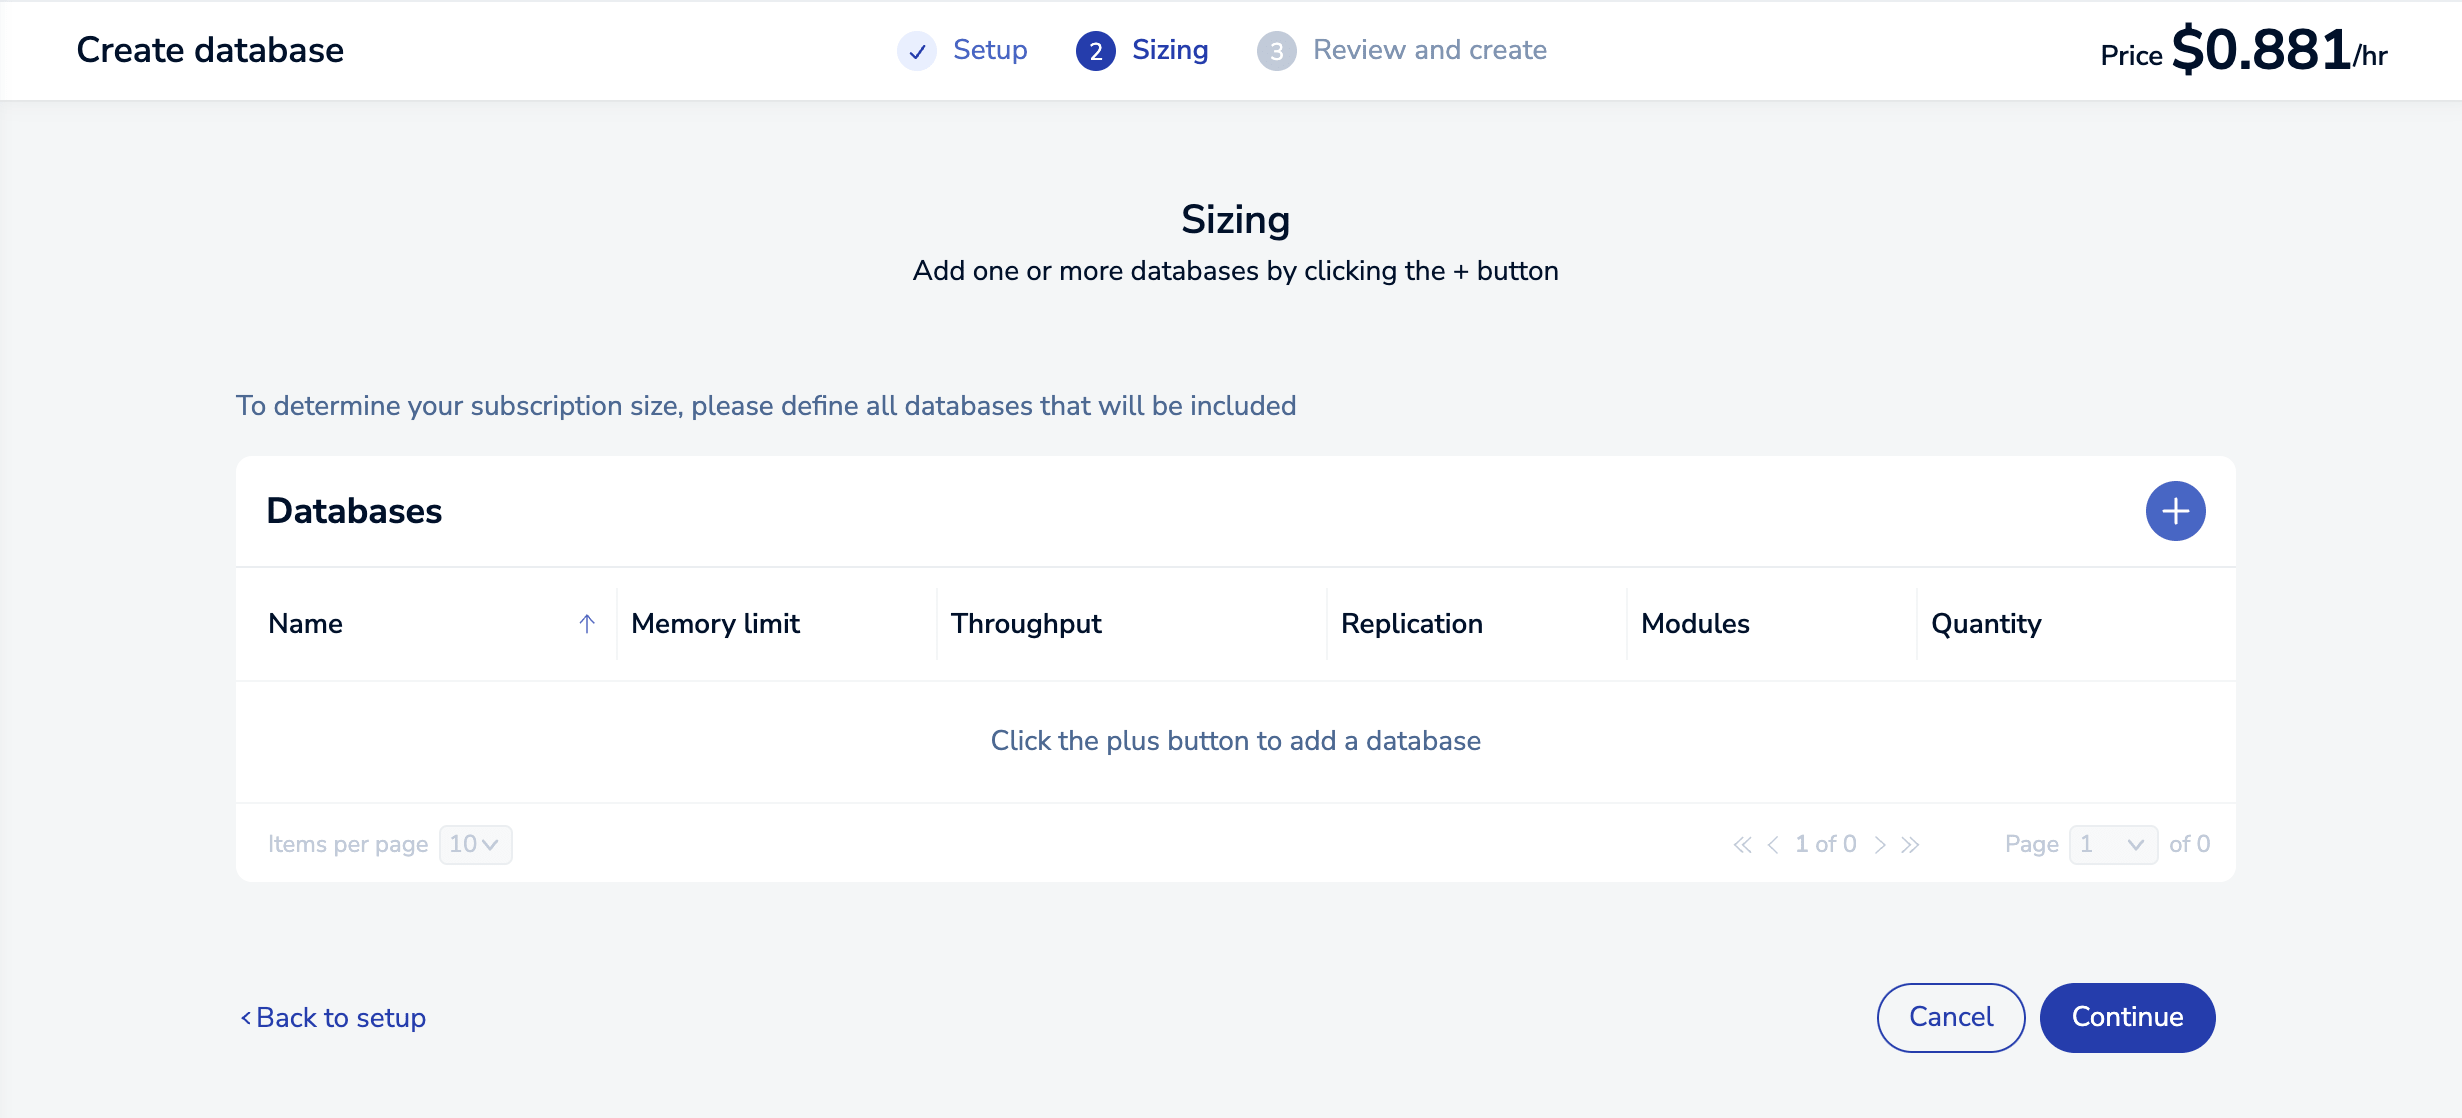
When you first visit the Sizing tab, there are no databases defined. Select the Add button to create one.
This opens the Database configurations dialog, which lets you define the requirements for your new database.
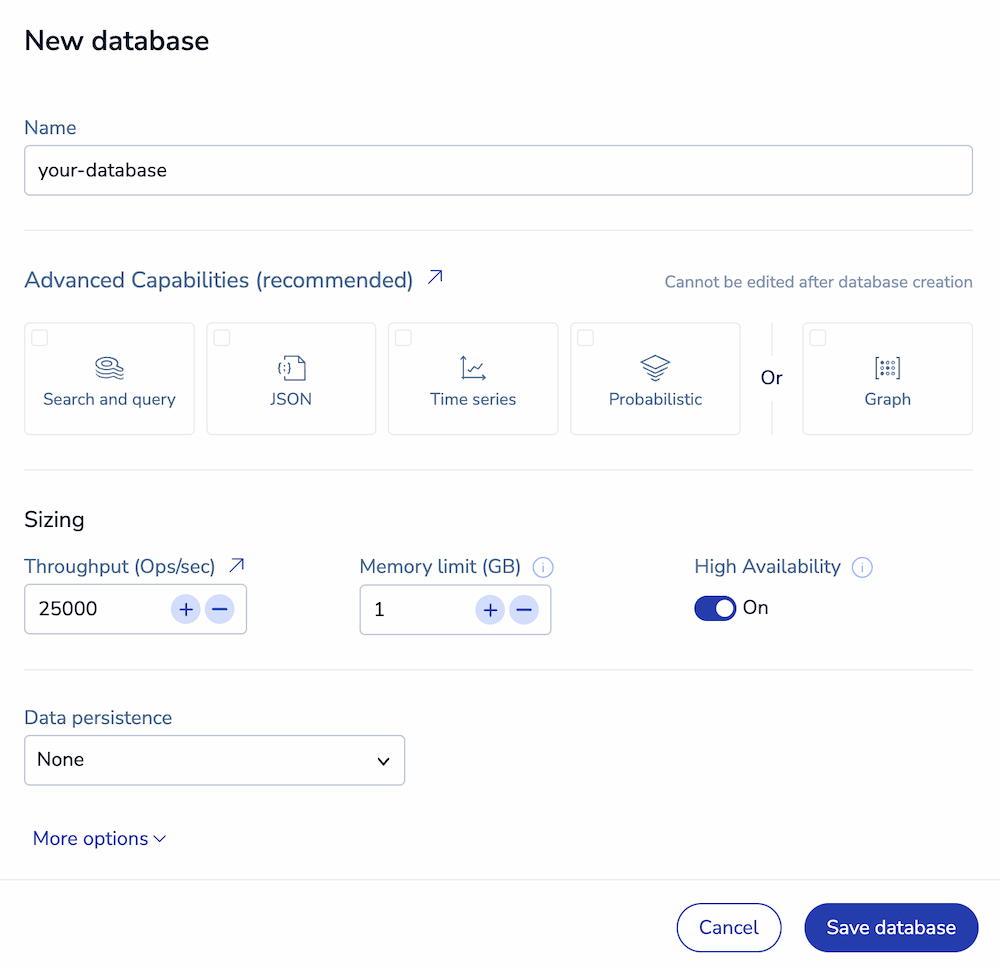
By default, you're shown basic settings, which include:
| Database setting | Description |
|---|---|
| Name | Redis Cloud generates a database name for you, but you can change it at any time. |
| Version | The Redis version for your database. We recommend you choose the latest available version. See Redis version management for more information. |
| Dataset size (GB) | The amount of data for your dataset. Specify small sizes as decimals of 1.0 GB; example: 0.1 GB (minimum). We calculate the total memory limit for you based on the other settings you choose for your database. Databases with Search and query have specific sizing requirements, see Search and query sizing for more information. |
| High Availability | Indicates whether a replica copy of the database is maintained in case the primary database becomes unavailable. (Warning: Doubles memory consumption). See High Availability. |
| Throughput | Identifies maximum throughput for the database, which is specified in terms of operations per second (Ops/sec). See Throughput for more information. Databases with Search and query have specific throughput requirements. See Search and query sizing for more information. |
| Hashing policy | Determines how data is distributed across multiple Redis processes of a database. Available options depend on your account creation date. See Clustering for more information. |
| Query performance factor | (Search and query databases on Redis 7.2 or later only) Adds additional compute power to process your query and vector search workloads and boost your queries per second. See Search and query sizing for more information. |
| Data Persistence | Defines the data persistence policy, if any. See Data persistence. |
Select More options to specify values for the following settings.
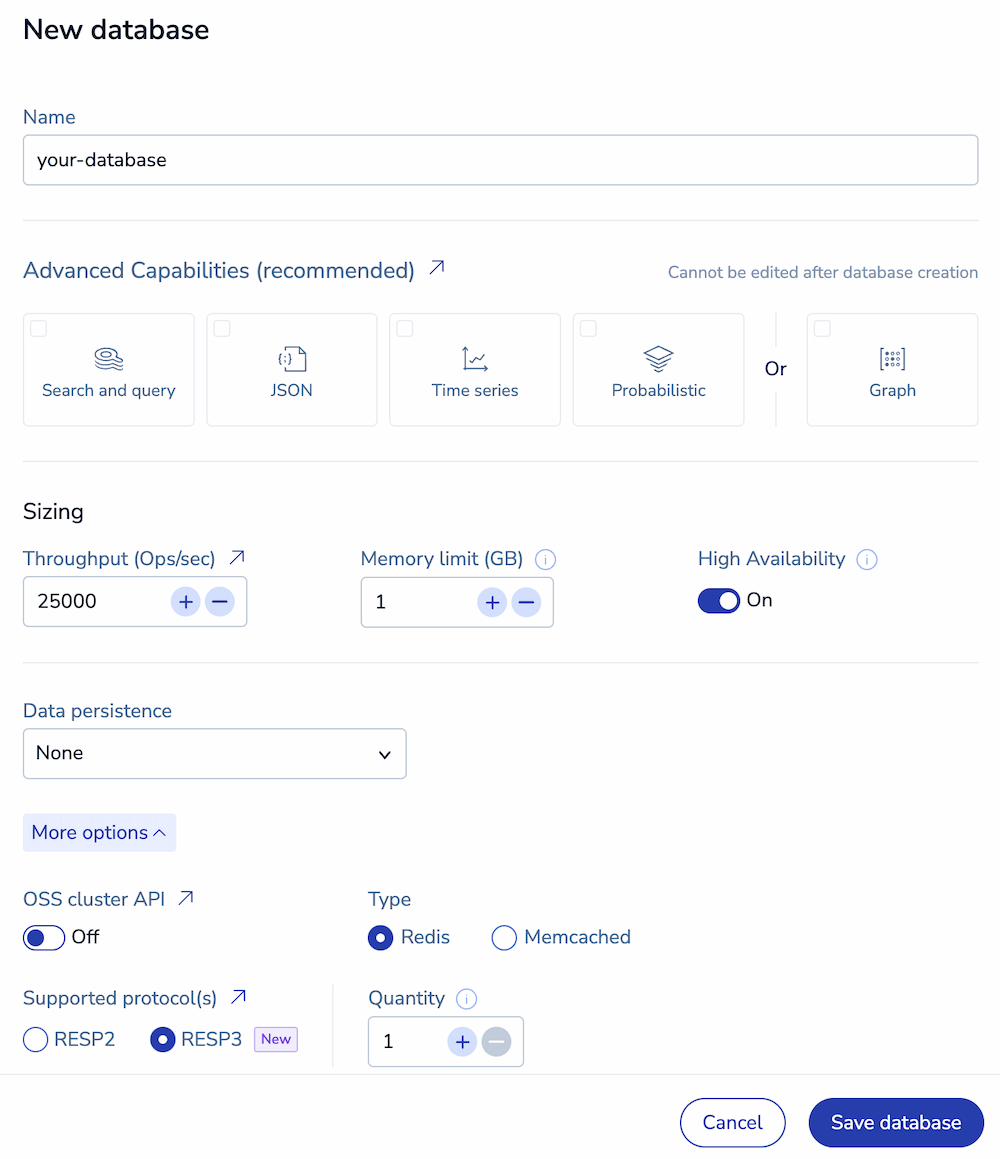
| Database option | Description |
|---|---|
| Advanced Capabilities | Advanced features and data types used by the database. Starting with Redis 8.0, all advanced capabilities are included in Redis by default. |
| OSS Cluster API | Enable to use the OSS Cluster API. |
| Type | Set to Redis, otherwise Memcached database for legacy database support. |
| Supported Protocol(s) | Choose between RESP2 and RESP3 (Redis 7.2 and later only). See Redis serialization protocol for details |
| Quantity | Number of databases to create with these settings. |
When finished, select Save configuration to save your database configuration.

Use the Add database button to define additional databases or select the Continue button to display the Review and create tab.
Hover over a database to see the Edit and Delete icons. You can use the Edit icon to change a database or the Delete icon to remove a database from the list.
Review and Create tab
The Review & Create tab provides a cost estimate for your Redis Cloud Pro plan:
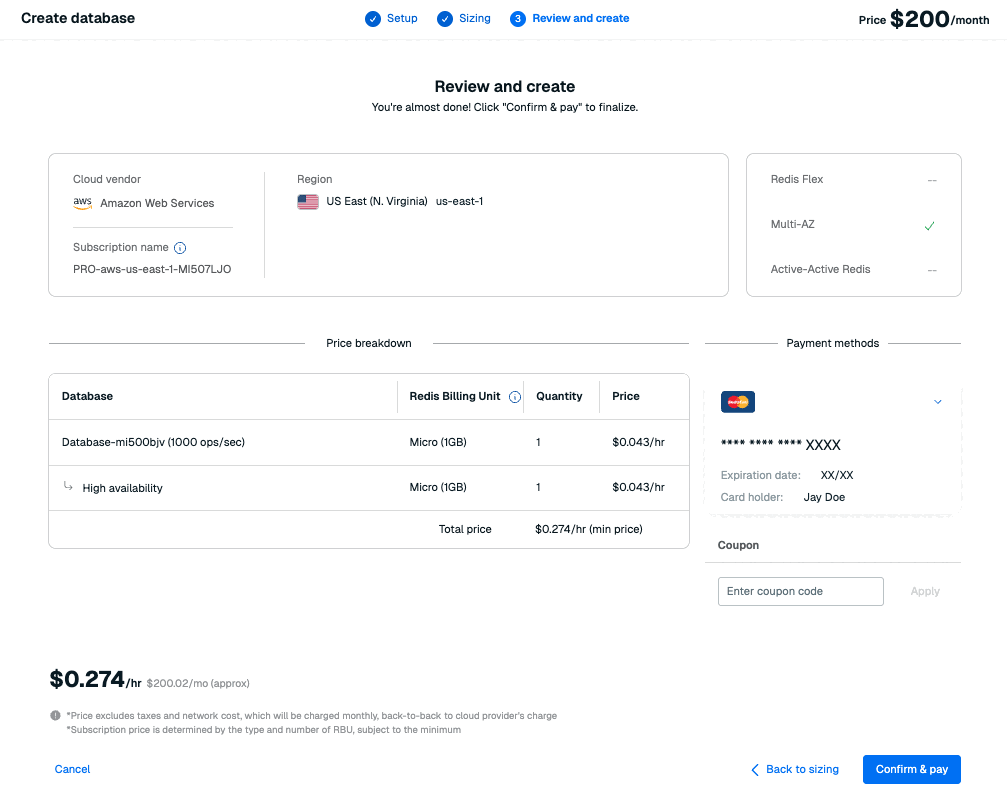
Redis breaks down your databases to Redis Billing Units (RBUs), each with their own size and throughput requirements. For more info, see Billing unit types.
The Payment methods section of this tab shows which payment method you're using for this database. Select the arrow on the top right of this section to view all available payment methods.
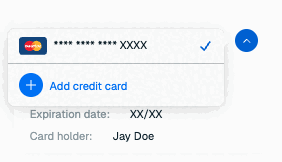
If you have not added a payment method or want to add a new payment method, select Add credit card to add a new credit card.
If you have not already added a business address to your account, you must enter one. Redis uses your business address for communication, invoicing, and tax purposes.

If you already have a business address, you don't need to enter one here. See Account settings to learn how to update your business address.

If the card's billing address is the same as your account's business address, select Same as business address to fill the billing address with your business address details.
Select Back to Sizing to make changes or Confirm & Pay to create your databases.

Note that databases are created in the background. While they are provisioning, you aren't allowed to make changes. This process generally takes 10-15 minutes.
Use the Database list to check the status of your databases.
Billing unit types
The Redis Billing Unit types associated with your Pro subscription depend on your database memory size and throughput requirements.
| Billing unit type | Capacity (Memory/Throughput) |
|---|---|
| Pico | 100MB / 100 ops/sec |
| Nano | 500MB / 500 ops/sec |
| Micro | 1GB / 1K ops/sec |
| High-throughput | 2.5GB / 25K ops/sec |
| Small | 12.5GB / 12.5K ops/sec |
| Large | 25GB / 25K ops/sec |
| Very large1 | 50GB / 5K ops/sec |
| XLarge2 | 50GB / 10K ops/sec |
Prices vary according to the cloud provider and region. Minimum prices apply.