For developersHow to Build and Deploy Your Own Analytics Dashboard using NodeJS and Redis on the AWS Platform
An interactive analytics dashboard serves several purposes. They allow you to share data and provide you with all those vital information to make game-changing decisions at a faster pace. Building a real-time dynamic dashboard using a traditional relational database might require a complex set of queries. By using a NoSQL database like Redis, you can build a powerful interactive and dynamic dashboard with a small number of Redis commands.
Let’s take a look at how this was achieved.
- What will you build?
- What will you need?
- Getting started
- How does it work?
- How data is stored
- Navigating the application
#What will you build?
You’ll build an analytics dashboard app that uses Redis Bitmap written in NodeJS (JavaScript) and then deploy it to AWS. Ready to get started? Ok, let’s dive straight in.
#What will you need?
- NodeJS: used as an open-source, cross-platform, backend JavaScript runtime environment that executes Javascript code outside a web browser.
Redis Cloud: used as a real-time database, cache, and message broker. - NPM: used as a package manager. It allows you to build node apps.
#Getting Started
#Prepare the environment
#
Install Node - v12.19.0
- Install NPM - v6.14.8
#Step 1. Sign up for a Free Redis Cloud Account
#Sign up for a free Redis Cloud account
#Choose AWS as a Cloud vendor while creating your new subscription. At the end of the database creation process, you will get a Redis Cloud database endpoint and password. You can save it for later use
#Step 2. Clone the repository
#Step 3. Set up a backend environment
First we will be setting up environment variables
Go to /server folder (cd ./server) and then execute the below command:
Open .env file and add Redis Cloud Database Endpoint URL, port and password as shown below:
#Step 4. Install dependencies
#Step 5. Run the backend
#Step 6. Set up the frontend environment
Go to the
client folder (cd ./client) and then:Add the exact URL path and port number of your choice for VUE_APP_API_URL parameter as shown below:
#Step 7. Install dependencies
#Step 8. Run the frontend

#How does it work?
#How the data is stored
The event data is stored in various keys and data types which is discussed below:
#For each of time spans
- year: like 2021
- month: like 2021-03 (means March of 2021)
- day: like 2021-03-03 (means 3rd March of 2021)
- weekOfMonth: like 2021-03/4 (means 4th week of March 2021)
- anytime
#For each of scopes
- source
- action
- source + action
- action + page
- userId + action
- global
#For each of data types/types
- count (Integer stored as String)
- bitmap
- set
It generates keys with the following naming convention:
where values in [] are optional.
For each generated key like
rab:count:*, data is stored like: INCR {key} #Example of INCR
For each generated key like:
rab:set:*, data is stored like:#Example of SADD
For each generated key like
rab:bitmap:*, data is stored like:#Example of SETBIT
#Cohort data
- We store users who register and then bought some products (action order matters).
- For each buy action in December we first check if the user performed register action (register counter must be greater than zero).
- If so, we set user bit to 1
#Example of cohort data
- Example - User Id 2 bought 2 products on 2015-12-17. It won't be stored.
- Example - User Id 10 bought 1 product on 2015-12-17 and registered on 2015-12-16. So, it will be stored like:
- We assume that user cannot buy without registering first.
#Retention data
- Retention means users who bought on two different dates
- For each buy action we check if user bought more products anytime than bought on particular day (current purchase not included).
- If so, we add user id to set like:
- Example - User Id 5 bought 3 products on 2015-12-15. His retention won't be stored (products bought on particular day: 2, products bought anytime: 0).
- Example - User Id 3 bought 1 product on 2015-12-15 and before - 1 product on 2015-12-13. His retention will be stored (products bought on particular day: 0, products bought anytime: 1) like:
#How the data is accessed
#Total Traffic
#December
#X week of December
#Example of Total Traffic BITCOUNT
#Traffic per Page ({page} is one of: homepage, product1, product2, product3)
#December Traffic per Page
#Example of Traffic per Page BITCOUNT
#X week of December Traffic per Page
#Example of Traffic per Source BITCOUNT
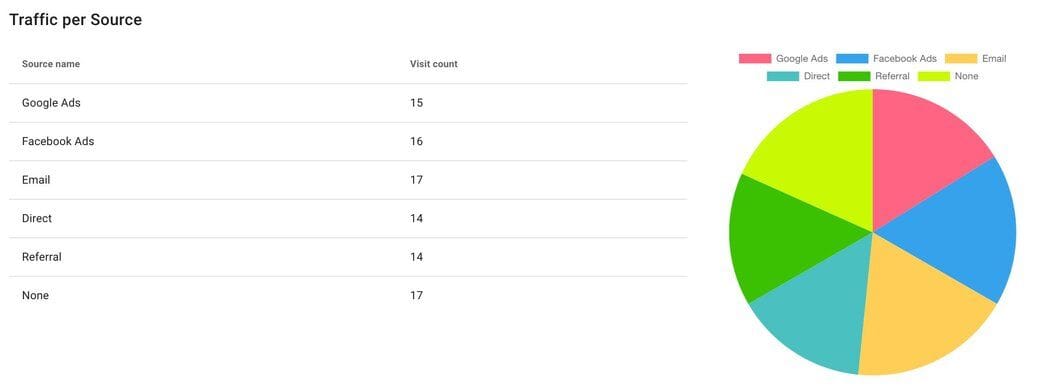
#Traffic per Source ({source} is one of: Google, Facebook, email, direct, referral, none)
#December Traffic per Source
#Example of source referral BITCOUNT
#X week of December Traffic per Source
#Example of source google BITCOUNT
#Trend traffic ({page} is one of: homepage, product1, product2, product3)
#December Trend Traffic
From
to
- 1st Week of December: Similar as above, but from 2015-12-01 to 2015-12-07
- 2nd Week of December: Similar as above, but from 2015-12-08 to 2015-12-14
- 3rd Week of December: Similar as above, but from 2015-12-15 to 2015-12-21
- 4th Week of December: Similar as above, but from 2015-12-22 to 2015-12-28
- 5th Week of December: Similar as above, but from 2015-12-29 to 2015-12-31