END-OF-LIFE NOTICE
Redis is phasing out RedisGraph. This blog post explains the motivation behind this decision and the implications for existing Redis customers and community members.
End of support is scheduled for January 31, 2025.
Beginning with Redis Stack 7.2.x-y, Redis Stack will no longer include graph capabilities (RedisGraph).
RedisGraph is a Redis module that enables enterprises to process any kind of connected data much faster than with traditional relational or existing graph databases. RedisGraph implements a unique data storage and processing solution (with sparse-adjacency matrices and GraphBLAS) to deliver the fastest and most efficient way to store, manage, and process connected data in graphs. With RedisGraph, you can process complex transactions 10 - 600 times faster than with traditional graph solutions while using 50 - 60% less memory resources than other graph databases!
Step 1. Create a free Cloud account
Create your free Redis Cloud account. Once you click on “Get Started”, you will receive an email with a link to activate your account and complete your signup process.
TIP
For a limited time, use TIGER200 to get $200 credits on Redis Cloud and try all the advanced capabilities!
Step 2. Create Your database
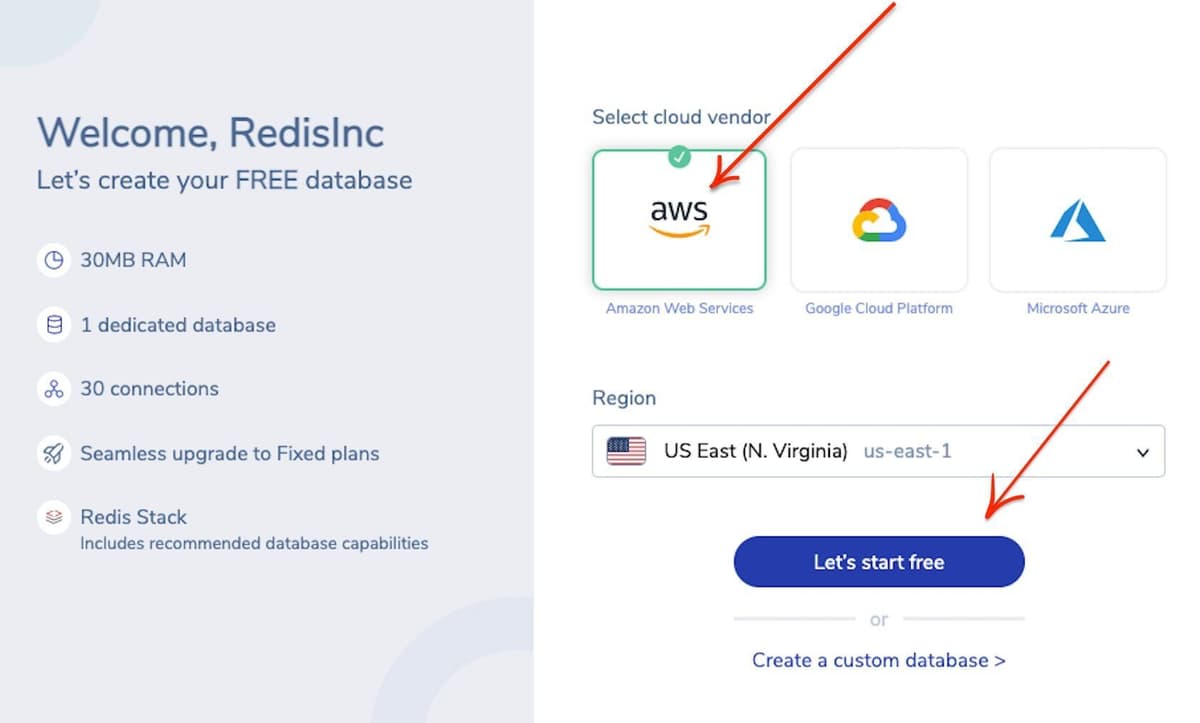
Choose your preferred cloud vendor. Select the region and then click "Let's start free" to create your free database automatically.
Tip
If you want to create a custom database with your preferred name and type of Redis, click "Create a custom database" option shown in the image.
Step 3. Verify the database details
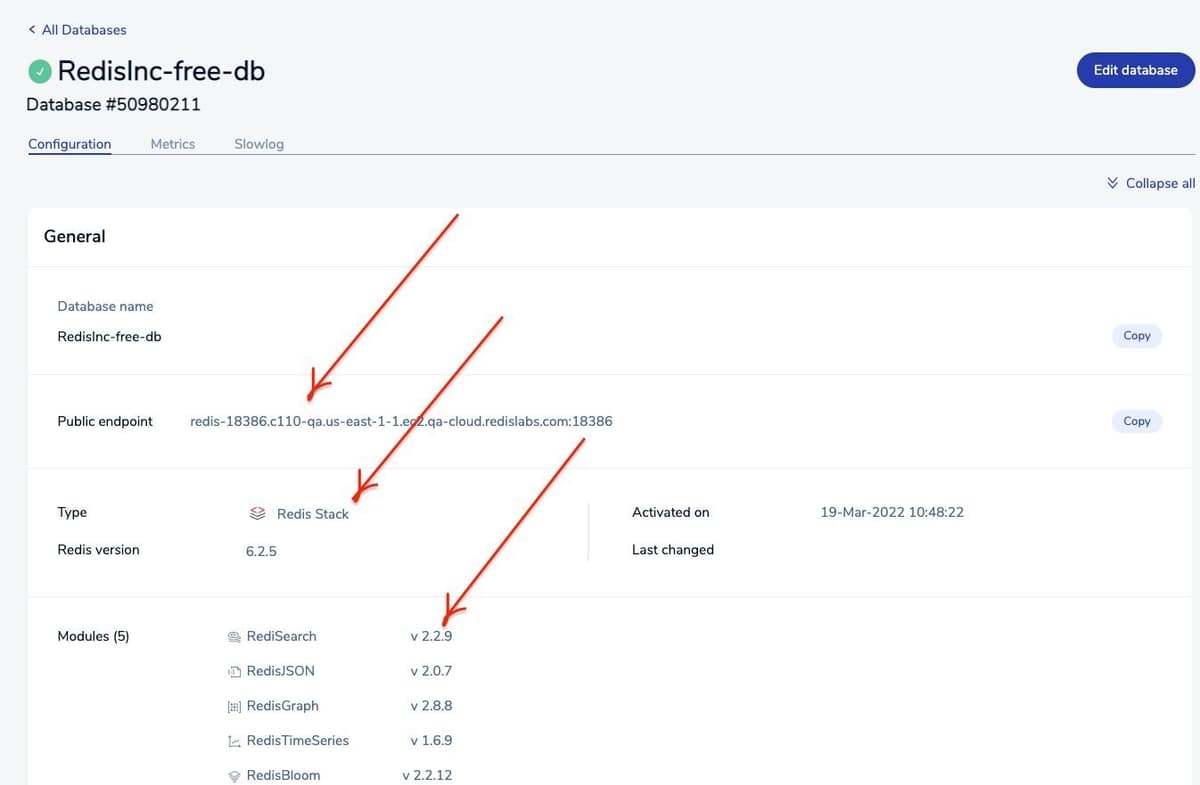
You will be provided with Public endpoint URL and "Redis Stack" as the type of database with the list of modules that comes by default.
Step 4. Install RedisInsight
RedisInsight is a visual tool that lets you do both GUI- and CLI-based interactions with your Redis database, and so much more when developing your Redis based application. It is a fully-featured pure Desktop GUI client that provides capabilities to design, develop and optimize your Redis application. It works with any cloud provider as long as you run it on a host with network access to your cloud-based Redis server. It makes it easy to discover cloud databases and configure connection details with a single click. It allows you to automatically add Redis Enterprise Software and Redis Cloud databases.
You can install Redis Stack on your local system to get RedisInsight GUI tool up and running. Ensure that you have brew package installed in your Mac system.
Go to Applications and click "RedisInsight-v2" to bring up the Redis Desktop GUI tool.
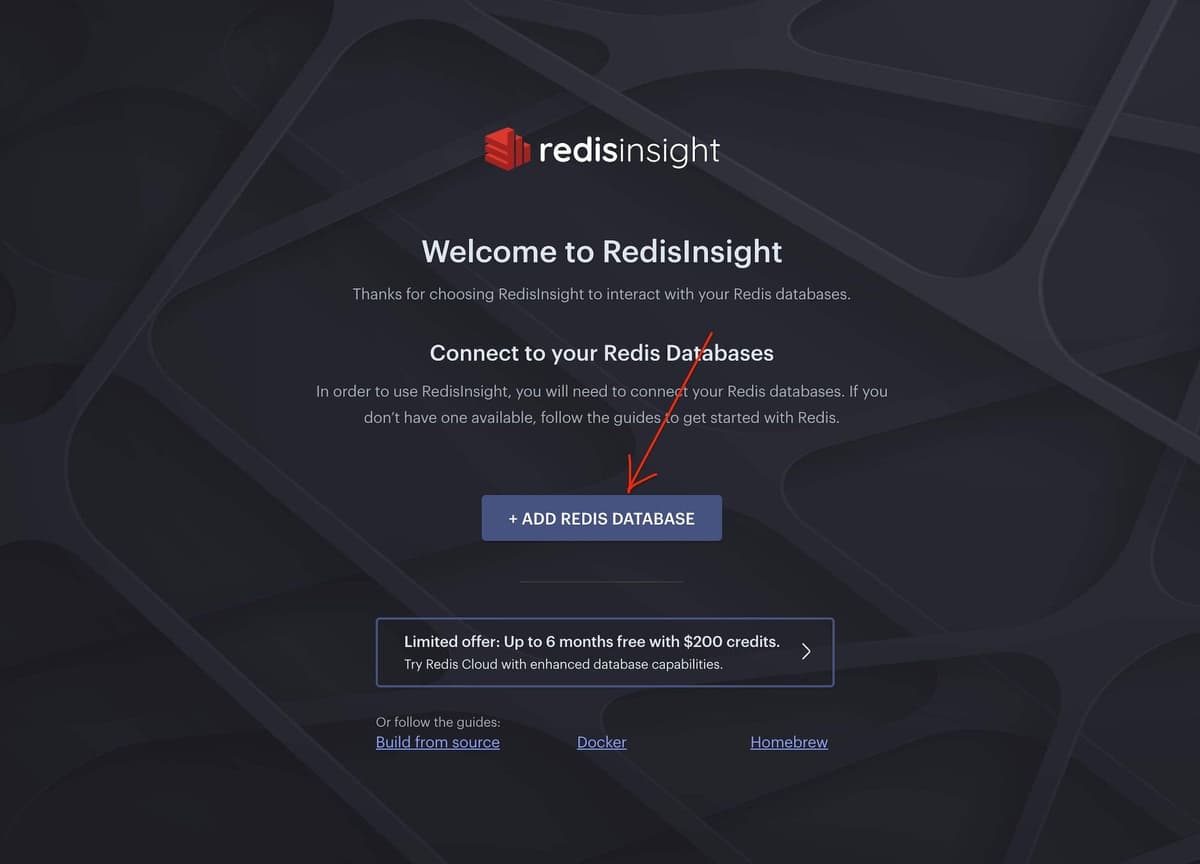
Step 5. Add Redis database
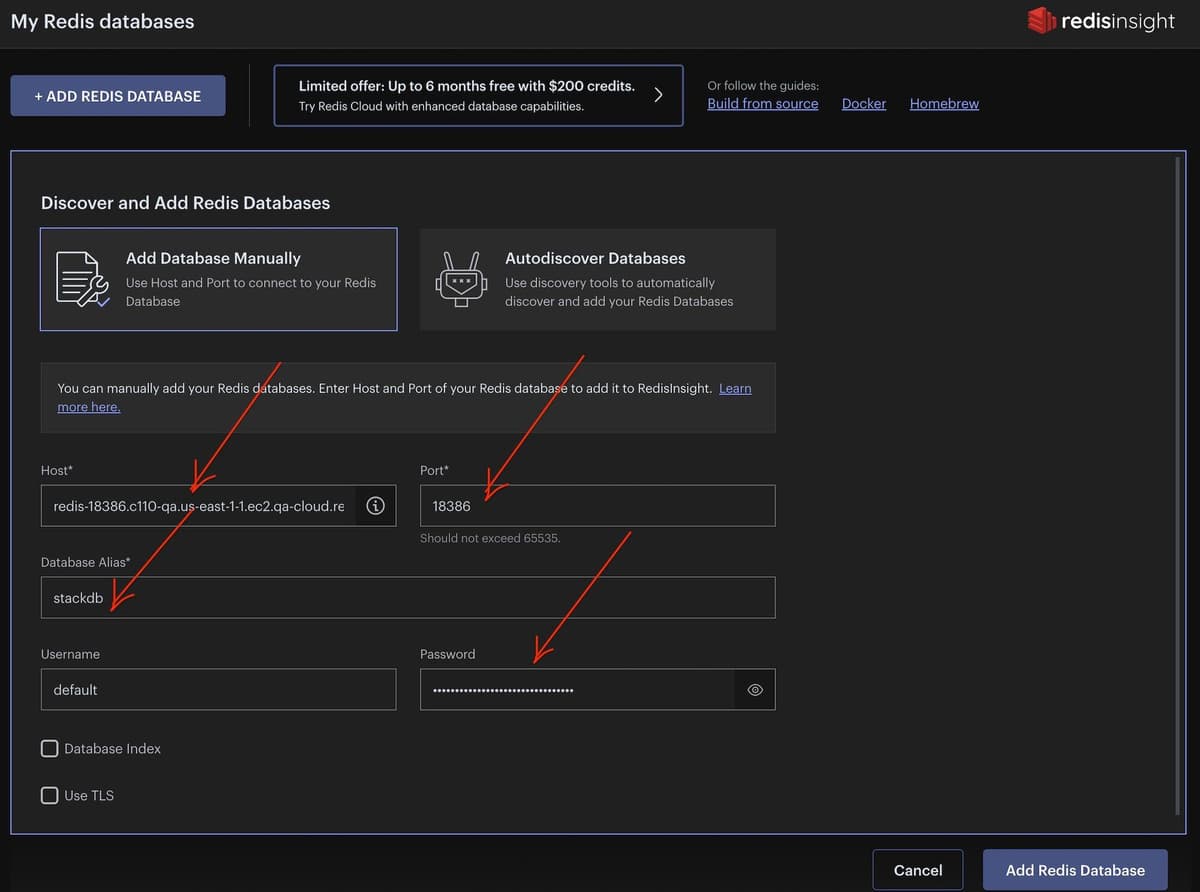
Step 6. Enter Redis Cloud details
Add the Redis Cloud database endpoint, port and password.
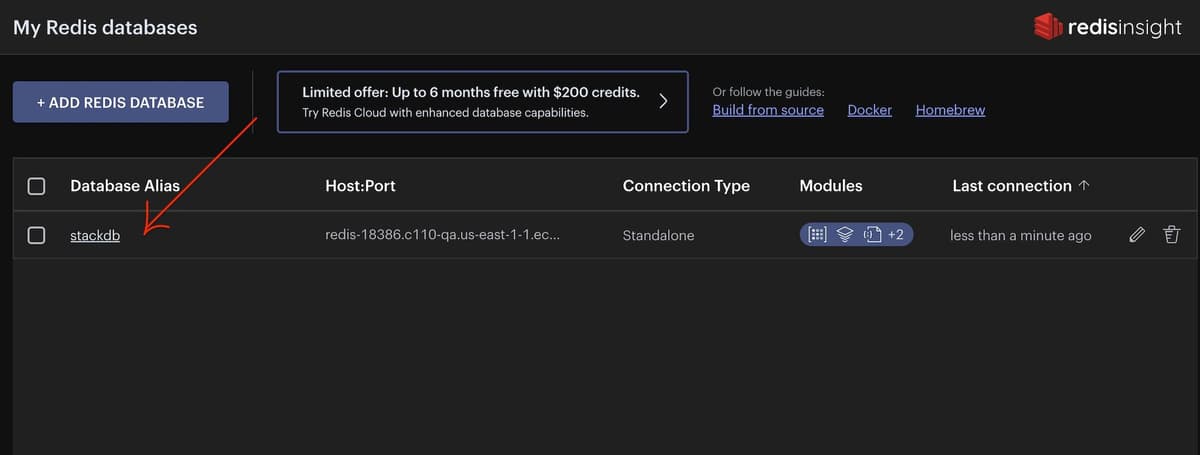
Step 7. Verify the database under RedisInsight dashboard
Step 8. Getting Started with RedisGraph
In the following steps, we will use some basic RediGraph commands to insert data into a graph and then query the graph. You can run them from the Redis command-line interface (redis-cli) or use the CLI available in RedisInsight. (See part 2 of this tutorial to learn more about using the RedisInsight CLI.)

Step 9: Insert data into a graph
Insert actors
To interact with RedisGraph you will typically use the GRAPH.QUERY command and execute Cypher queries. Let’s start to insert some actors into the graph:movies graph name, which is automatically created using this command:
This single query creates three actors, along with their names and unique IDs.
Insert a movie
This single query creates a movie with a title, the release year, and an ID.
Associate actors and movies
The core of a graph is the relationships between the nodes, allowing the applications to navigate and query them. Let’s create a relationship between the actors and the movies:
This command created a new relation indicating that the actor Mark Hamill acted in Star Wars: Episode V as Luke Skywalker.
Let’s repeat this process for the other actors:
You can also do all of this in a single query, for example:
Querying the graph
Now that you have data in your graph, you’re ready to ask some questions, such as:
“What are the titles of all the movies?”
“What is the information for the movie with the ID of 1?”
“Who are the actors in the movie 'Star Wars: Episode V - The Empire Strikes Back' and what roles did they play?”
Visualizing graph databases using RedisInsight
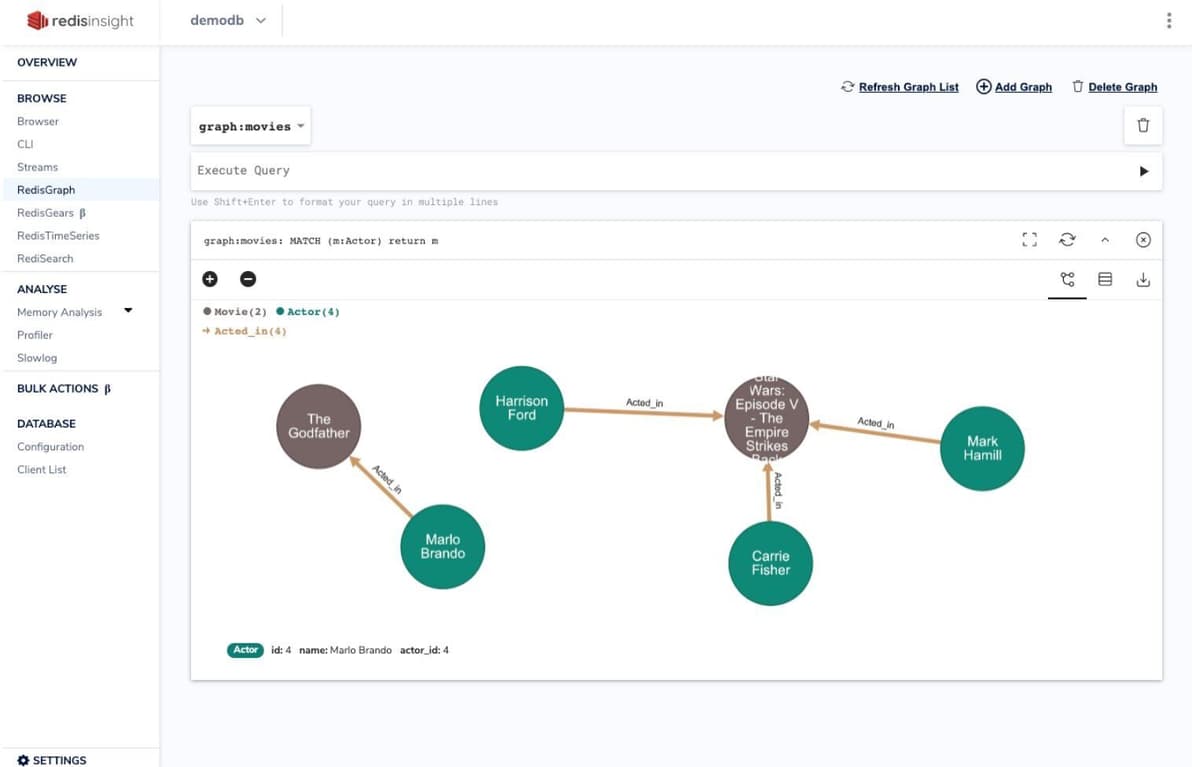
If you are using RedisInsight, you can visualize and navigate into the nodes and relationships graphically. Click on the RedisGraph menu entry on the left and enter the query:
Click on the Execute button, and double click on the actors to follow the relationships You should see a graph like this one:
Resources
Next Steps
- Learn more about RedisGraph in the Quickstart tutorial.
