For developersHow to Deploy a Redis Database from a Jenkins Pipeline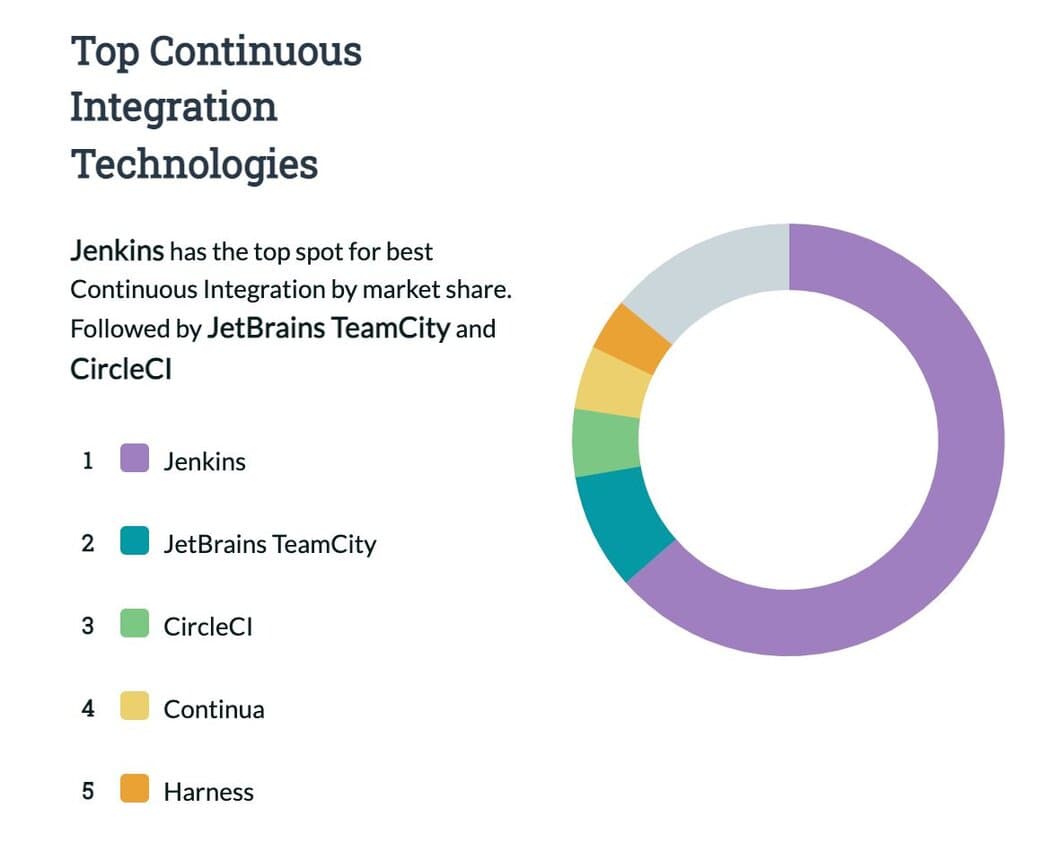

Jenkins is currently the most popular CI(Continuous Integration) tool, with ~15M users. It is an open source automation server which enables developers to reliably build, test, and deploy their software. It was forked in 2011 from a project called Hudson after a dispute with Oracle, and is used for Continuous Integration and Continuous Delivery (CI/CD) and test automation. Jenkins is based on Java and provides over 1700 plugins to automate your developer workflow and save a lot of your time in executing your repetitive tasks.

Source: Datanyze market analysis
Jenkins Pipeline performs Continuous Delivery tasks declared in a
Jenkinsfile stored alongside code. The Pipeline plugin has a fairly comprehensive tutorial checked into its source tree. Plugins are the primary means of enhancing the functionality of a Jenkins environment to suit organization- or user-specific needs. Using a Pipeline, you can configure Jenkins to automatically deploy key pieces of infrastructure, such as a Redis database.#Architecture
Jenkins Pipelines are the Continuous Delivery (CD) side of Jenkins. They use a
Jenkinsfile declarative script to define the behavior of the pipeline. You can script actions in Groovy and run shell scripts from it, so you can make it do pretty much anything.The
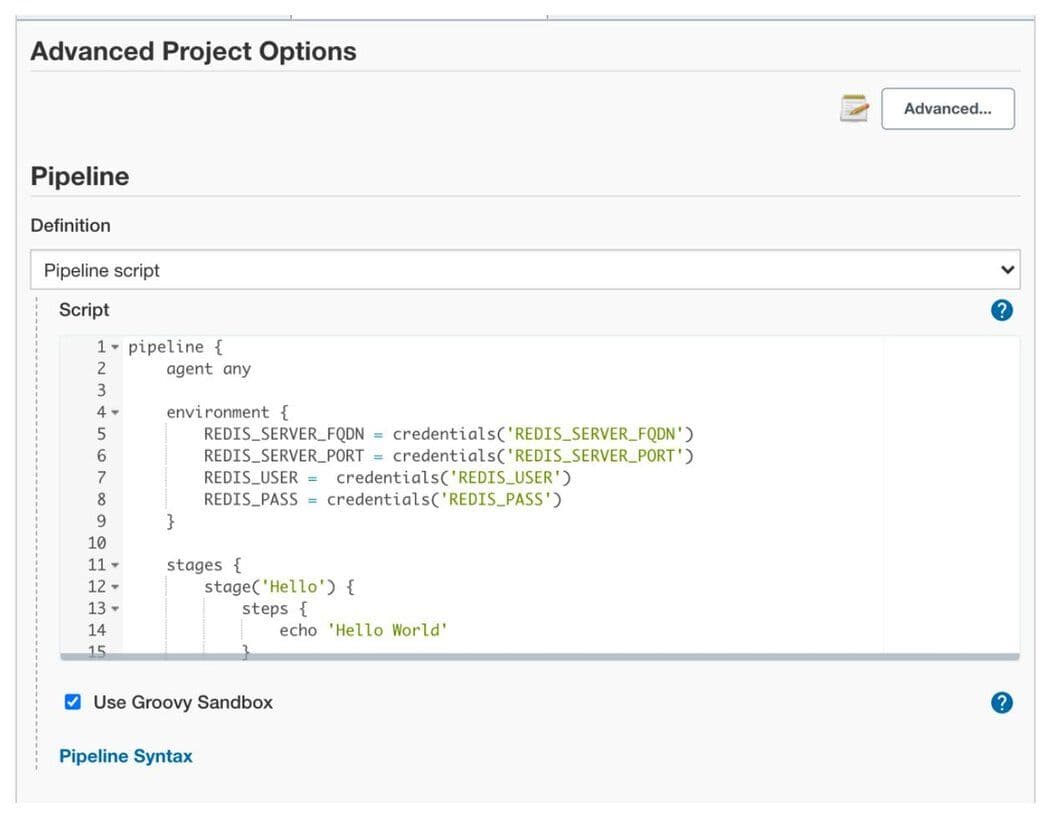
Jenkinsfile instructs Jenkins to export some environment variables from the Credentials store in order to connect to the Redis server, then executes the Python pipeline script with the Deployment Configuration file given as a parameter. An example deployment-configuration-file.json looks like:The Python script uses predefined JSON template files that create Redis databases of fixed t-shirt sizes (S, M, L, XL). The Deployment Config file tells the Python script what the desired database name, port, and size are. A sample template file looks like:
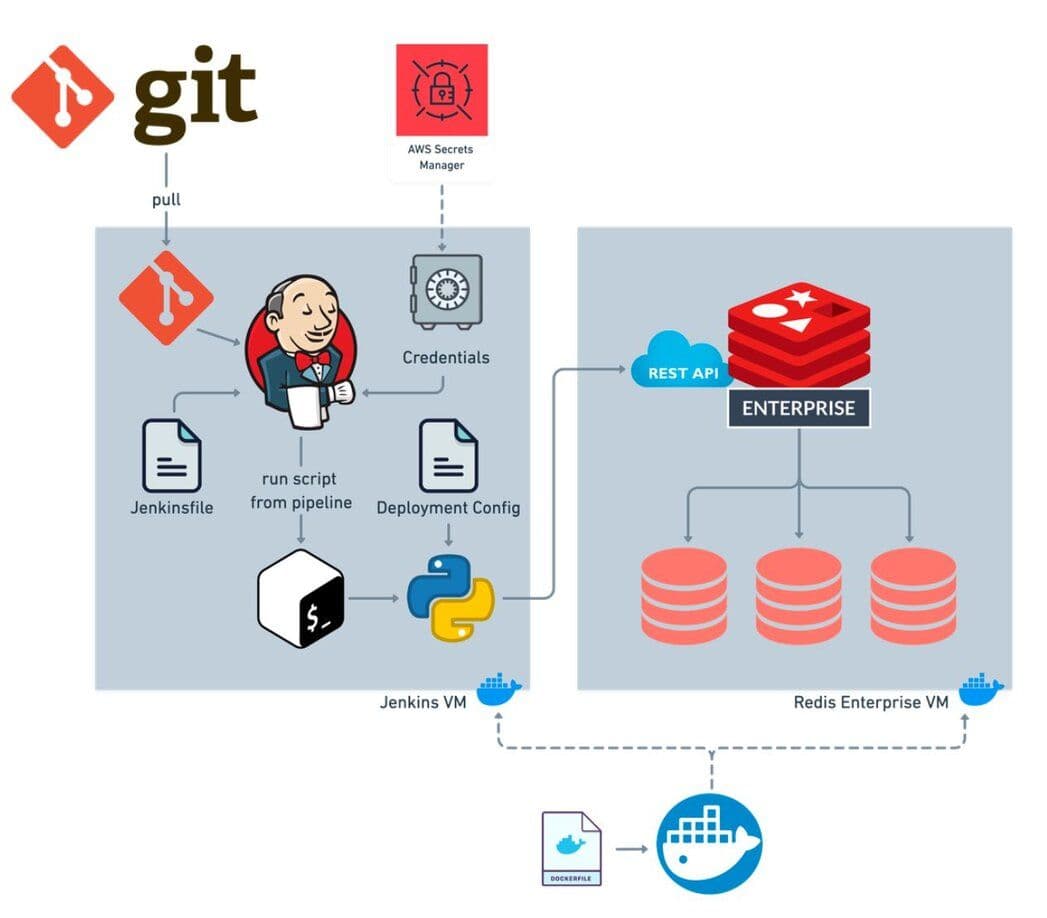
The following is an architectural diagram of how a Jenkins pipeline adds a database to a Redis cluster.

#Process
- The Jenkins pipeline clones a remote git repository, containing the application code and the pipeline code.
- The Redis host, port, user, and password are decrypted from the credentials store and are exported as Environment variables.
- Jenkins runs the Python pipeline script, specifying the deployment configuration file in the git repo.
- The Python script uses the deployment configuration file to choose and customize a pre-populated template to use as the body of the REST create database request to Redis.
#List of Pipeline Code Files
- jenkins-re-pipeline.py config file
- The Python script that creates a Redis database through the Redis REST API.
- deployment-configuration-file.json
- The user-specified configuration file for creating a database.
- redis-standard-size-s.json.template
- redis-standard-size-xl.json.template
#Configuring Jenkins
#Installing Jenkins
You can use Docker Desktop to quickly get a Jenkins instance up and running, exposing ports 8080 (web GUI) and 50000 (inbound agents).
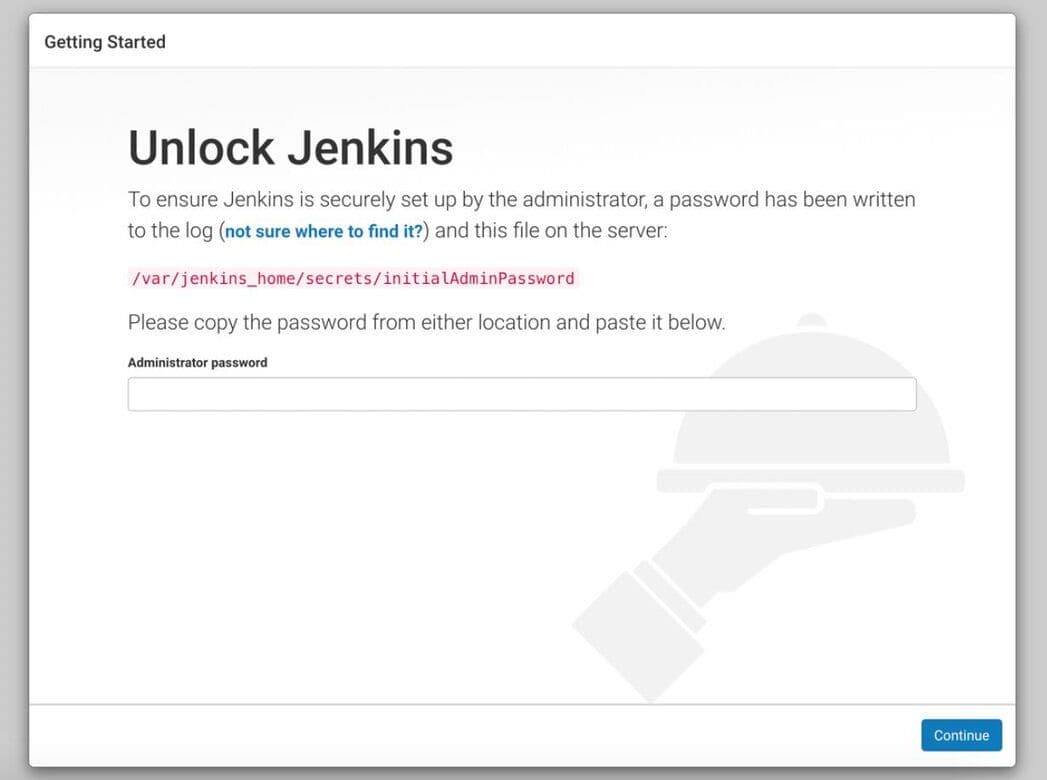
The installation will generate a first-run password in the docker-cli output.
Then open the Jenkins URL http://localhost:8080/ and enter the password to unlock your instance and begin installation.

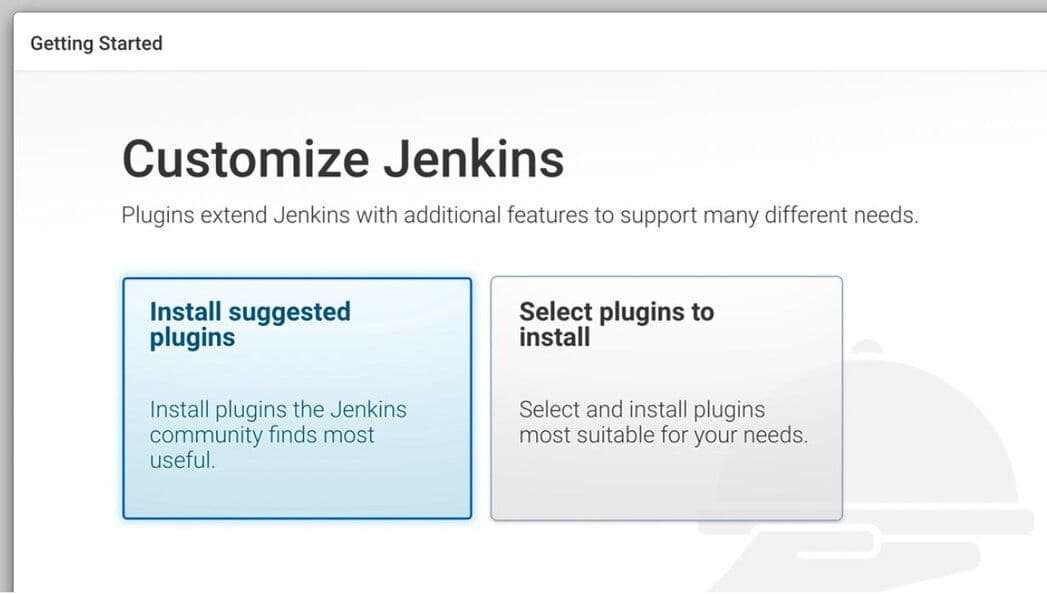
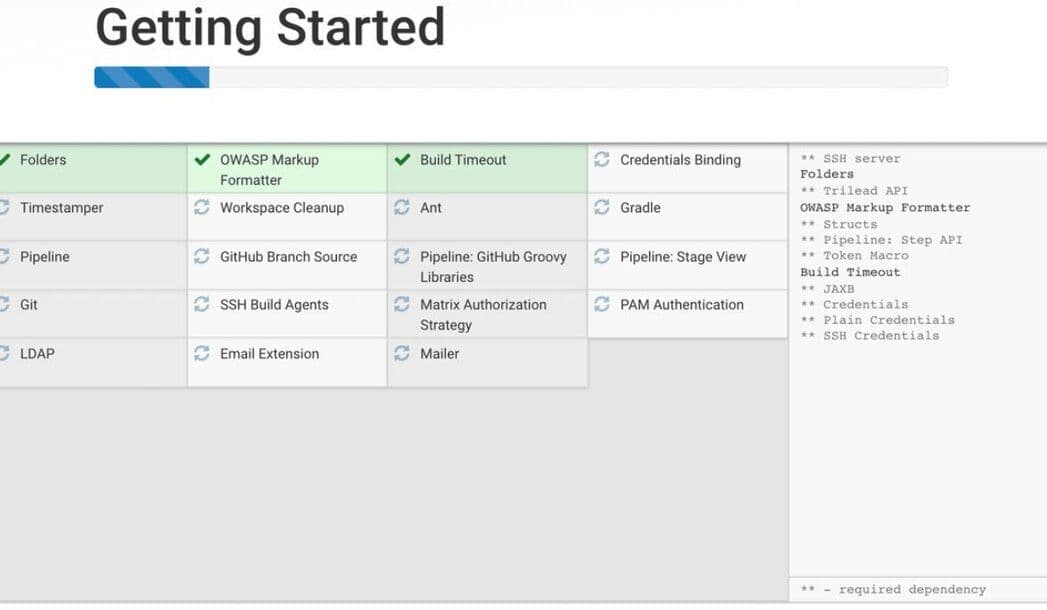
Choose "Install suggested plugins" to perform the Jenkins configuration.

Wait for the plugins to complete the installation process.

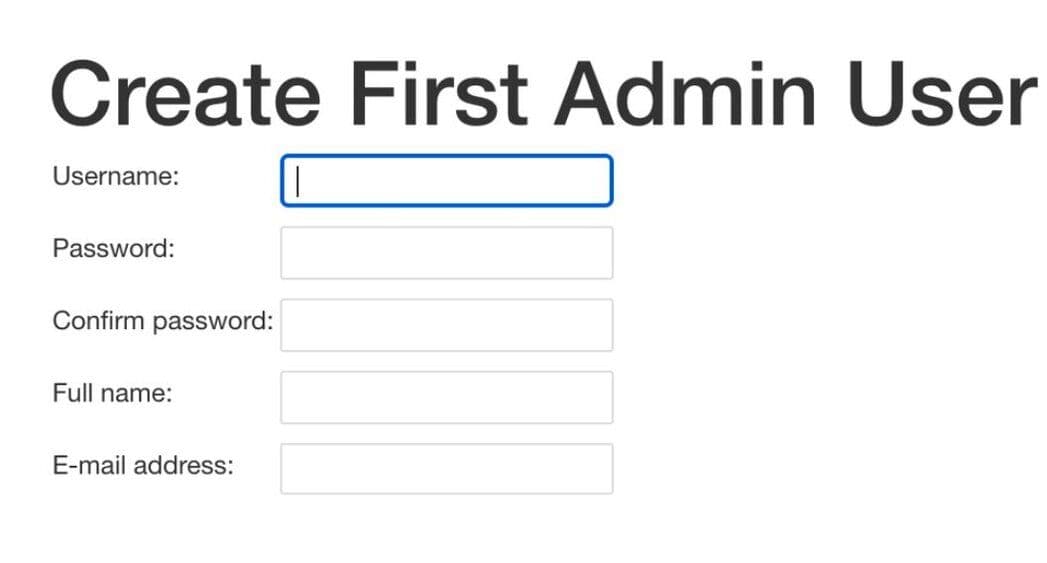
Next, you’re prompted to create your admin user.

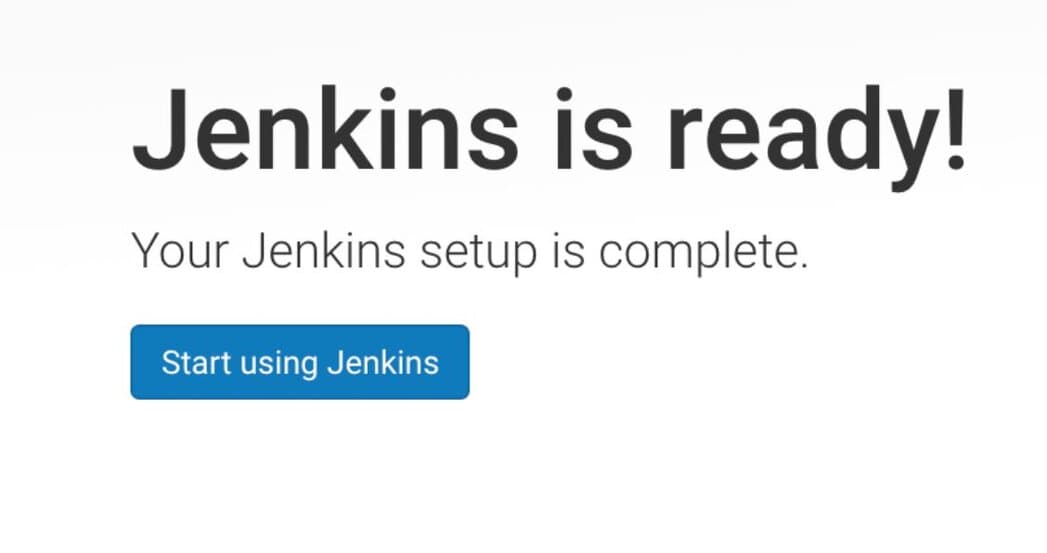
Congratulations! Jenkins is ready!

#Installing Python and custom libraries
If you use an existing instance of Jenkins server, you can install Python and the custom libraries from the command line interface of that machine.
Docker instances of Jenkins can be accessed by shell using the following command:
The Python pipeline script requires the libraries
click and requests. It also requires Python.Alternatively, if you are creating a new Jenkins from scratch, you can include these dependencies in a separate
Dockerfile that builds off the base Jenkins image:#Add credentials to Secret Store
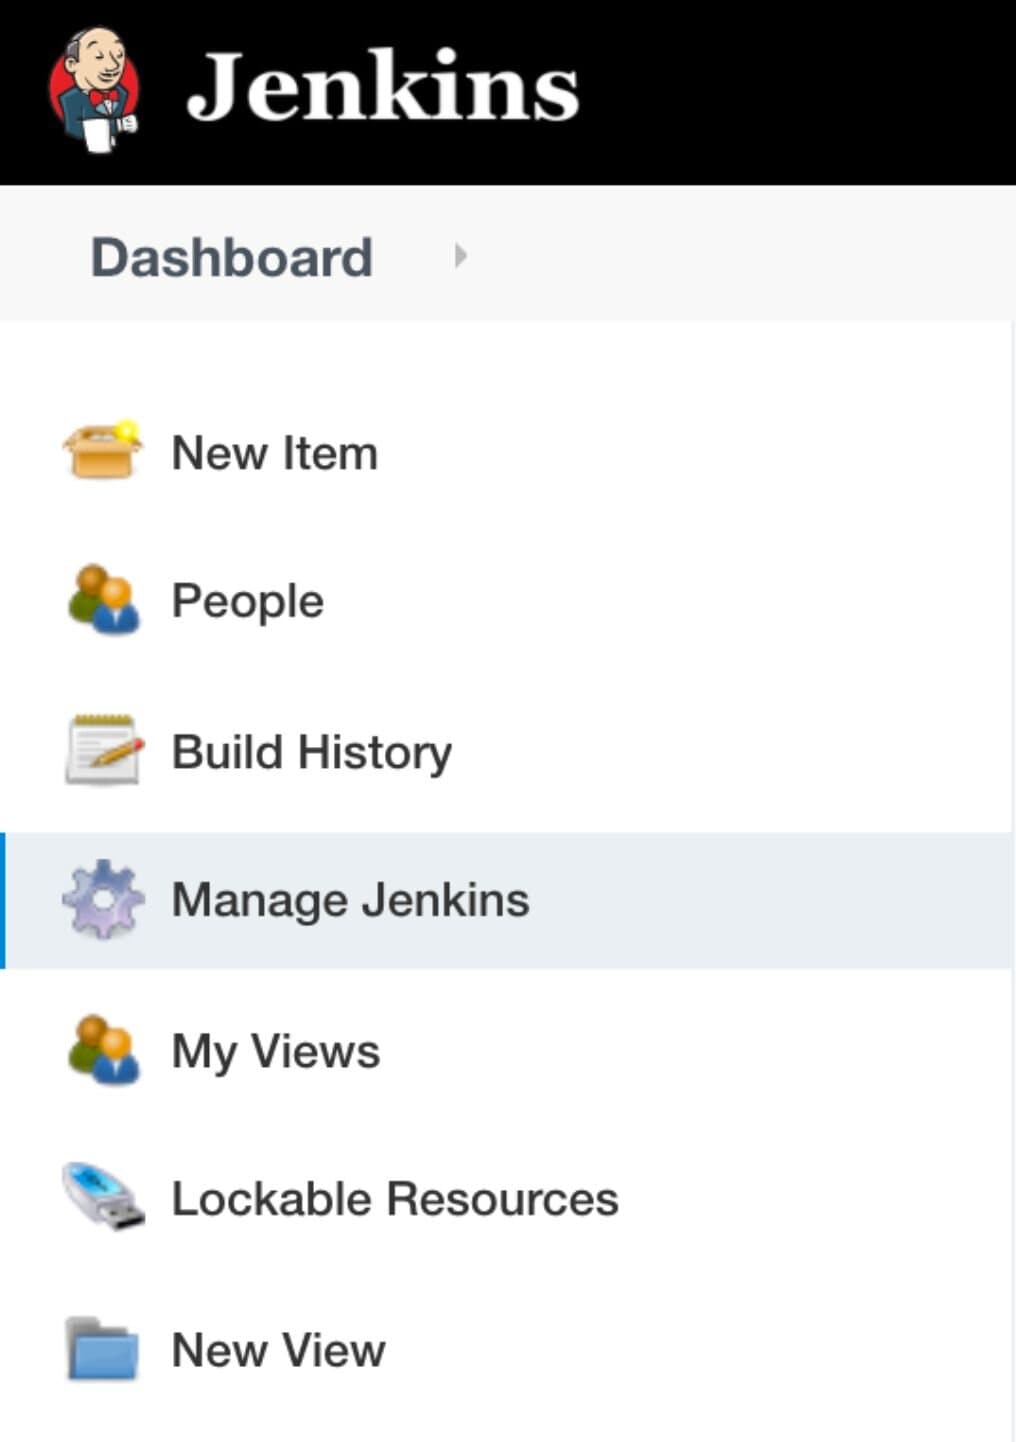
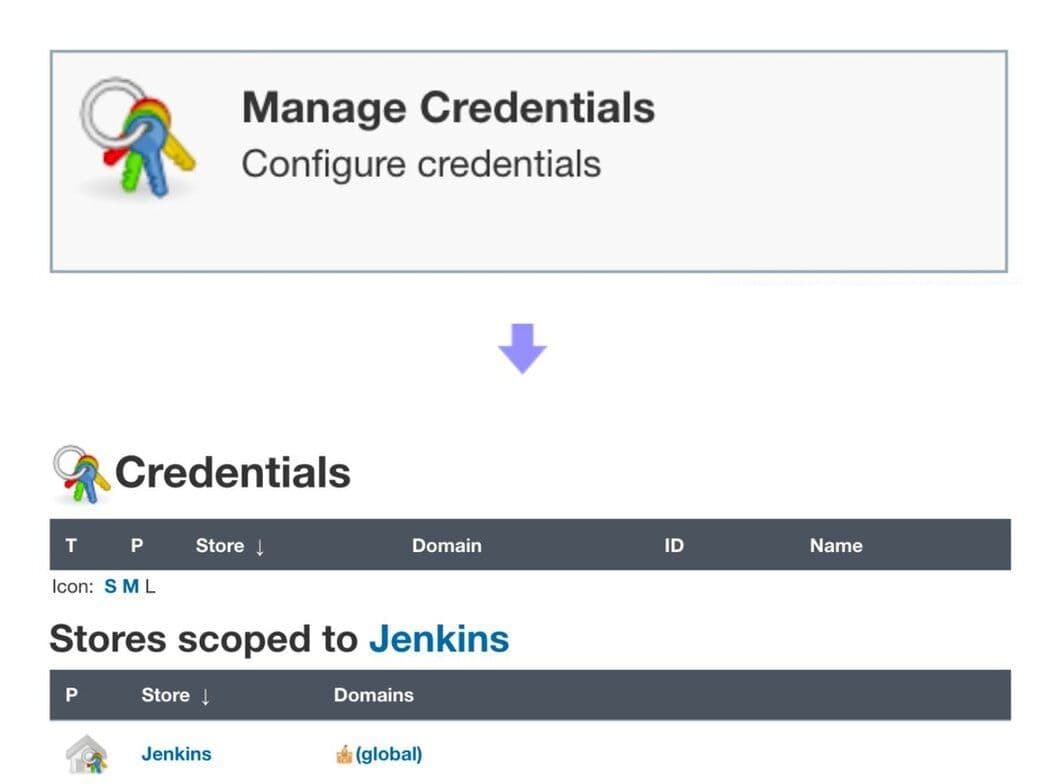
Using the left-side menu, select Manage Jenkins, then select Manage Credentials, then click the link (global).


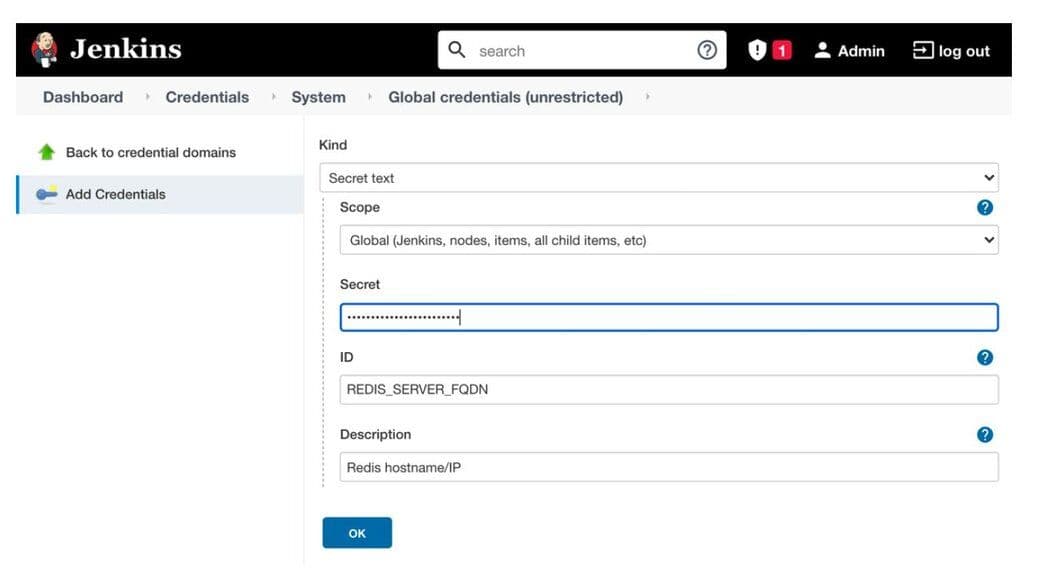
From here, you can specify Kind: Secret text for the 4 secrets required to connect with the Redis REST endpoint:
- REDIS_SERVER_FQDN
- Set to the 'https://server-address' of the target Redis instance.
- REDIS_SERVER_PORT
- Set to the Redis REST API port (default 9443).
- REDIS_USER
- Set to the Redis admin user allowed to create databases.
- REDIS_PASS
- Set to the Redis admin user's password.

If you are using a private code repository, you may also wish to include a Personal Access Token here.
#Create the Jenkins pipeline
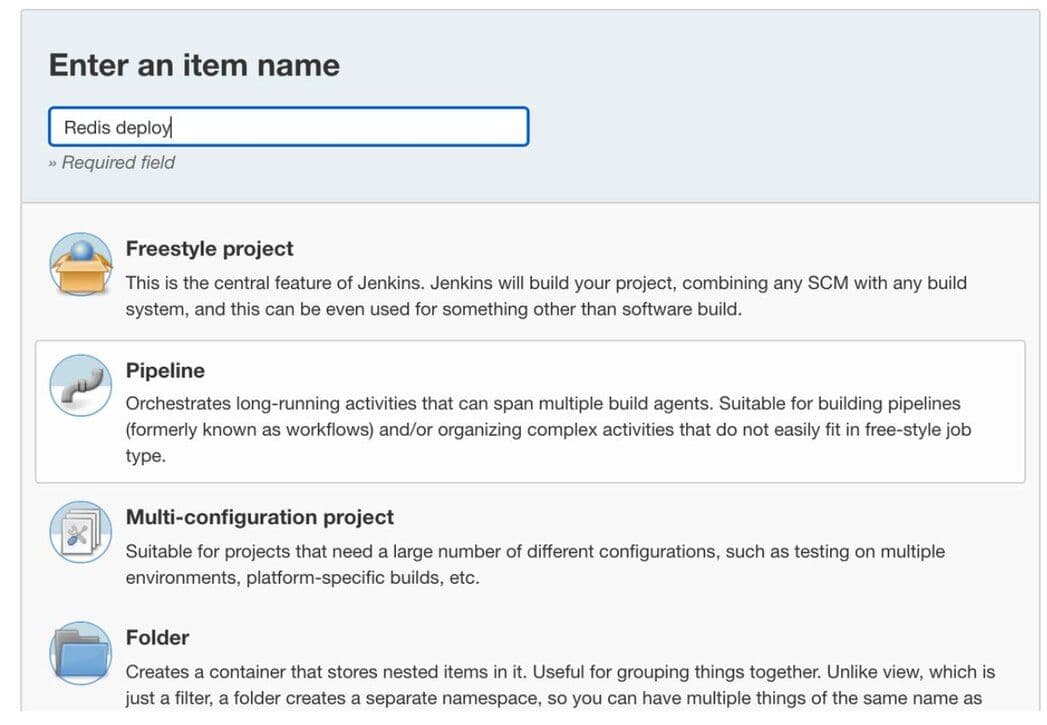
From the dashboard, click New Item.
Enter in a name for the pipeline, and choose the Pipeline type.

#Connect GitHub repository
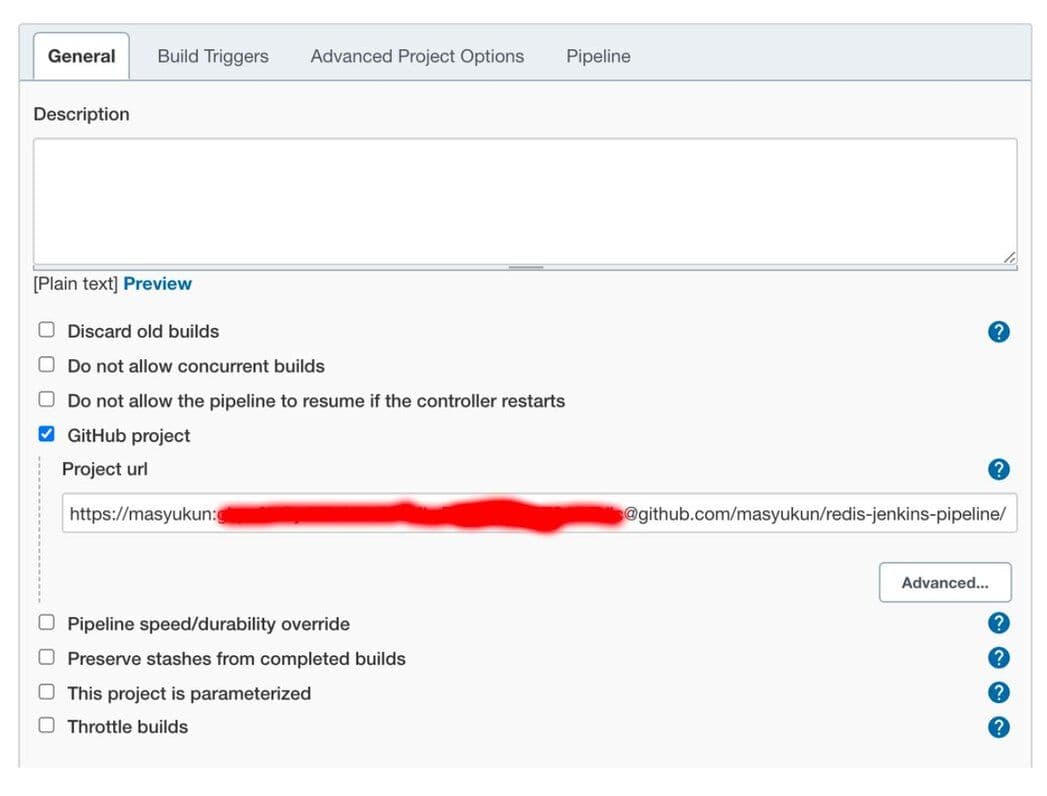
From the Pipeline configuration page that appears, check the GitHub box and enter the git clone URL, complete with any credentials needed to read the repository. For GitHub access, the password should be a Personal Access Token rather than the actual user password.

#Redis pipeline Jenkinsfile
Scrolling down on this page to the Advanced Project Options, you can either past in the
Jenkinsfile, or you can specify the filename if the file exists in the git repository.
Here is an example
Jenkinsfile containing the mapping of Credentials to the environment variables, and 2 separate stages – a Hello World which always succeeds, and a build stage that invokes the Python script. Paste this into the pipeline script section.Click "Save" when the job spec is complete.
#Run the Jenkins pipeline
Click on the pipeline you created:

Click the "Build Now" icon on the left side menu.
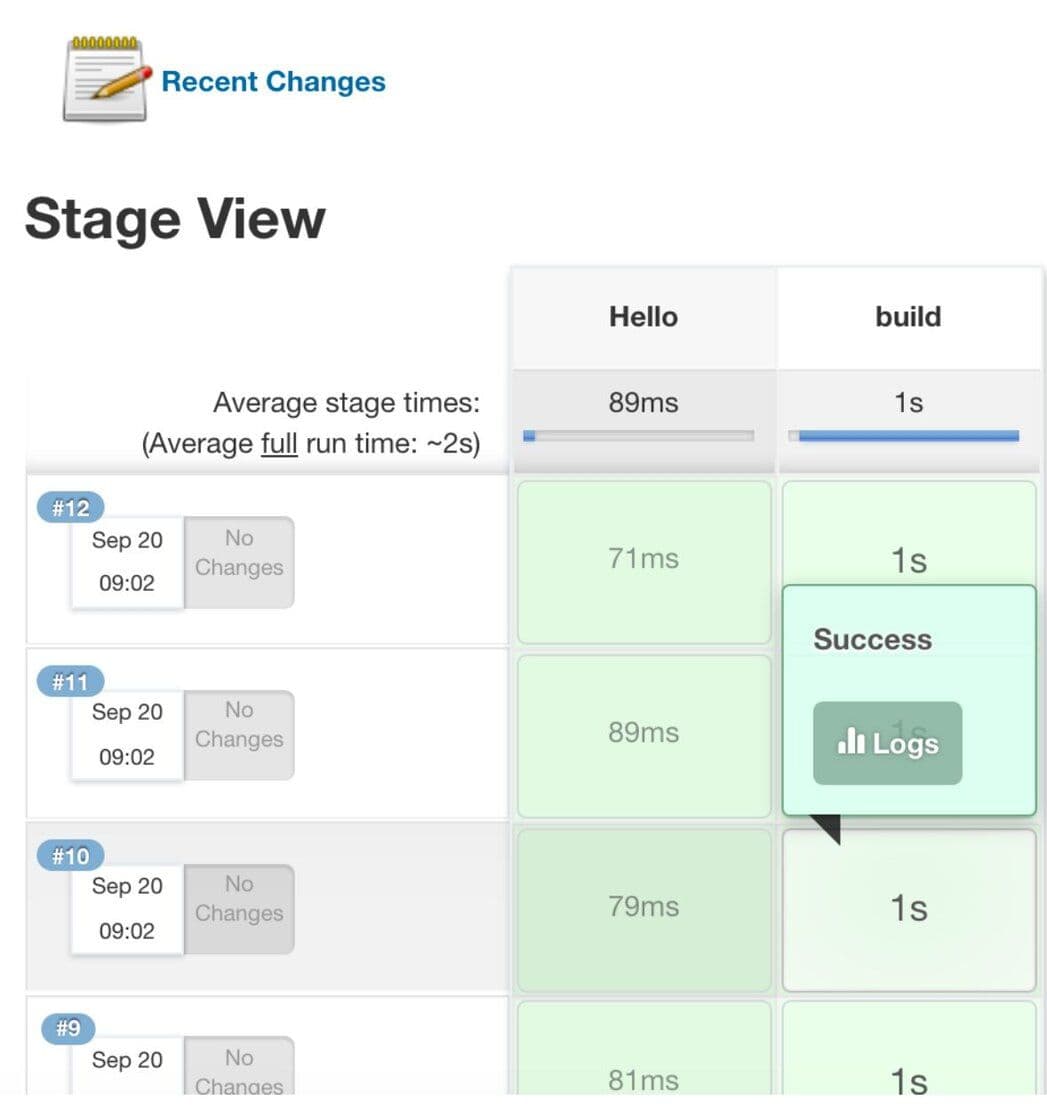
Click the Status icon on the left side menu in order to see the results of all the output from each of the stages of your pipeline.
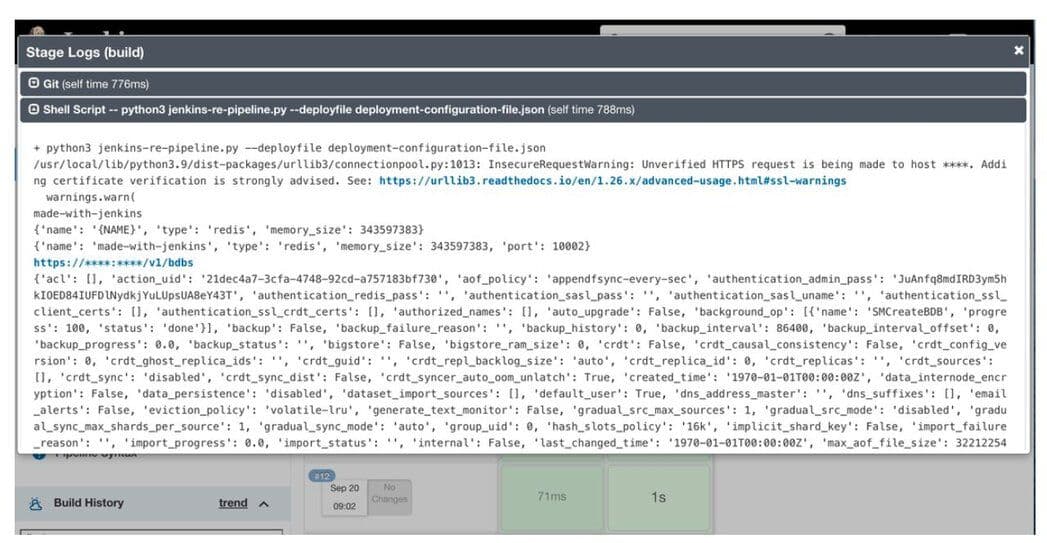
Hover over the build stage and click the Logs button of the most recent build in order to see the Python script’s output.
Hover over the build stage and click the Logs button of the most recent build in order to see the Python script’s output.

Sample output: you should see a verbose response from Redis’s REST service in the “Shell Script” accordion pane.
There’s also a “Git” output log, in case you need to debug something at that level. Any time you update the branch in the remote git repository, you should see evidence in that log that the latest changes have successfully checked out into the local Jenkins git repository.

Open your Redis Secure Management UI at
https://servername:8443 and click on the databases menu item to verify that your database was created with the name, port, and size specified in the deployment-configuration-file.json file.Congratulations! You have deployed a Redis database using a Jenkins Pipeline!
The GitHub repository is currently: https://github.com/masyukun/redis-jenkins-pipeline