Tutorial
How to build a Java based application on Heroku using Redis
February 26, 20263 minute read

TL;DR:Create a Redis Cloud database, install the Heroku CLI, clone the sample Java rate-limiting app, setREDIS_ENDPOINT_URIandREDIS_PASSWORDas Heroku config vars, and rungit push herokuto deploy.
Deploy a Java application on Heroku with a Redis Cloud database. This tutorial walks through every step from account setup to a live deployment using a sample rate-limiting app built with the Jedis client.
#What you'll learn
- How to create a Redis Cloud database and retrieve connection credentials
- How to set up a Heroku account and install the Heroku CLI
- How to connect a Java application to Redis Cloud using environment variables
- How to deploy a Java app to Heroku with
git push
#What are the prerequisites?
Before you begin, make sure you have:
- Java 11+ installed (check with
java -version) - Git installed (check with
git --version) - A free Redis Cloud account
- A Heroku account (Heroku requires a verified account with a payment method on file)
Note: Heroku no longer offers a free tier. Review Heroku's current pricing before proceeding. If you are looking for a free way to get started with Redis, see the Redis Cloud free tier.
#How do I create a Redis Cloud database?
Create your free Redis Cloud account. Follow this link to create a Redis Cloud subscription and database as shown below:
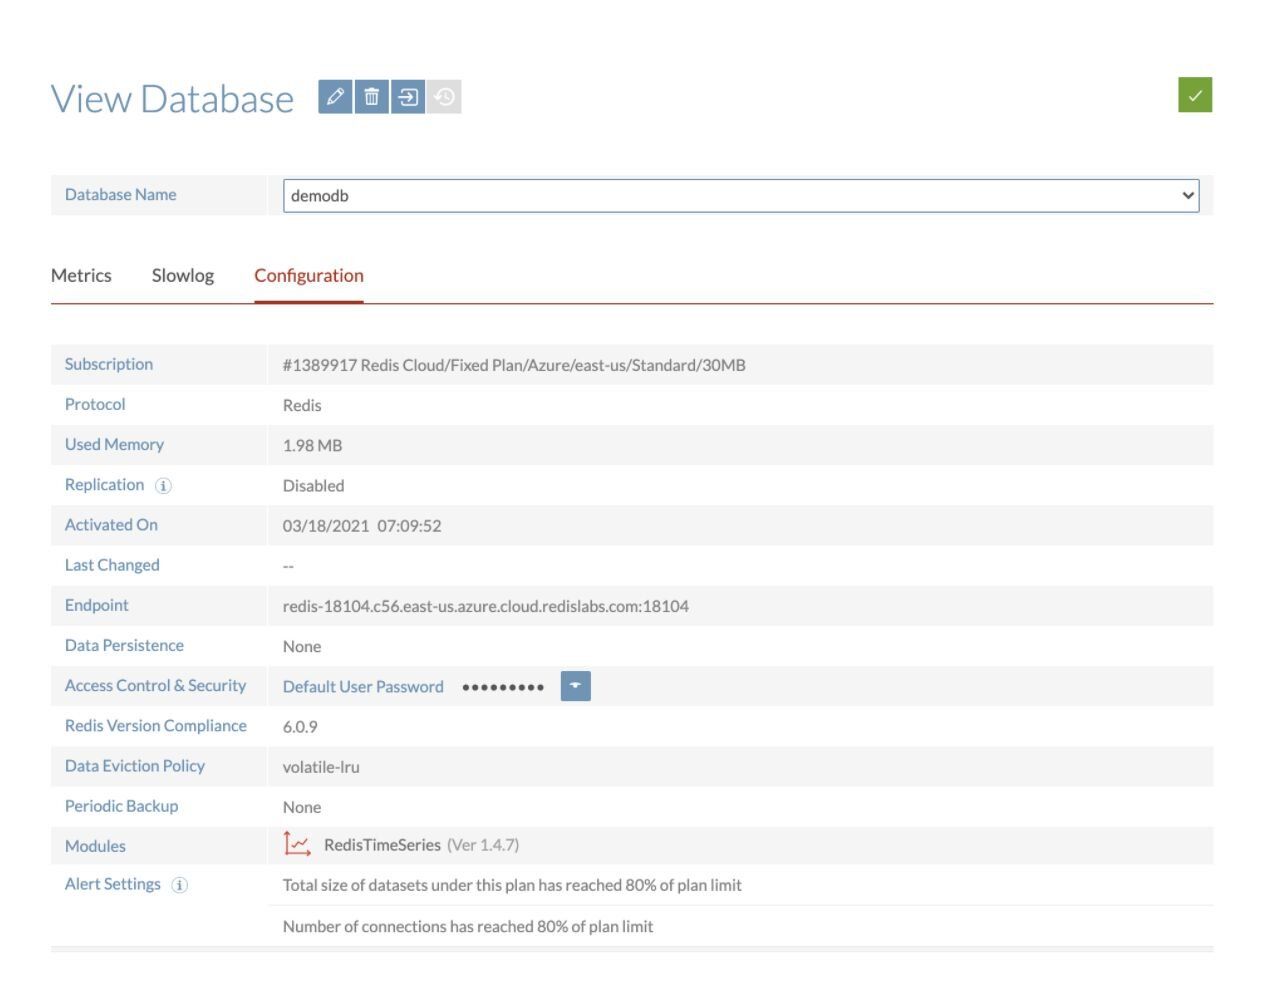
Save the database endpoint URL and password for future reference. You will need them when configuring Heroku environment variables.
For a deeper look at Redis Cloud setup, see the Redis on Heroku portal tutorial.
#How do I set up Heroku?
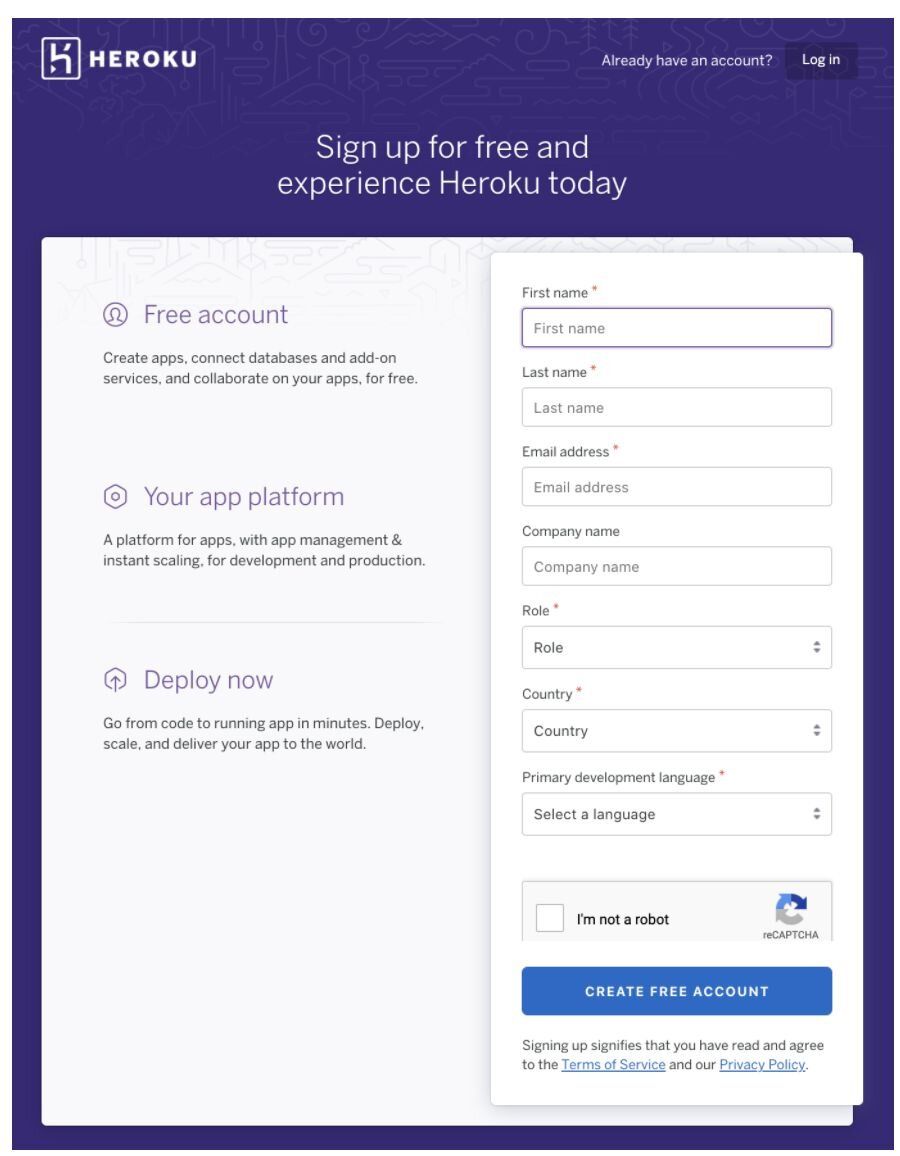
#Create a Heroku account
If you are using Heroku for the first time, create your new Heroku account through this link.
#Install the Heroku CLI
#Log in to Heroku
#How do I connect a Java app to Redis Cloud on Heroku?
For this demonstration, we will be using a sample rate-limiting application that showcases Redis-backed request throttling with the Jedis client.
#Clone the repository
#Create a Heroku app
#Set environment variables
Go to the Heroku dashboard, click Settings, and set
REDIS_ENDPOINT_URI and REDIS_PASSWORD under Config Vars. Use the credentials you saved when creating your Redis Cloud database.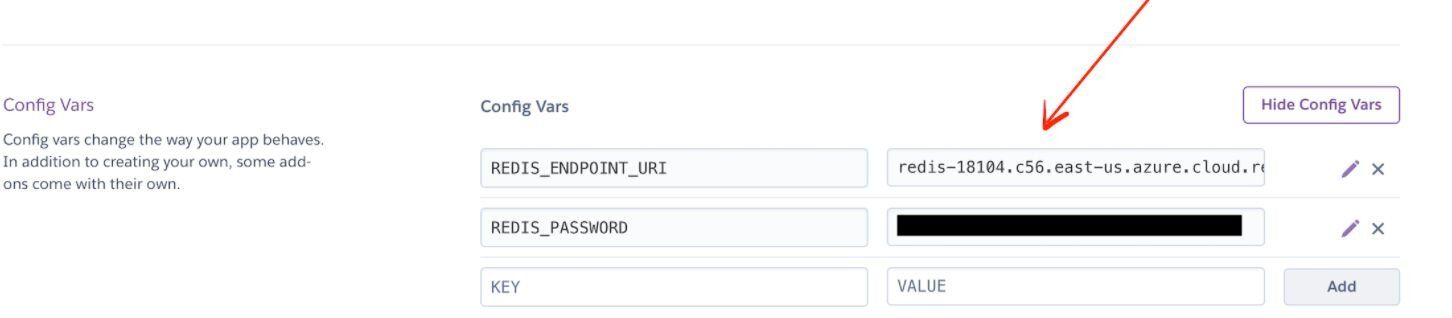
You can also set config vars from the CLI:
#How do I deploy the Java app to Heroku?
Heroku generates a random name (in this case
hidden-woodland-03996) for your app, or you can pass a parameter to specify your own app name. Deploy your code:#How do I access the deployed application?
Open
https://hidden-woodland-03996.herokuapp.com/ (replace with your app URL) to see the running application: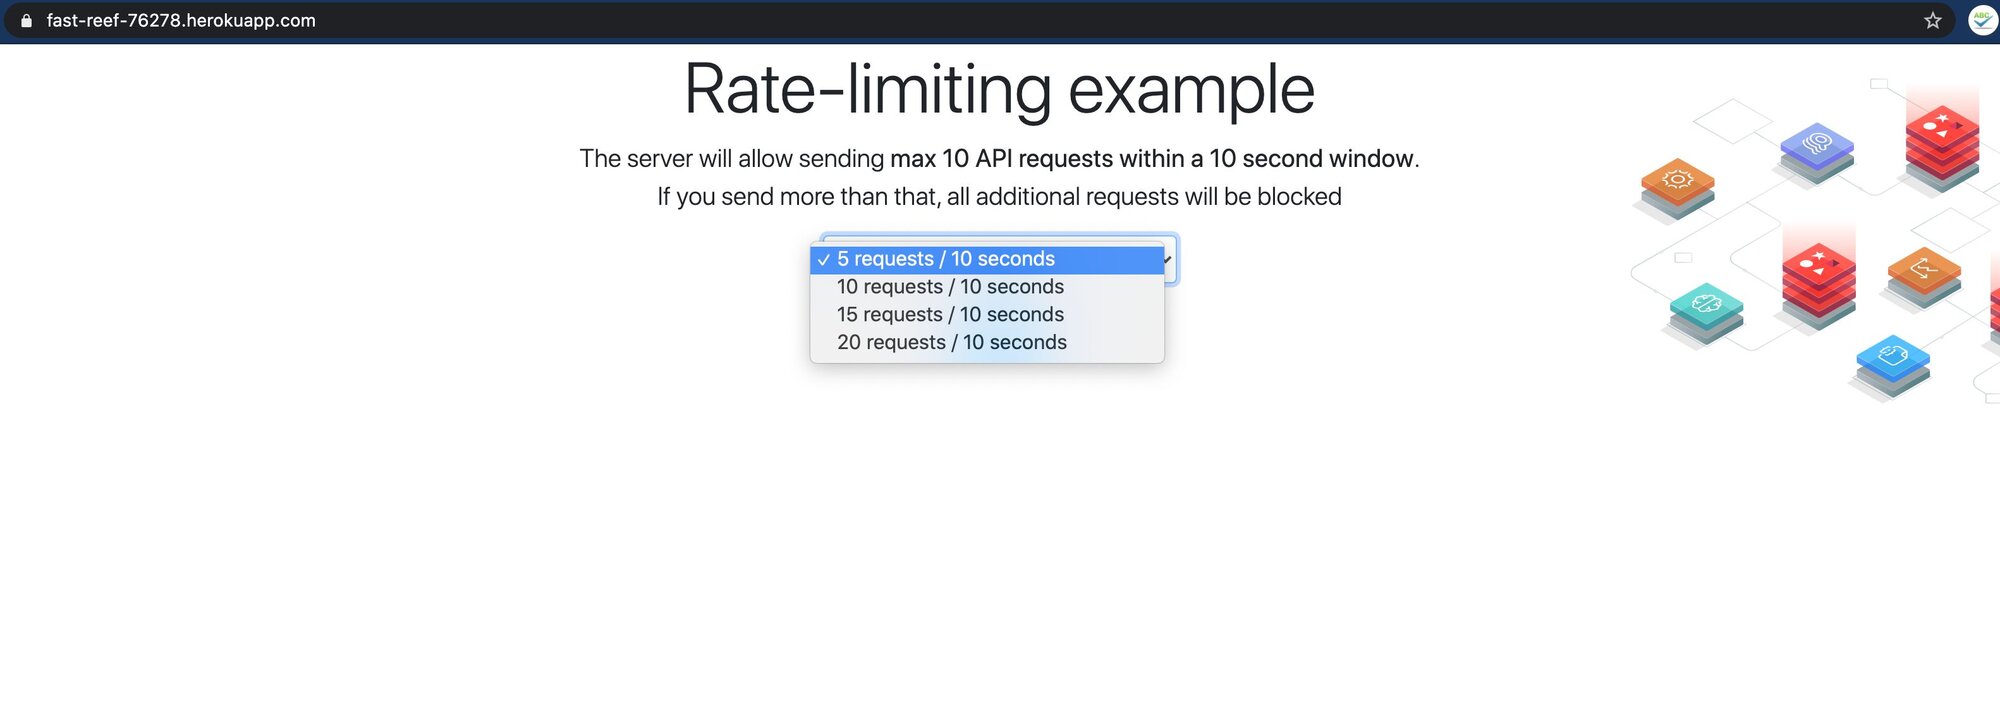
#Next steps
- Learn Java + Redis fundamentals: Getting Started with Redis and Java covers the Jedis client, connections, and basic operations.
- Explore the Heroku + Redis ecosystem: The Redis on Heroku portal walks through managing Redis Cloud as a Heroku add-on.
- Try another language on Heroku: See how to deploy a Node.js app on Heroku with Redis.
- Build more with Redis: Browse the full Redis tutorials catalog for caching, rate limiting, session management, and more.